
Hello All~ I sure do hope you are doing okay, wherever you are. I have so much I’d like to say and share about what this COVID-19 pandemic is teaching me. I may have to do that in another post. But here and now, I will share with you a project I made up for wonderful kids I get to spend time with, even though we are all doing some wicked epic social distancing. I have spent large bits of the last seven years teaching fiber art in my kids’ classes (and in some others, too!) and I can tell you, the kids inspire in me so much longing to keep making, keep creating and keep sharing. Now that our Fiber Friday classes are happening on Saturdays via Zoom, I’m trying to figure out lots of yarn-y things to teach using materials we might have kicking around at home. The thing with weaving is, you can make a loom out of so many things! “Homework” for this week is to look around the house and yard to see if we might find weird, unexpected, unique or random “looms” that could be woven on. These could be sticks, frames, chairs, trees… whatever! I hope I see some good ideas next week!
This project is aptly called the Cookie Sheet Weaving Project. As you can see, I’ve used a cookie sheet, yarn, and tape to make this loom. I’ll give step-by-step instructions and maybe you can give it a go!
Materials:
- cookie sheet, any size
- yarn
- scissors
- tape
Optional Materials
- fabric
- large eyed tapestry needle
- lots of variety of yarn- this is a great project for using up small bits of yarn stash
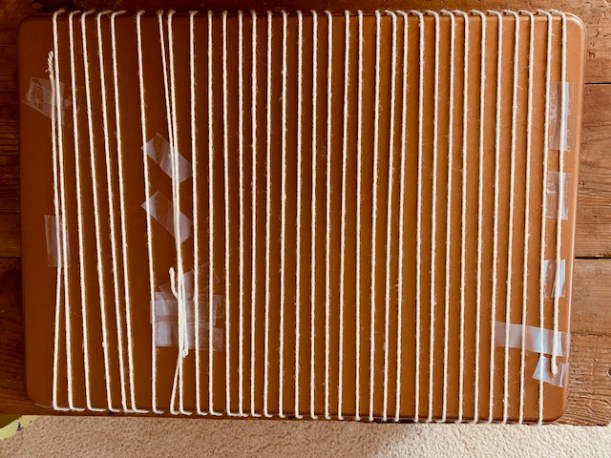
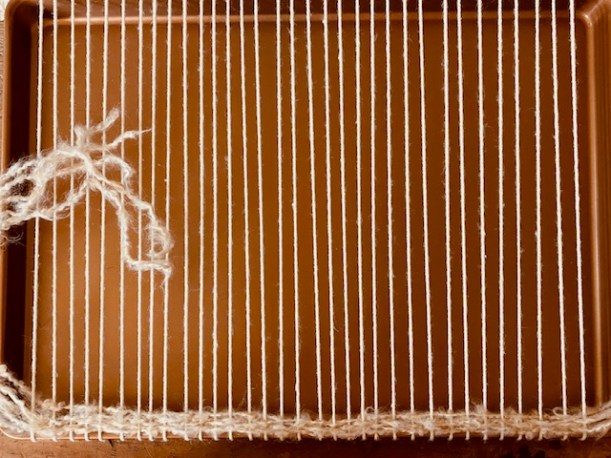
This is what your loom will look like once it is set up. I’ve chosen to warp my tray the long way, making my weaving piece wide. You can do it the other way, too. You can also choose to warp only a portion of the tray.

To secure the warp, tape the end of skein of yarn to one side of the bottom of the tray, and then start wrapping the yarn around the tray, with about a 1/4 inch to a 1/3 inch between each wrapped thread. You can see, the underside of the loom isn’t gorgeous, with tape everywhere, securing the warp. Don’t worry about that. It’s most important that your warp is securely fastened onto the tray. Since my tape wasn’t turbo sticky, I used a lot of it.
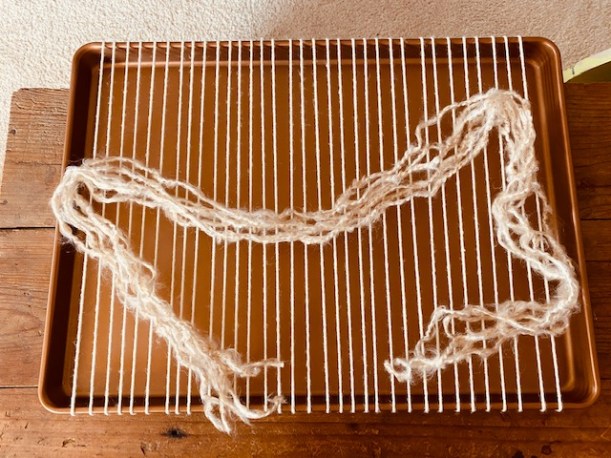
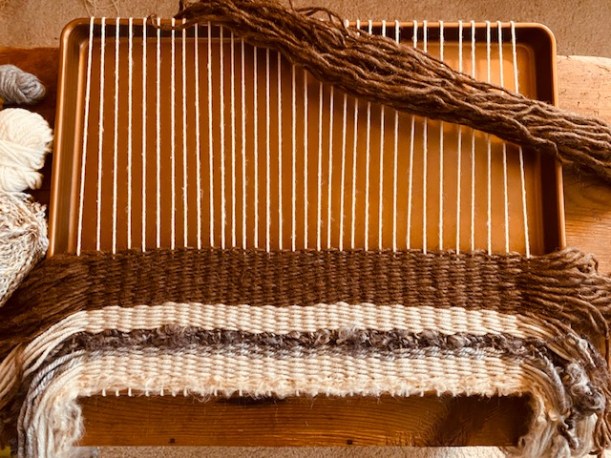
I opted for making a very fringy piece. Rather than moving back and forth and back and forth with the yarn, leaving no fringe on the edge, I chose to cut lengths of yarn that were several inches longer than the width of the cookie sheet. I wove each thread individually and then made sure that the remaining yarn was about equal on each side. If you don’t want fringe, just keep weaving back and forth with a long length of yarn, being sure not to pull too hard on the warp threads as you come back the other way.
Row 1: I started by taking one end of a cut length of yarn and going under the first warp thread, over the next, under the next, and so on.
Row 2: With the next cut length of yarn, I went over the first warp thread, under the next, over the next, under the next and so on. In this way of weaving, I noticed that I liked weaving from right to left, over and over again. This is different than when you weave with a very long length, moving back and forth from right to left, and then left to right as you head back again.
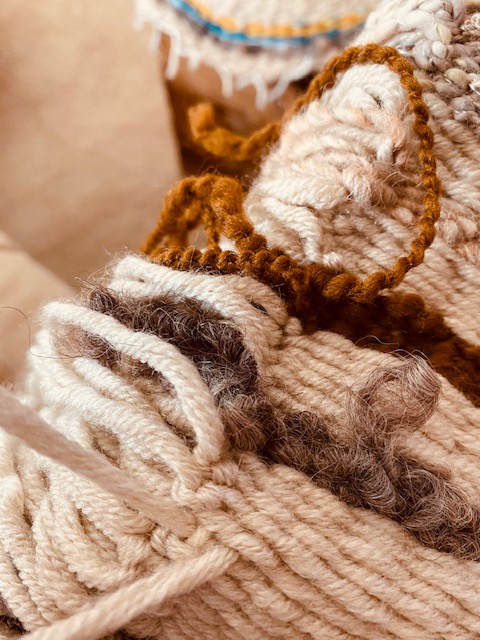
Because I have a LOT of small balls of yarn, I chose colors and textures that go well together and I cut a bunch of lengths at a time so I could just get into the flow of weaving. This is a very portable project, so I had it all over the house depending on what I was doing.
And I wove, and wove… and wove… Once you get to the top, you’ll notice that there’s not much room for your fingers to move the yarn around the warp threads.
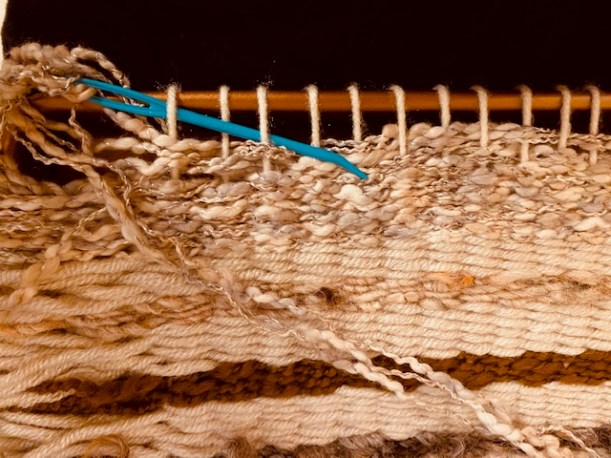
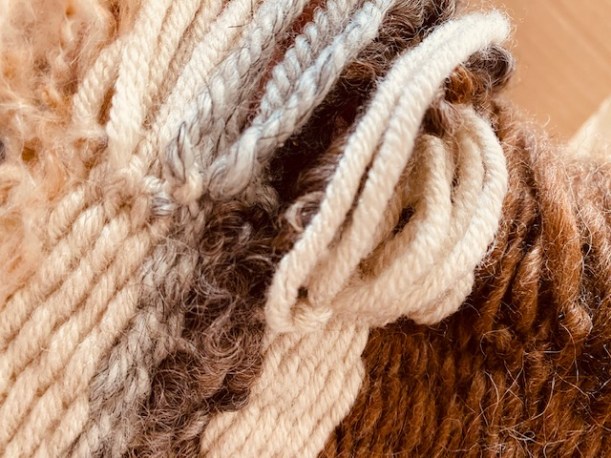
If you have a tapestry needle, this is a good time to get it. Threading it with the yarn you are weaving with (the weft), you can really get up to the edge of the tray.
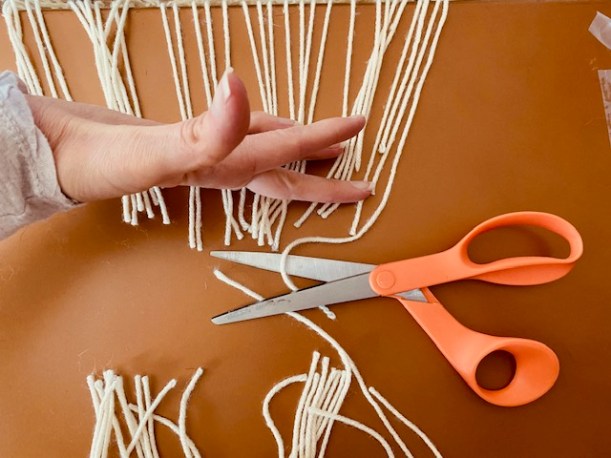
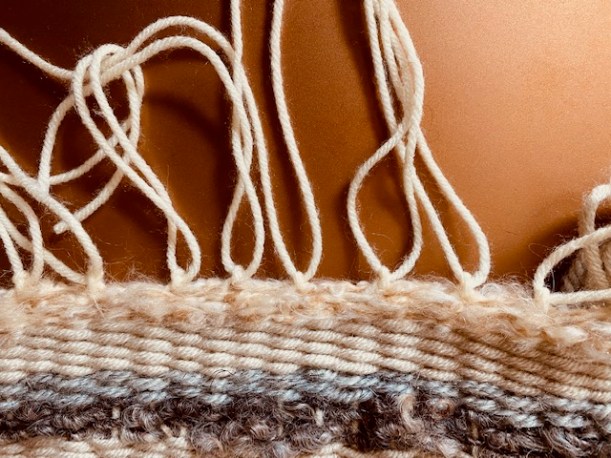
Before I thought about taking the project off the loom, I tied off the fringe on each side. You just take one weft thread, and the next one, and tie it in a double knot. Make sure that the two edges you tie are on opposite sides of the warp thread. This will ensure that the warp is secure and your piece won’t become loose and/or unravel.
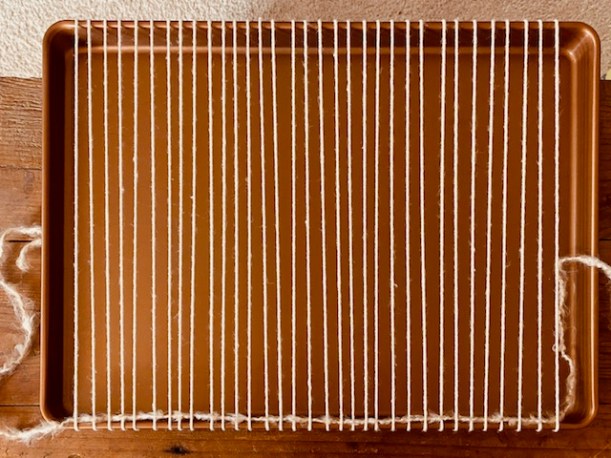
When your fringe is all tied up, flip the tray over and remove the pieces of tape that are securing the edges of the warp. Then, cut across the middle of the warp threads, freeing the piece from the tray.
You have a choice to make here. For both choices you should tie off the warp threads in the same way you did the fringe, tying one thread next to its neighbor. If you have an extra one at the end, just include it with the two next to it.
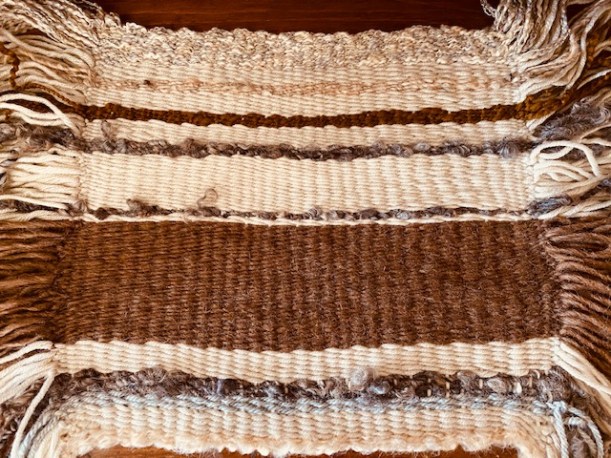
Then, the choice… Do you leave the warp as fringe, too? Or do you sew it into your weaving? There is no right answer except for doing what you think is best for your piece. If I had used a thicker, more interesting or robust yarn for my warp, I think I would have left it as fringe, but the yarn I chose is kind of tame compared to my fringy side, so I opted to sew it in.
Here’s the warp threads tied off.
I chose to sew the two tied threads at a time, because they are already tied together as one.
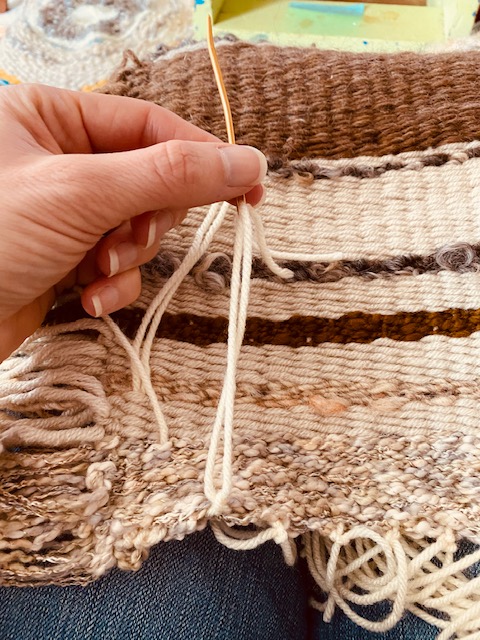
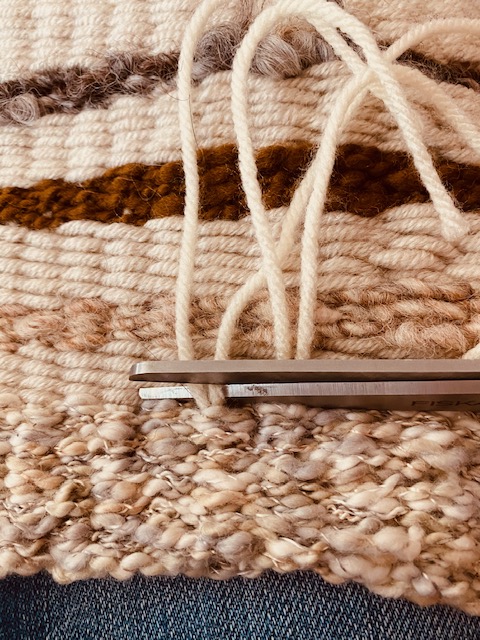
Using your tapestry needle, bring the warp threads back through the weaving, drawing the needle through the column of the woven piece that is right under it. Don’t pull too tight here as you’ll pucker your cloth.
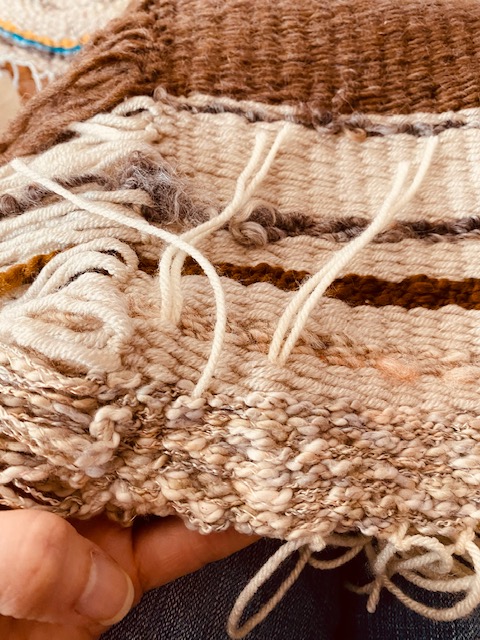
Flip your piece over to make sure the warp threads are really hidden in the column of weaving. Sometimes they peep through too much and you have to do it again.
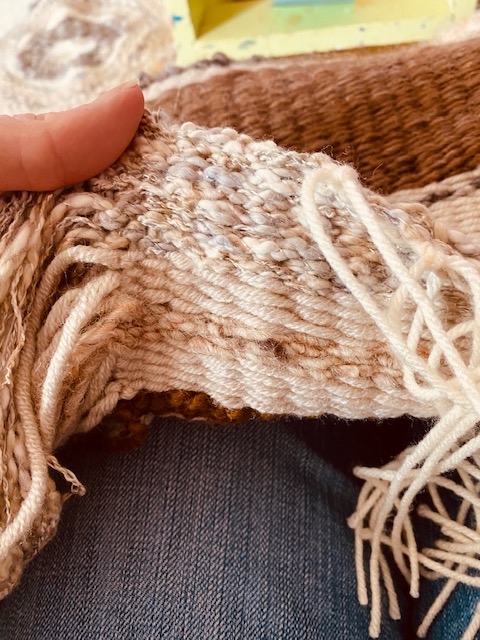
Once you’ve gone through a couple of inches, you can snip the remainder off.
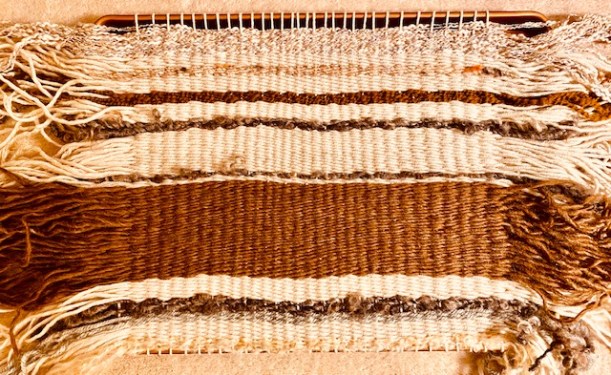
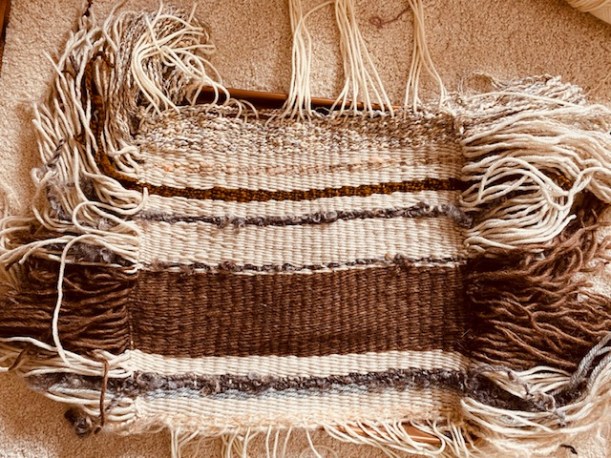
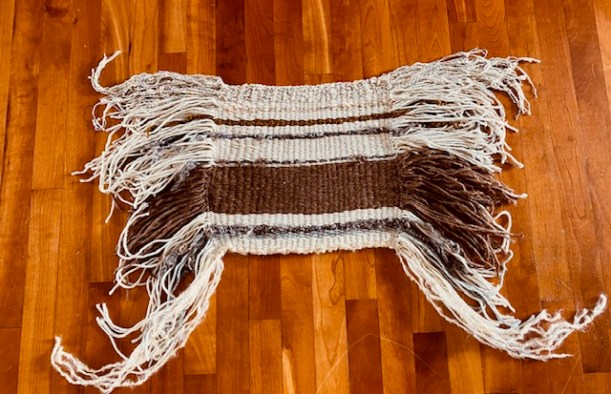
Here you see my piece with the wild fringe and sewn in warp threads. This thing definitely needs a little fringe-cut.
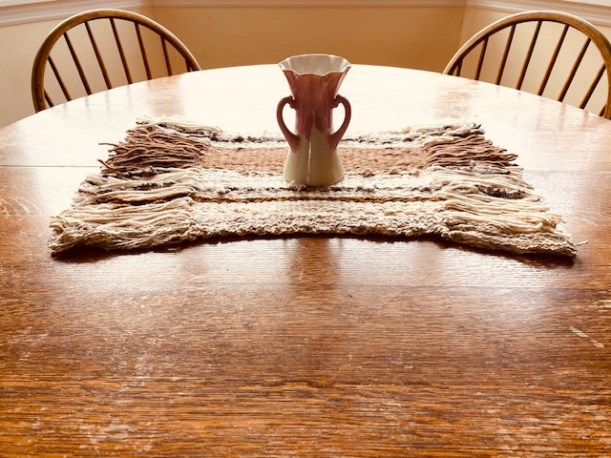
And there we have it! Who knew I needed a new woven table decor piece?!
Stay tuned for some more fiber art ideas. These will always be great for kids to do, but for sure, these are also fun for folks of all ages. It’s the truth that handcrafting is good for us. It quiets the mind, especially once we get into a good flow. It helps ground us when things feel wild or unpredictable. And, it can give us the chance to see that we can make some really beautiful things.
Take good care,
Bradie
