Healing Handcrafting

exploring process and healing through fiber arts and handcrafting


6 Comments

A Very Muppet Halloween!

I feel like I should just begin each post with: It’s been a while…

Rather than detail all of the reasons why keeping up with writing has been difficult lately, I’ll show you one thing I spent a considerable amount of time on in the last couple of weeks. It’s crafty. It’s funny. It’s… Animal.

IMG_4529

Animal from the Muppets~ this is the real puppet, not mine!

Remember Animal, from the Muppets? I loved him when I was a kid, and I love him now, after spending a bunch of time considering all of the subtleties of his face, his expression, his noisy look. Of course, my animal does not come close to Jim Hensen’s, but oh, I love him still.

My son and I got the idea of him dressing up as Animal for Halloween one evening when he was playing the piano, very dramatically. He was cracking me up, swaying his head back and forth, his longish hair flying everywhere. He reminded me of Animal’s crazy drum playing ways and then and there, we decided it needed to happen. My boy needed to be Animal.

There’s no easy way to just get an animal costume. Can you believe that?! There’s not. Once we figured that out, my fantasy was too far in. I couldn’t reverse course. So, noodling around online, I took a gander at other people’s animal costumes. Paper maché seemed to be something folks tried but that intimidated me. I don’t know why but I think it just seems unruly and like I would just make a big heap of mess instead of a mask. I also found a post about a woman using a baseball helmet as part of the head support. It was from that idea that my mask was born.

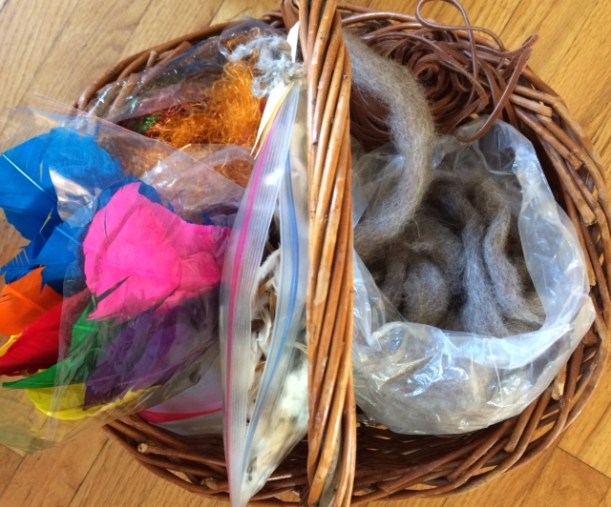
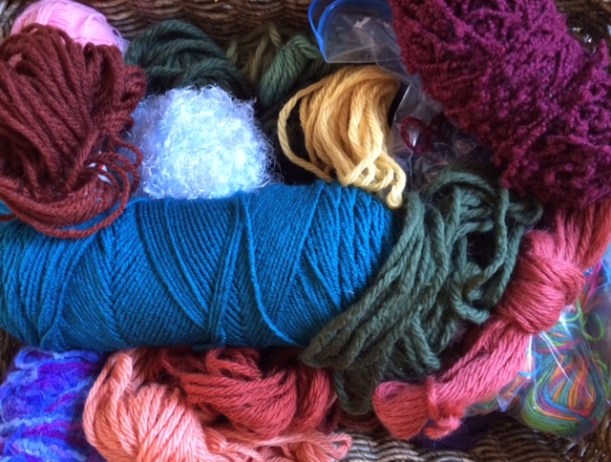
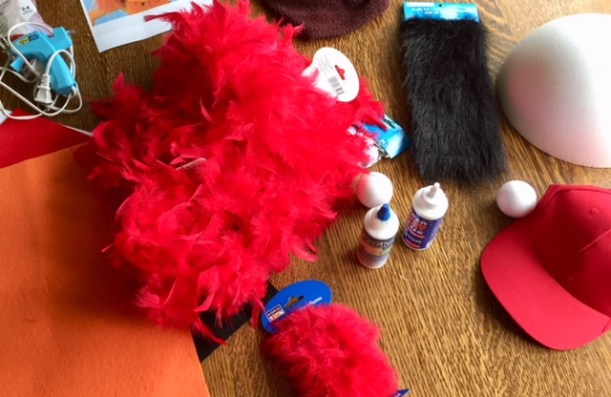
After ruminating on the costume for a few days, I went to Michael’s craft store and walked around, hoping to find things that looked like they’d work for costume construction. I ended up with: styrofoam balls, three large and two small red feather boas, fun fur, black, red and orange felt, a styrofoam bowl, a red baseball cap, and glue.

IMG_4530

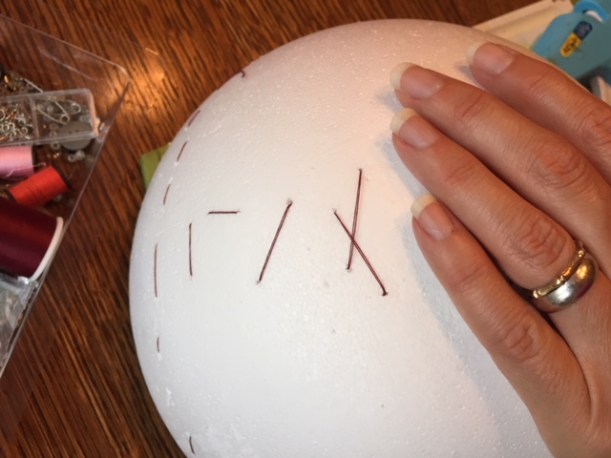
First, I stitched the baseball cap to the styrofoam bowl. The idea here was that the head needs to be large, and there is a bit of a lip where Animal’s upper lip and nose protrude. The rim of the baseball cap provided the structure for that. The stitching here was tricky; if I pulled too hard on the needle, the thread would at times pull right through the styrofoam. Knowing it was going to be totally covered with feathers, I didn’t care about it looking great. It just needed to be functional. The cap, by the way, was fitted on my son’s head before I sewed it into the bowl.

IMG_4534

IMG_4536

Then, I glued the bowl edge onto the rim of the hat. What in the world did people do before glue guns?

IMG_4535

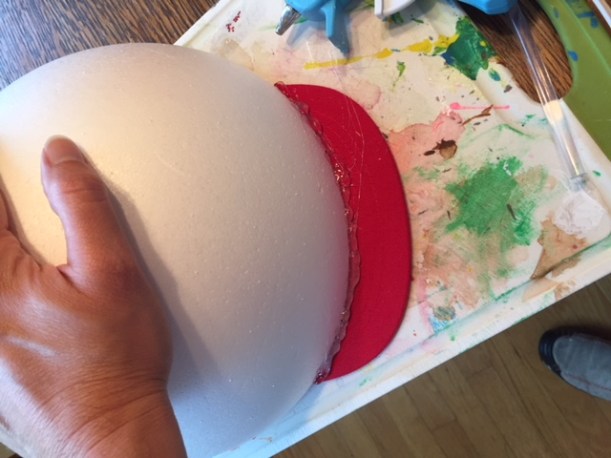
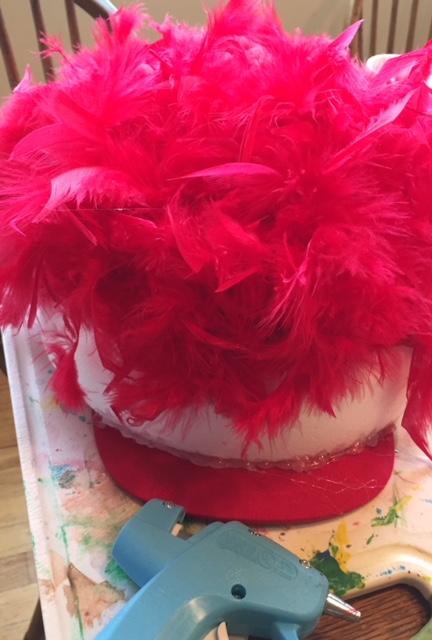
Once that was dry, I began the fun process of wrapping and gluing the feather boas around the bowl. A little messy at times, it’s good to have wet paper towel on hand to get glue off fingers. Feathers seem especially attracted to glue.

IMG_4537

Once I got the bowl covered, I had to start tinkering with the mouth and how it would attach to both the head and to my kid. I apologize now for the lack of pictures of the rest of the process. I tried a bunch of different things. Finally, I settled on using thick paper plates for the structure of the mouth.

IMG_4539

I eye-balled the plate size against the bowl/rim of the baseball hat. The idea was that the mouth would attach to the rim of the hat, and my kid’s face would be behind the mouth. Originally, I thought I’d cut out eye-holes in the black felt I used for the dark part of the mouth, but I changed that later.

IMG_4540

IMG_4541

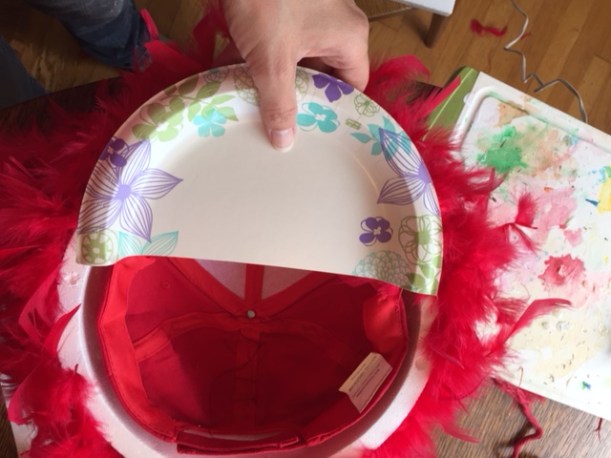
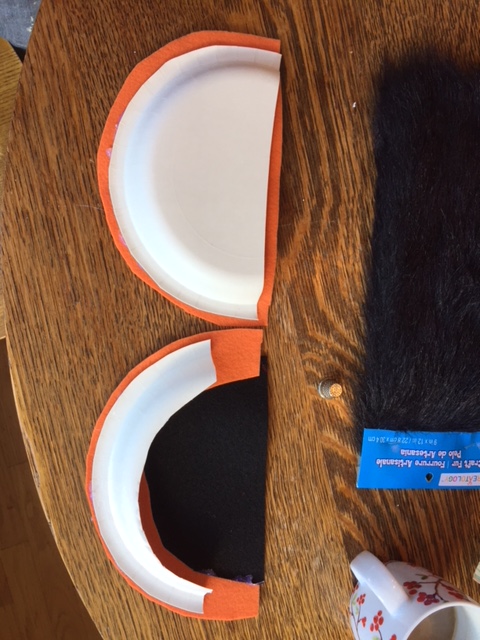
I cut a plate in half and then cut out the flat part of the plate, leaving just the rounded edge of the plate. After a couple of experiments, I opted not to trim the rim of the plate itself (this is not pictured).

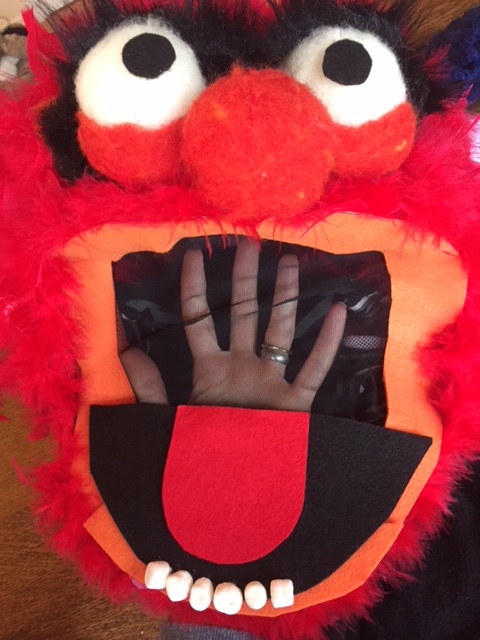
Then, I eye-balled the orange felt lips Animal has against the rim of the plate, and after that, the black inside of the mouth. Those pieces were glued to the plate rims. Now, below you see the full mouth where I used the black felt. I ended up using black meshy fabric instead. I included both pics here because some might prefer the darker felt for the mouth. I opted to switch to the see-through mesh because I wanted my son’s face to be fairly free and open, and for him to be able to see easily at night. I made the same kind of paper frame for the structure of the mouth, glued the black mesh onto the paper rim, then the orange felt lips on top. I placed black felt just on the bottom half of the mouth, on which the tongue could be glued.

IMG_4542

IMG_4543

IMG_4546

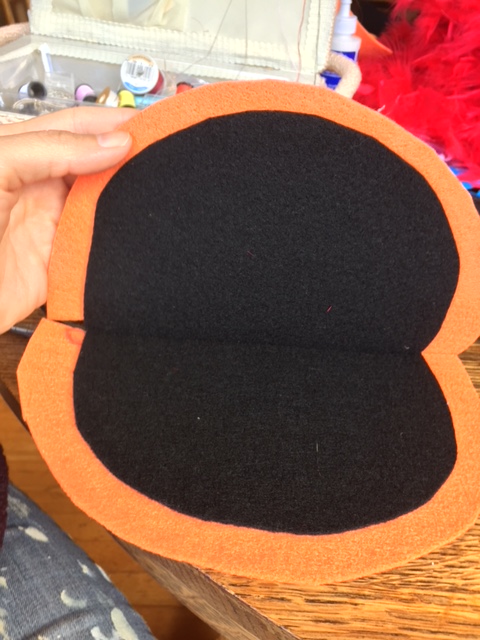
Below is what I ended up with.

IMG_5063

Now, the major tricky part was how to make the head full and round looking. Remember, the head up until this point was just the bowl, which only came halfway down the back of my son’s head. The top of the mouth was glued to the rim of the hat (so sorry there are not more detailed pictures). That allowed for the mouth to stay strong and in place. The bottom of the mouth naturally hangs down. After a lot of McGuyver style attempts to complete the mask, I almost gave up. I was really having a hard time figuring out how it would all go, until I talked it through with my step-mom. She suggested attaching it to a hooded sweatshirt and then wrapping the feathers around that way to complete the rounded head. Voila! That’s what I did, and it worked great. I sewed the hood to the baseball cap, and then the edges of the hood to the edge of the mask. Around the hood, back and forth, I was able to add more feathers and bring them around the bottom the the mouth.

Once that structure was complete, it was time for the fun stuff~ the eyes, the nose, the teeth. For the eyes and nose, I wrapped the styrofoam balls in wool, needle felted them to give them a nice fuzzy look and glued them onto the head. I used black felt for the pupils, fun fur for the eyebrows, and marshmallows for the teeth.

Once Animal’s face was on, I felt so relieved! If I were to do it again, I’d needle felt the orange lips using orange wool, instead of the cut-out felt.

Here it is, all finished!

IMG_5010

IMG_5037

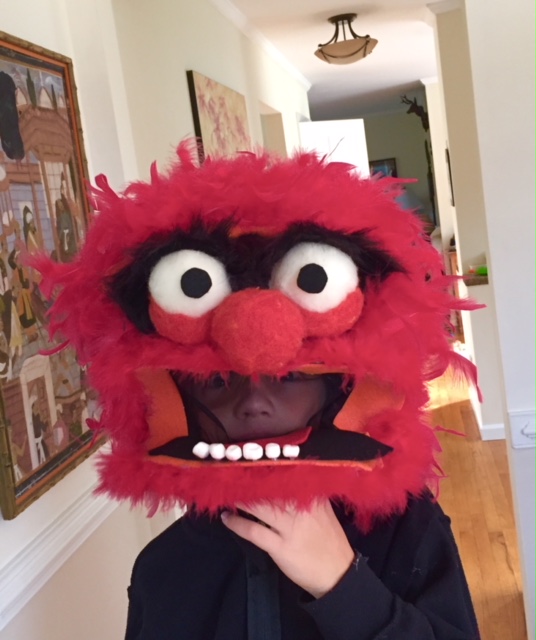
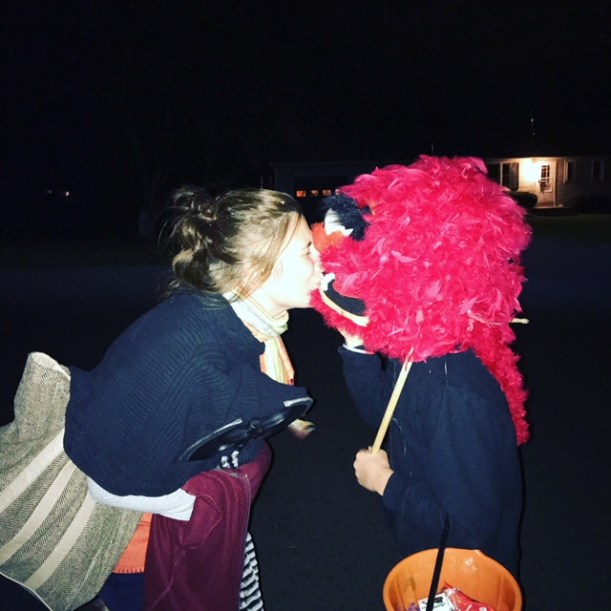
And here I am, having a loving moment with my Animal.

IMG_5057

I hope you had a great Halloween!


Advertisement


5 Comments

Weaving With Children Is My New Favorite Way to Pass Time

It’s been a while since I’ve written. The thing that’s hard about a blog is, it’s not a diary (at least not for me), it’s not for writing about everything because really, I must honor the privacy of loved ones, and in this case, it’s somewhat specific in terms of topic. Let me just say this: if you like this blog and noticed I’ve not been keeping up, I’m sorry and it’s been a regrettable reality of my life these days. Things got a little heavy, a little stressful, a little complicated and a lot lifey, and I need to work on still writing through those times.

A recent event has reignited my fuel center, and reminded me of what the heck I’m trying to convey through this blog. I had the opportunity to bring a weaving project to my son’s second grade class, and wow, was it amazing. Let me just jump in and explain.

First know this: I am not an expert weaver. I took one weaving class years ago where I learned how to use a big loom, and by learn, I mean was guided every step of the way, multiple times. The apparatus that is attached to a wall that you wind yarn around to get it prepared to warp the loom (I think), almost made me lose my mind. All of it. In a burning inferno of frustration. No matter what I did, I could not keep my yarn from tangling and turning into a wild Medusa hair-like mess. Omg. I shudder to remember it. I did make this though, and I’ll always be proud of it.

FullSizeRender-86

I know I’ll take another class on using a big loom now that I’m more mature and have practiced a bit of mindfulness.

Anyway, I love hand weaving on simple looms, circular looms or looms made out of random things like wire, branches, busted out doors. I love how intuitive it can be, how much freedom there is to throw any such thing into a piece because it feels good, and you don’t have to worry too much about a complicated machine. I love how accessible it is, and how it’s possible to make a downright beautiful piece of art simply by understanding some basic concepts, and appreciating how different materials respond to the process of moving around warp thread. I wanted to share this with children because again, it is accessible art, and going into summer, I wanted to encourage them to use their found treasures in art projects and just experiment. I also find this medium to be extremely satisfying, grounding and soothing. I often find when I’m talking to people about it, I place my hand on my stomach when describing how it makes me feel… it’s like it makes me feel comfortable in a part of my body that holds a lot of tension, and I think sometimes a lot of grief.

Here is a little picture montage of my process:

I used this book by Sarah Swett (check out her blog/website. you won’t be sorry) to gather some ideas. The loom I made was a bit different, but based on one described here. It’s a wonderful book and one I will refer to often in future projects with kids. And, my husband made me a standing loom from this book that I hope to write about soon!

IMG_8536

Figuring out the appropriate loom size and number of warp threads took some doing.

I went with the 4×6 cardboard size, but chose to use only seven warp threads. I found that the loom stayed stronger and more in tact with less threads, which I was interested in because my plan for the kids was to have all sorts of materials available to them to weave with. They also were going to only be using their fingers to weave, not needles, so I needed the loom to be able to withstand the pulling that would inevitably happen.

FullSizeRender-95

I wanted kids to understand that they can weave with all kinds of things.


FullSizeRender-96

My weave in progress…


FullSizeRender-78

Cardboard looms and another example piece using less wild materials.


FullSizeRender-94

Example of a weaving done on the simple cardboard loom.

Not gonna lie: I love my piece.

So, on the day of class, we did a little show and tell bit first. I showed the kids a napkin made from cloth that my mother-in-law’s mother, Else Jacob Eberitsch wove herself. We have a set of these napkins, and a matching table cloth. I am forever blown away by the beauty of them. My son was so proud to show it to his classmates.

FullSizeRender-89

I also showed them circular looms of different sorts, as well as one of those rectangular kid’s looms that can be found in most craft stores, reminding them that many might have some of these things kicking around their homes.

FullSizeRender-81

And then, when the wiggles got going and after answering some wonderful questions, I unveiled their materials and worked out with their teacher how to go about the rhythm of the acquisition of supplies.

FullSizeRender-91

feathers, roving, banana silk fibers, ribbon, popsicle sticks, leather rope


FullSizeRender-85

driftwood gathered from Lake Champlain


FullSizeRender-88

tons of yarn of all different colors, thicknesses, textures… hitting up garage sales and second hand shops is the way to go when gathering supplies for big projects like these.

And guess what happened? The kids were pumped. Truly. All of them, every single one, was into it. It was by far the most fluid and flowy project I’ve done with kids to date. Some got right into the weaving using worsted weight yarn and hit the flow. Others got into using minimal and the most wild materials~ I called theirs delicate porcelain-like pieces. I offered each child a strip of material that they could write a special message on, to be kept private or to show the world to commemorate the approaching end of their school year and some jumped on that. Some got real creative with making space between the individual woven stitches and needed some help understanding the concept behind the strength of the material they were making. Their teacher got into it, too! Her finished piece is gorgeous! Wish I had a picture of it.

Weaving is in us. It’s in our DNA somewhere. It must be. We’ve been doing it for as long as we’ve been covering ourselves, making baskets, mats, shelters (more to come on that topic, too).

If I had to do it over again, (which I will because I was invited back to do another round before school ends!!!), I would:

  • spend more time highlighting the importance of “beating in” or pushing the new row of woven material down against the previous row
  • for those whose pieces are very fragile, I would have encouraged them to keep their piece on their loom and decorate their loom to make the whole thing an art piece
  • I’d leave out the popsicle sticks~ those buggers are slippery
  • bring more ribbon
  • write their names on their looms BEFORE they start weaving

I actually can’t wait to go back and do it again. Seeing the children so engaged and so calm in their bodies while they worked kind of blew my mind, and I’ve spent a good deal of time in classrooms. Not to belabor the point, but I think weaving speaks to a part of our souls that is so organic, so without words and so true, that it simply must be something kids can do whenever they want. That’s why I love this. It’s inexpensive, it does not require special training, and anyone can do it. It just requires some stuff, some space, and some freedom to experiment.