Has it really been since March since I’ve written? I’ve been meaning to, but honestly, it’s really hard to extrovert (which in my mind includes putting parts of myself out into the world) when grieving. I’ve needed a lot of quiet, a lot of time alone, and not at all any “shoulds” where possible; just simply to have time to be in my own headspace, at least more than I typically am able. That all being said, I’ve missed writing here. I’ve come to look at this website/blog as the place that holds evidence of my thinking and ideas.
I’m grateful to you for tuning in.
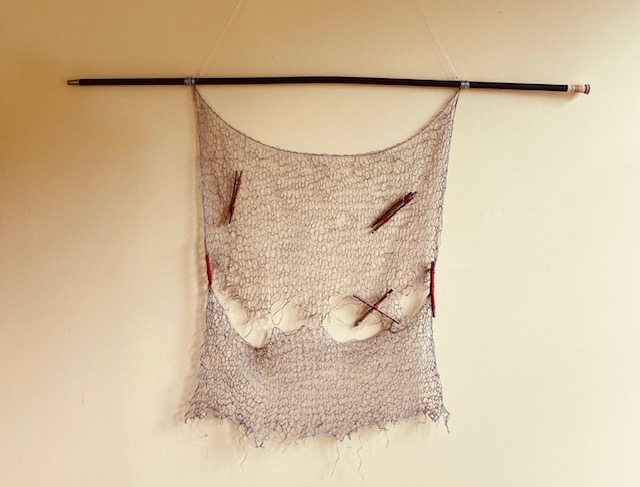
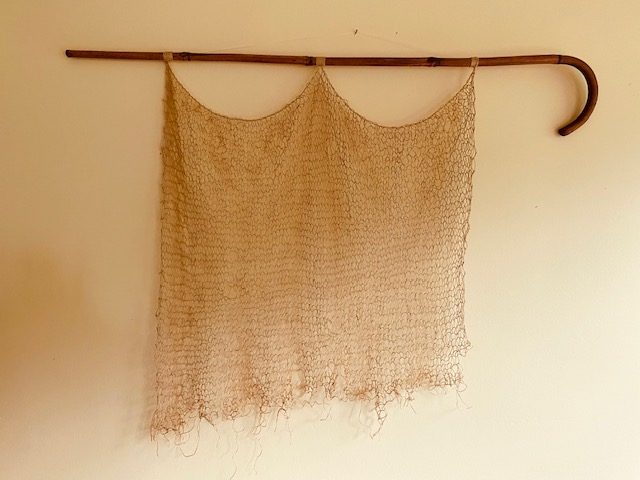
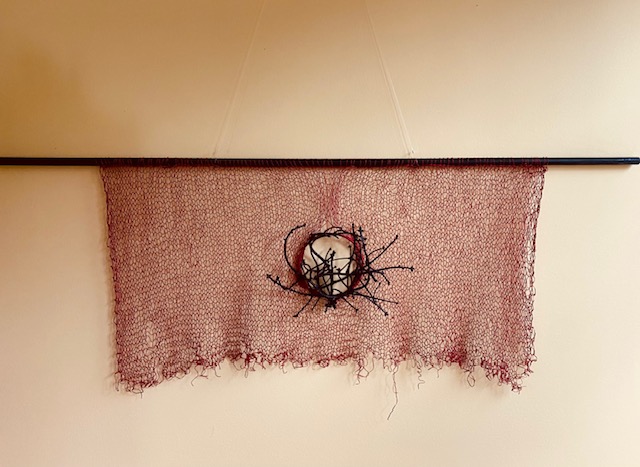
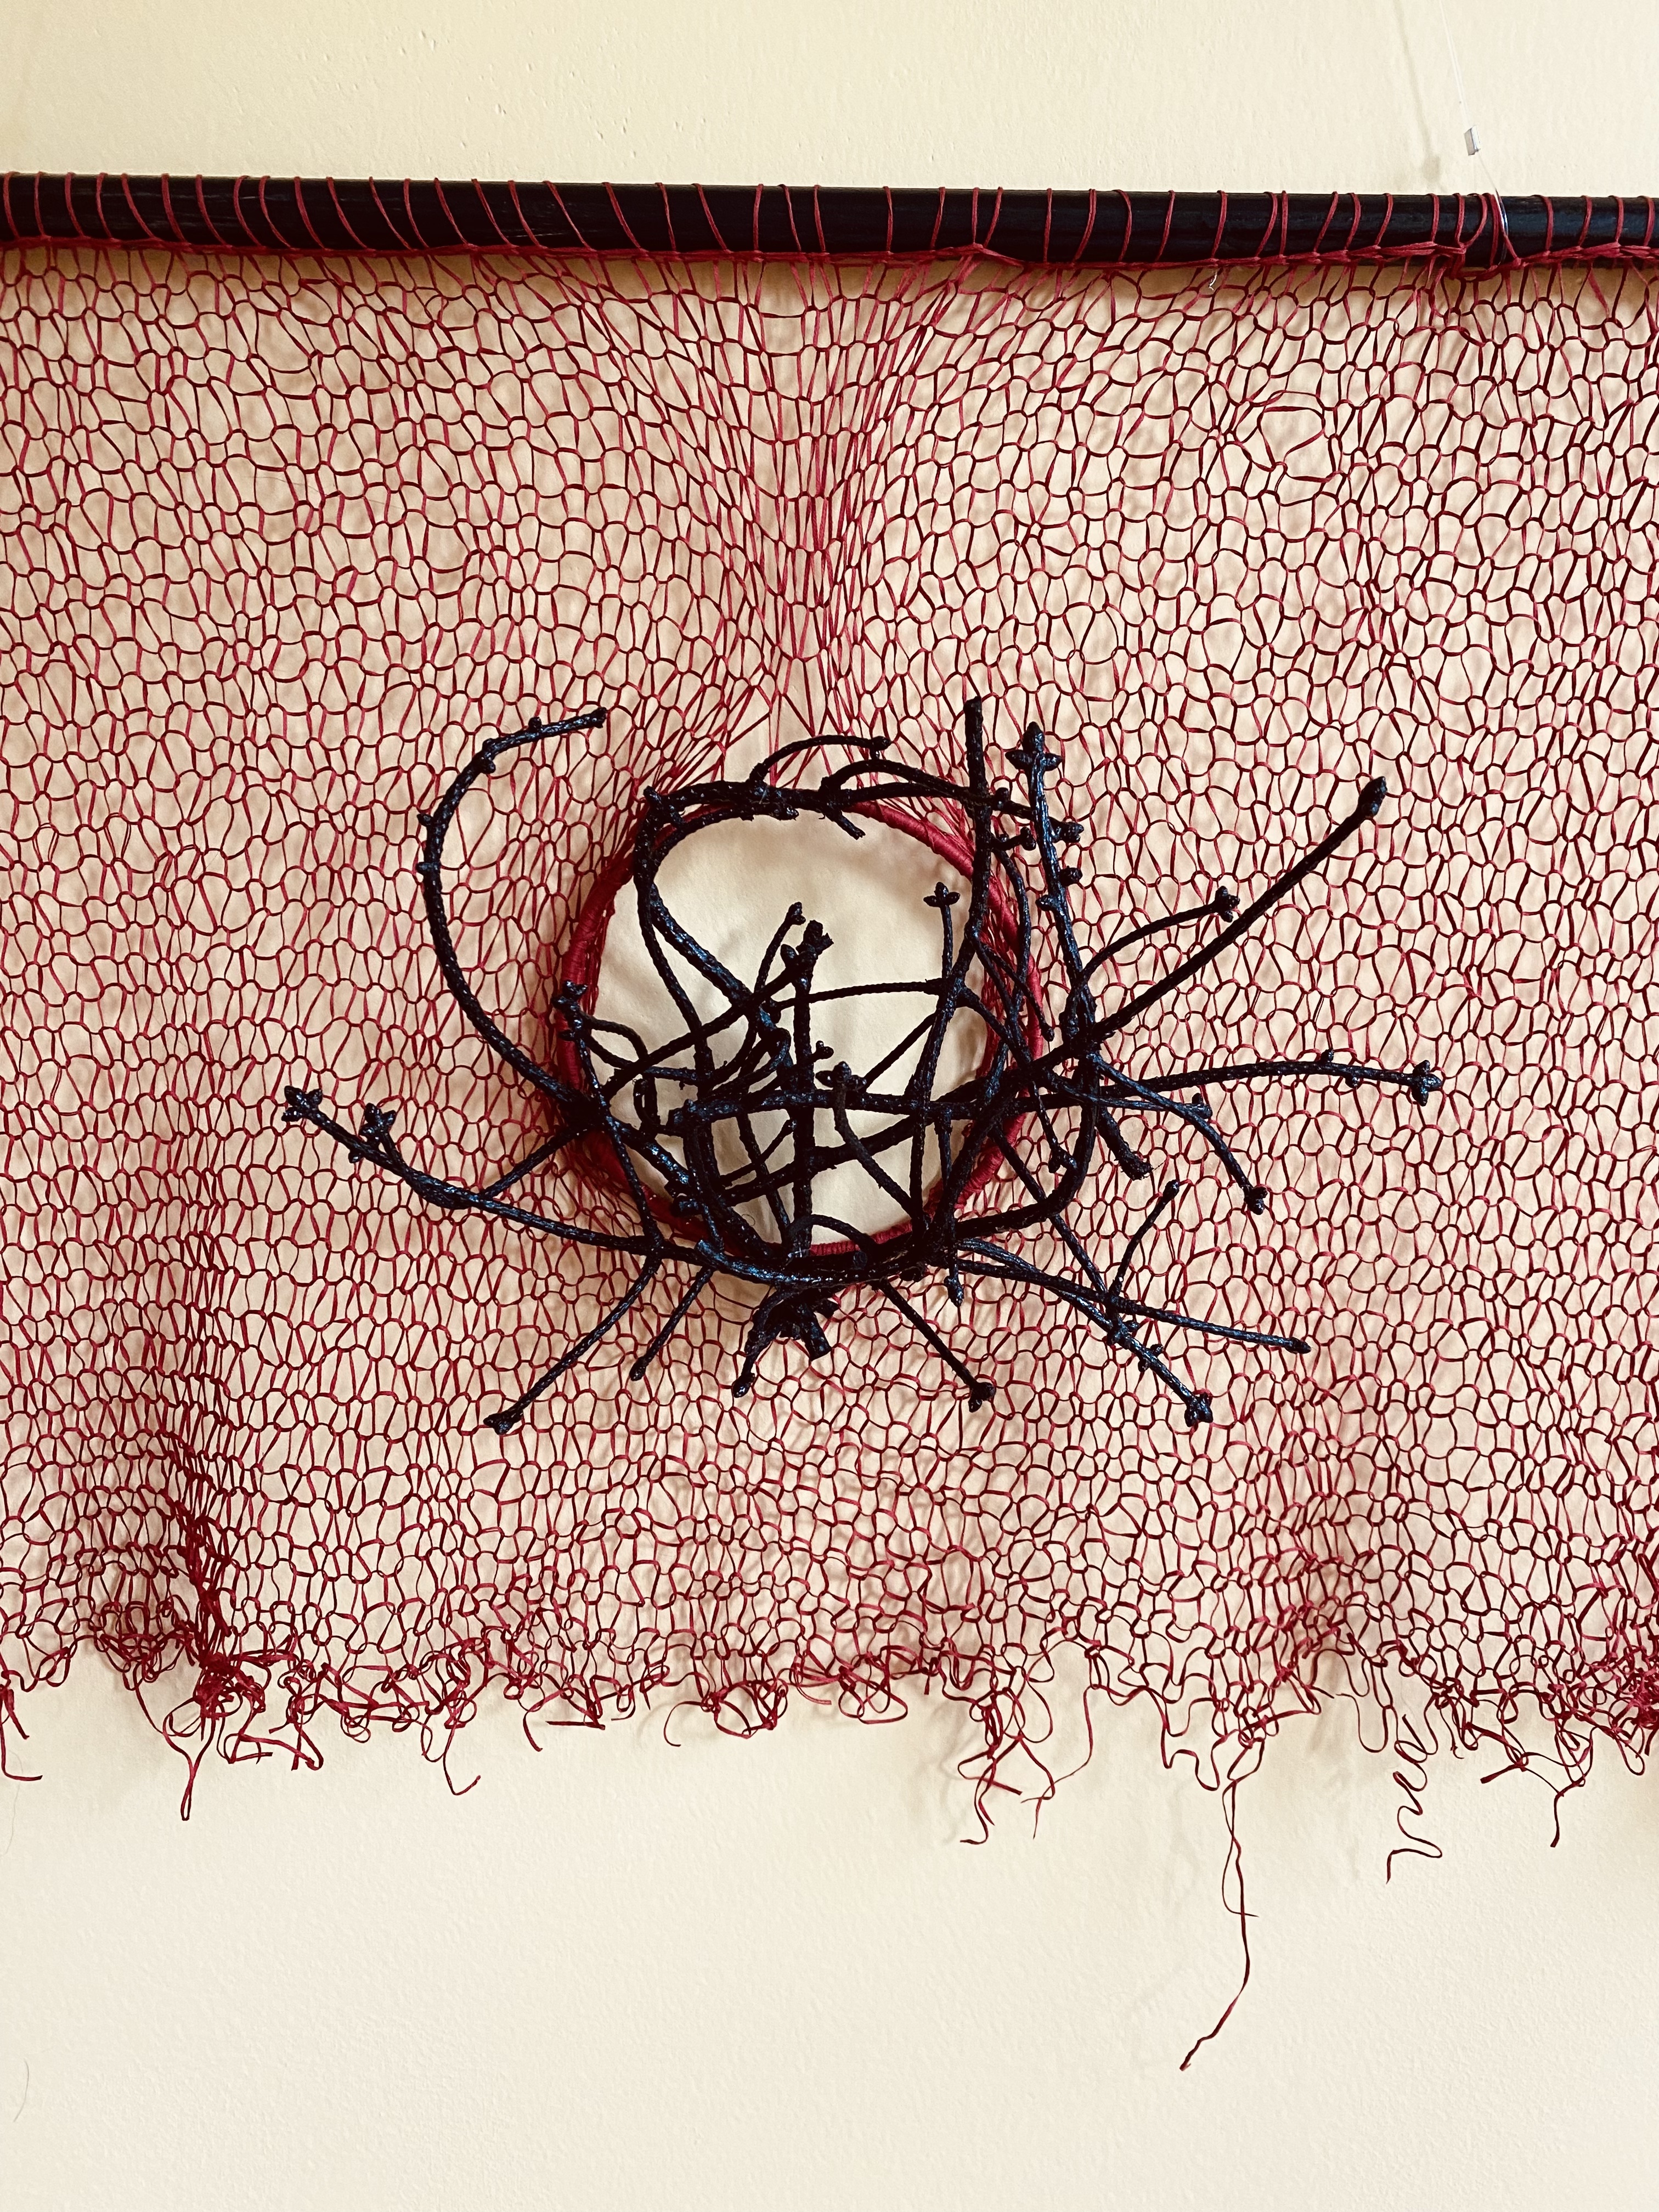
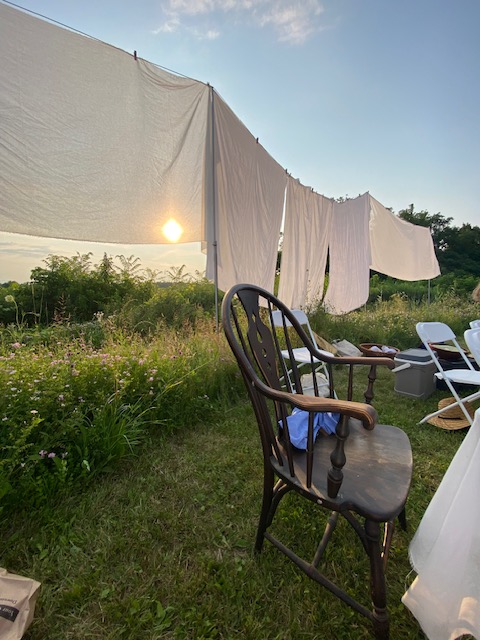
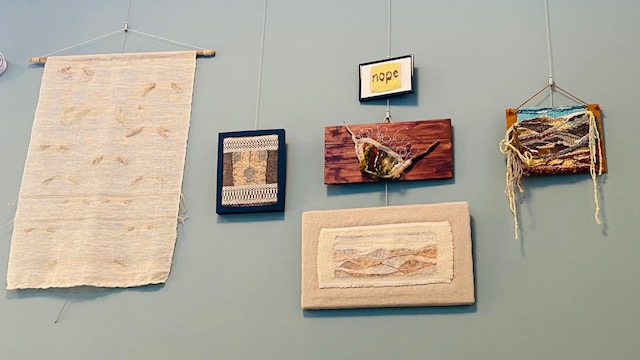
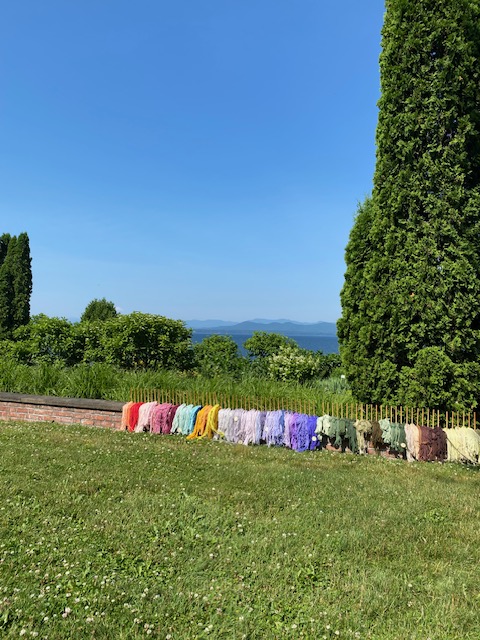
Some updates: I was asked to participate in a group art show entitled Interwoven at the South Burlington Public Art Gallery , and I wholeheartedly said yes. I’d been working on some projects and it was just the impetus I needed to really focus and bring them into being. Most everything I make has to do with something I’m working out in my psyche and the pieces I made for this are no exception. Three are hand knit and three are handwoven. I’ll love to share them with you. The show’s opening is on September 11. I’ll post more about that soon.
Evidence of Significant Repair
Wearing Away
Hema ThrínoRhythms
Winter of Our Discontent
Soil
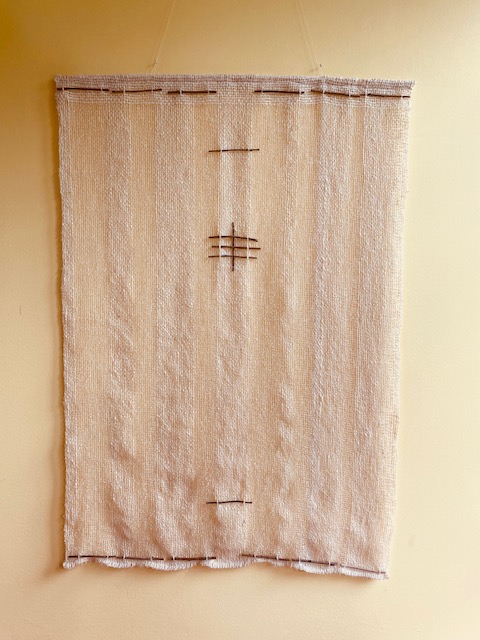
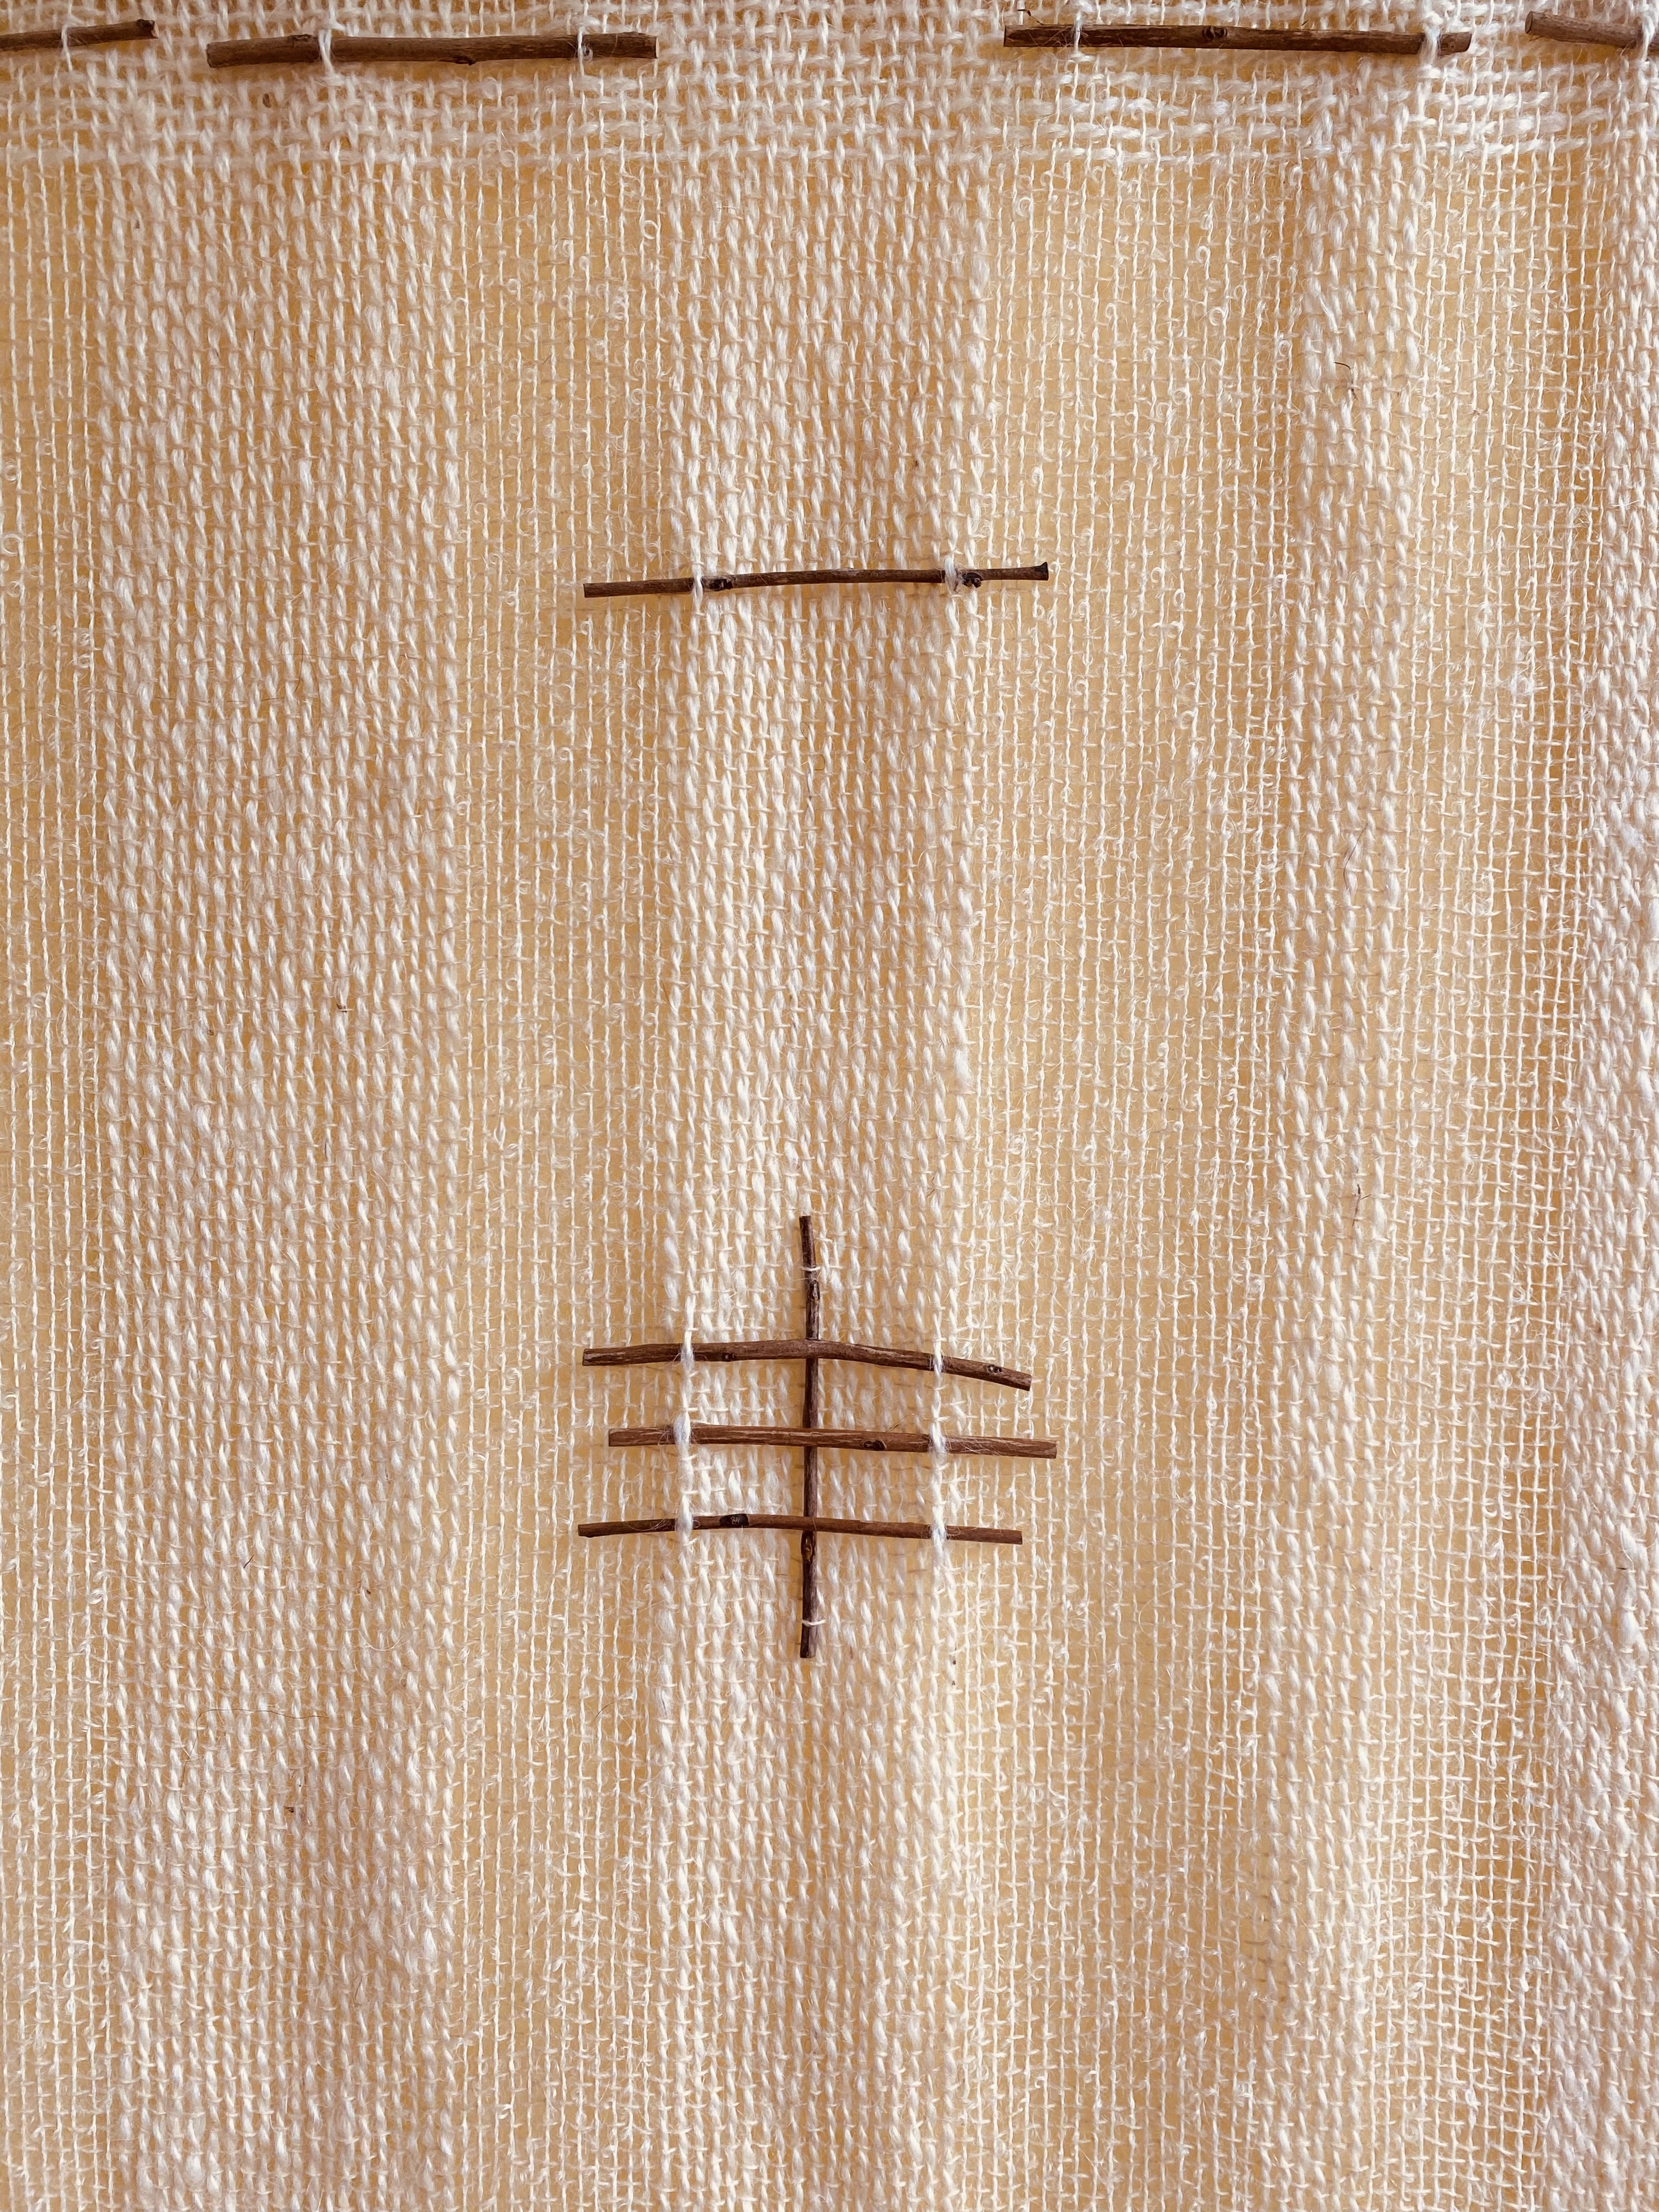
My wooly, woven pieces are actually curtains but could also be wall hangings. I love playing with the idea of warm and bold wool being woven in an airy, light-filled way. I was in my studio yesterday and the window was open, allowing Winter of Our Discontent to flow and move and I smiled, seeing it dance just the way I’d hoped. I’ll write separately about each piece to introduce them simply and properly in the next week or two.
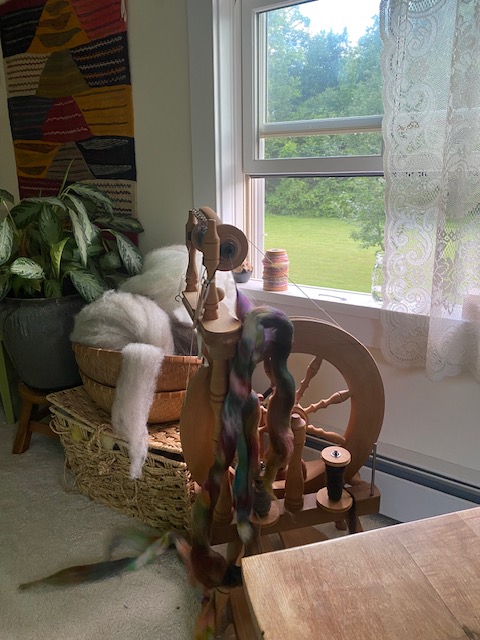
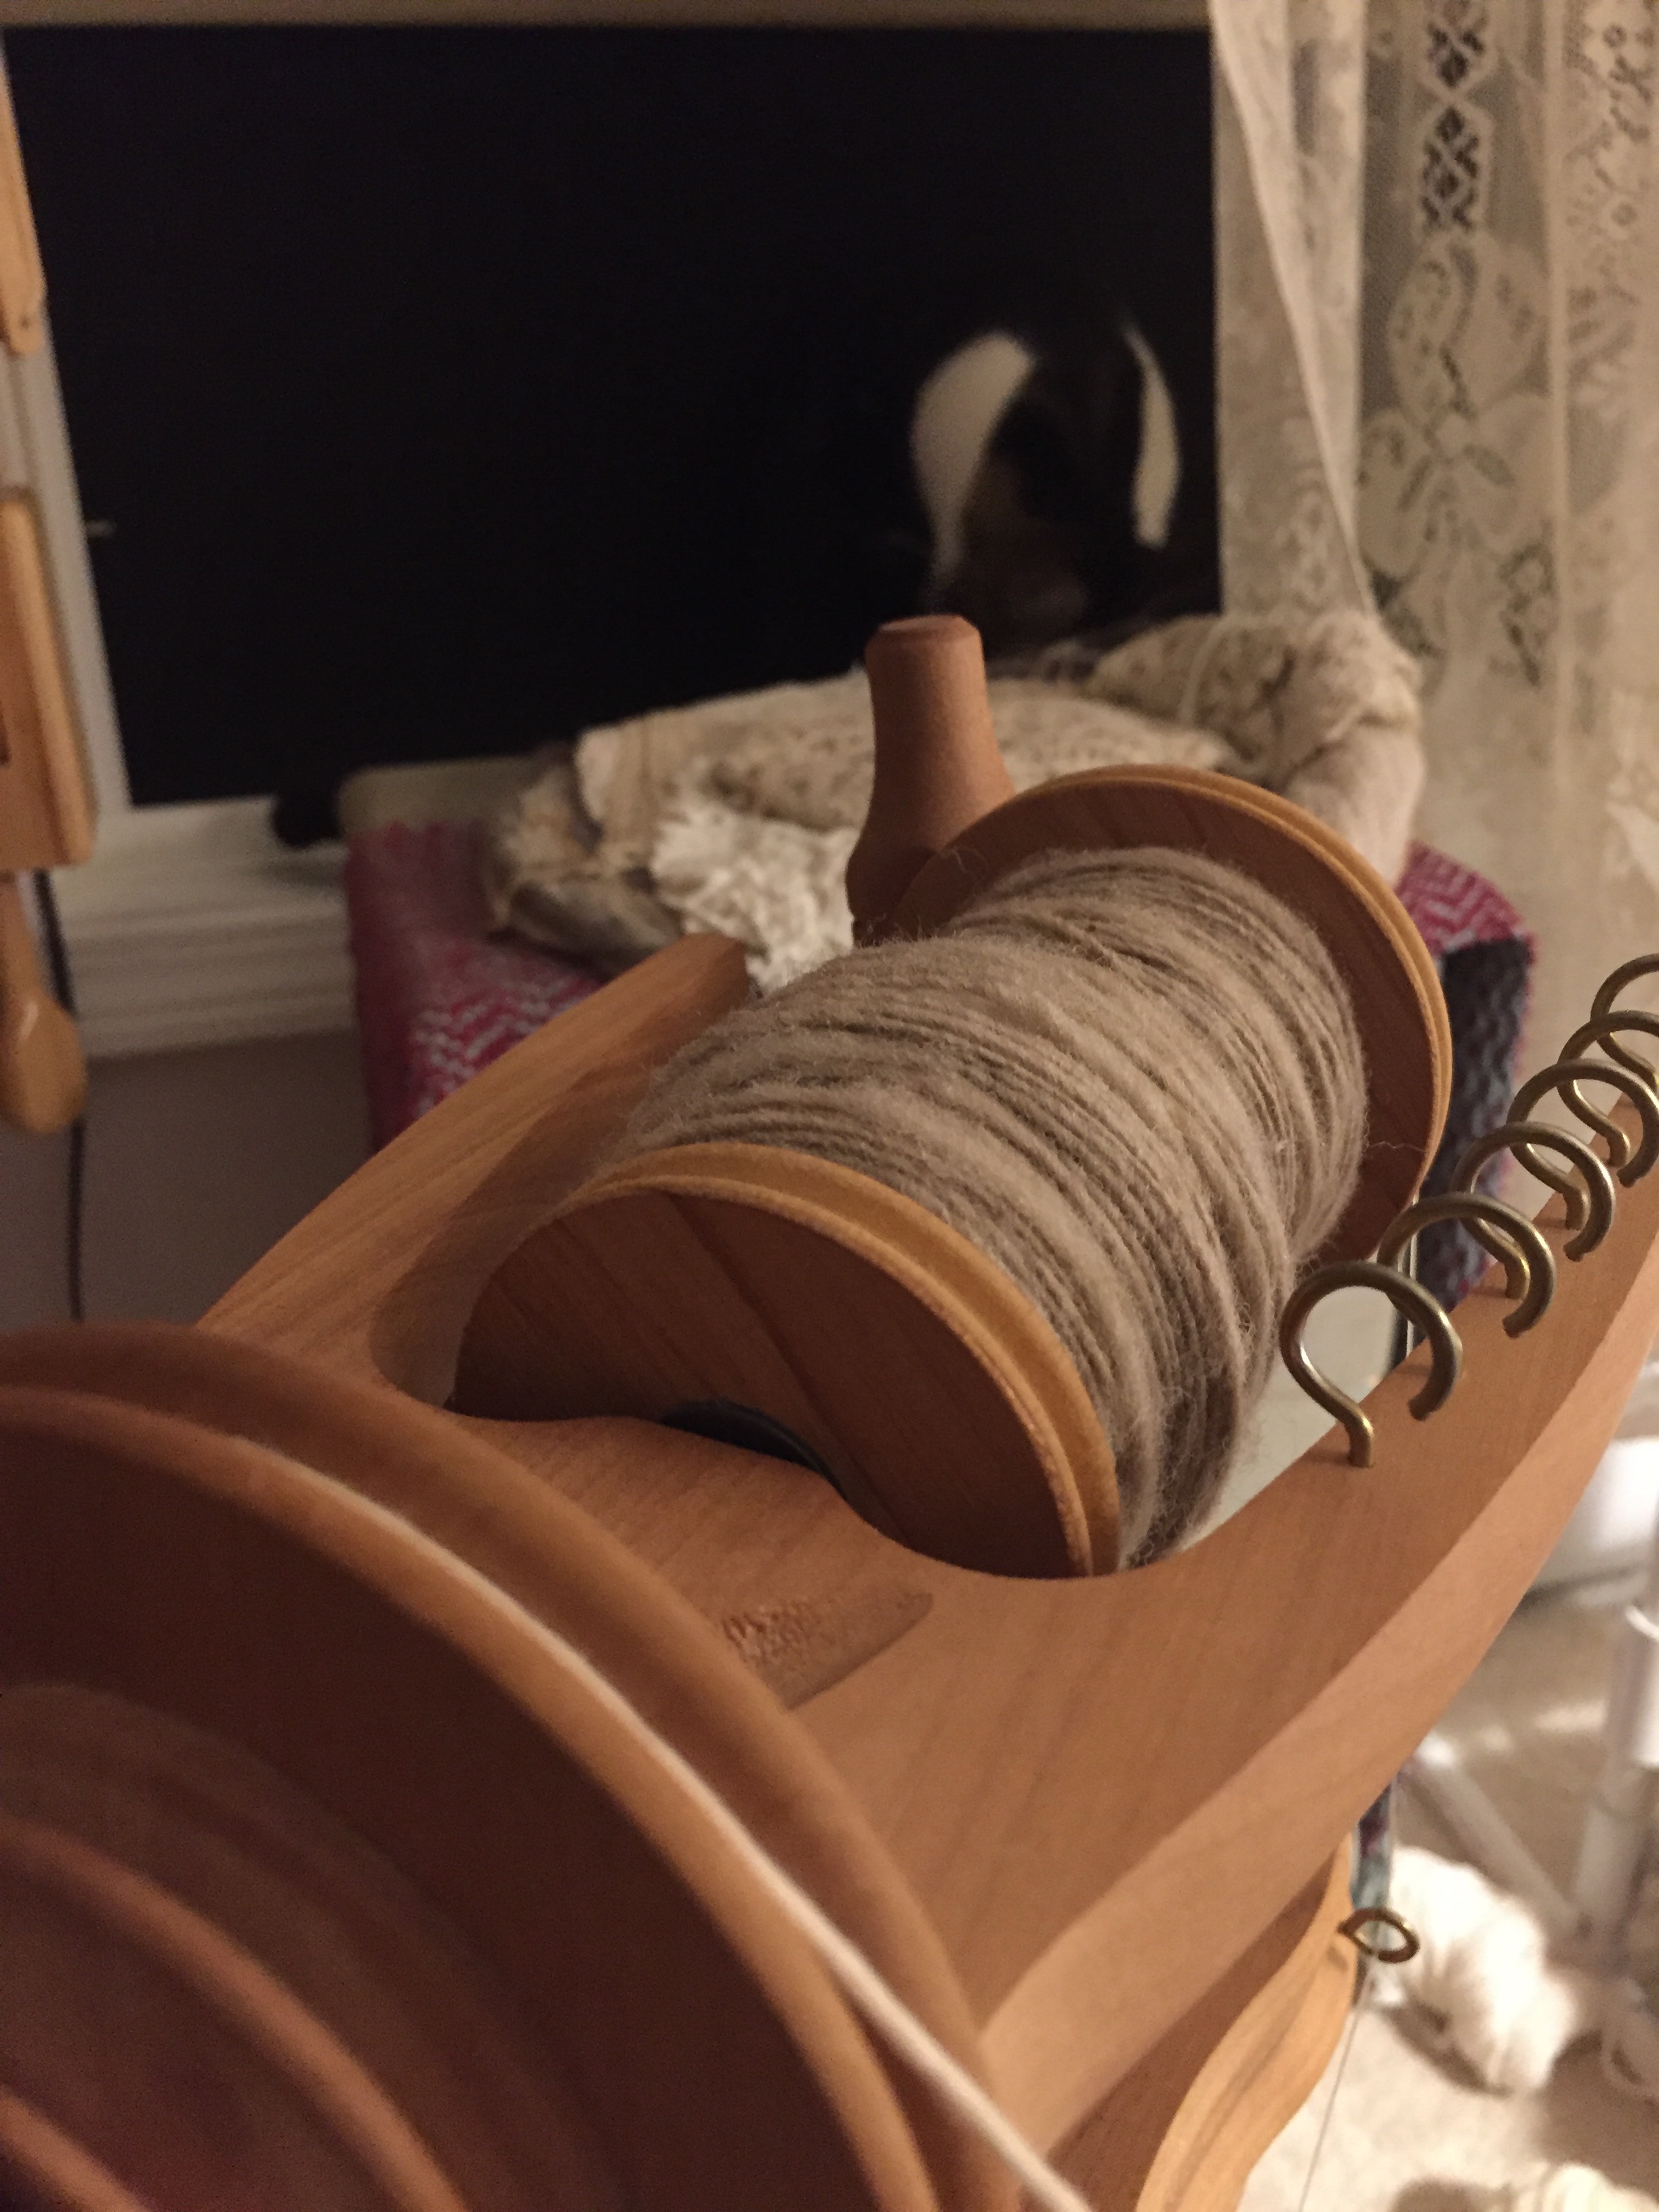
Also happening lately is the spinning of wool while listening to Clarissa Pinkola Estés’The Power of the Crone. I highly recommend listening to her wonderful stories. Pairing that with spinning is like eating dark chocolate while sipping a hot coffee. Perfection.
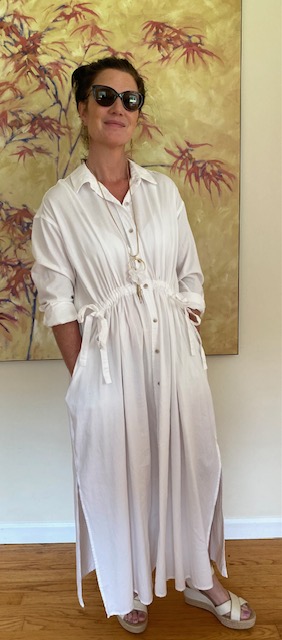
I got to dress up for a dear friend’s beautiful event thrown to raise money to develop a space that supports deep creativity and the arts…
And I got glasses- suddenly everything looks crisp and clear again… dang, that was a slow motion slippery slope…
I played with paint and yarn…
And had a lot of my work hung at the Pierson Library in Shelburne…
And did all kinds of fibery things with the Shelburne Craft School, my home away from home…
So, now that we’re all caught up (is that ever really possible?), I’ll love to know what you’ve been working on, thinking about, gearing up to do.
There is something alchemical about handweaving. It connects us with ourselves, with others, and with our ancestors, recent and distant. Weaving is part of our ancestral DNA and when we allow our fingers to interlace thread with thread, we create connection and foundation. Weaving does not have to be expensive, and weaving should be accessible to all people. If we can apply resistance to threads and create a taut warp, we can weave.
I love the long arc of weaving and the incredible potential it affords. One can sit with a simple frame loom and weave wild art pieces as well as work on a multi-harness floor loom and create wondrous and complex fabric. There are so many types of weaving and looms. Multi-shaft, tapestry, backstrap, pin, circular, inkle, Rinny Tin-Tin. Over the last decade, I’ve been teaching fiber art and craft in schools and more recently at the Shelburne Craft School, and there are some thought jewels that I’ve gathered along the way that fuel me, inspire me and make me want to keep learning and expanding. I’ve shared some of them here as a way of inviting anyone who has an inkling, to try out weaving, or any art or craft you’ve longed to try but keep putting off.
People Meet Themselves When They Weave
On many occasions, I’ve had the good pleasure of hearing people say things like, “I’m usually __________ (fill in the blank), but I’m playing with being __________ (fill in the blank) as I weave this” … or “I’ve never played with so much color before and I LOVE it!” …, or “I never realized how much tension I hold in my hands” …, or “the process of weaving while I reflect on my loved one is bringing up thoughts and feelings I’ve not held space for in so long, if ever.”
When we let ourselves just be with our hands, our eyes, and our breath as we make, our spirit has a chance to catch up and settle into the space between our lungs and in all the chambers of our heart. We can hear our own breathing again. We can let our eyes linger where they want to, and then notice where that is. We can meet our inner judge and talk it down from fear. We can usher ourselves into new territory and have woven fabric to show for the journey.
People Benefit from Having Access to Colors and Textures and the Opportunity to Experiment
This may sound so obvious it’s laughable, but hear me out. Have you ever had the experience of being invited to make something, and are given a certain set of materials that everyone else has, and a series of instructions that everyone else has, and you make something at the end that looks like a weird, kind of close but disturbingly not-close version of the thing you were supposed to make? Or is that just my life? In my experience, nothing botches up creativity more than when we are in a circumstance that doesn’t let us feel and see our way through materials we want to touch and witness. I’ve been blessed with a bunch of students who “go rogue” on the regular. It’s hilarious, and it’s shown me that people have their own ideas and their own version of learning that needs to be honored and allowed for as much as possible. Yes, sometimes technical truths need to be thrown in the mix to ensure that people can weave the thing they want to weave, but I’ve learned that creative drive is strong and shouldn’t be stamped out by rigidity.
People of All Ages Need to Play
I think we all know this intuitively, but what I’ve found is that people of all ages need access to opportunities where they can experiment, follow their noses, see what happens, try this and that, on low-stake projects. As we age, many of us become concerned with how much things cost, how much “time is worth”, how useful something is, and whether there is value to whatever it is we are doing. It puts so much pressure on the creative part of ourselves that just needs a freakin’ minute to look at things, try things out, observe what happens when certain materials interact with others, and take notice of how we feel about what we are seeing and experiencing. We need the chance to just be and drop in to our flow. When teaching elementary aged people as well as folks in their senior years, I’ve heard many exclaim, “Oh wow, I get to use this?” and, “I can’t believe I can weave with all of this! It’s so much fun!”
That makes my day.
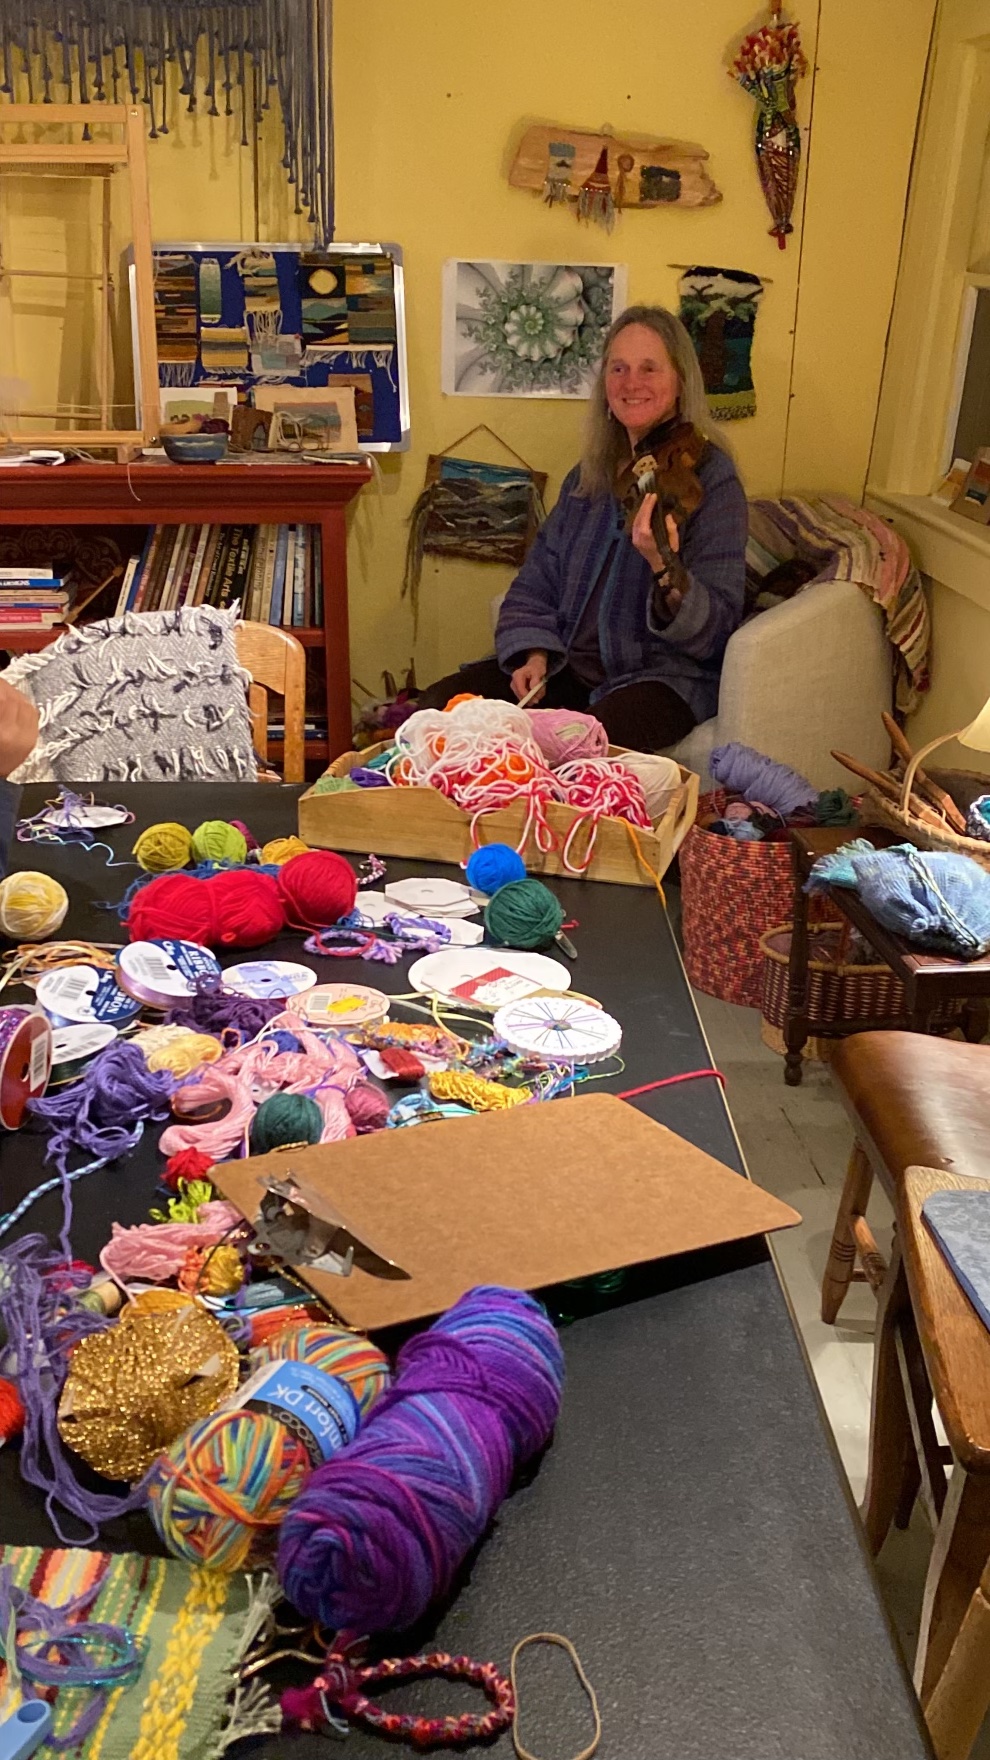
My friend and weaving teacher, Lausanne Allen, playing the fiddle while guests learned to braid using the Kumihimo method during an event at the Shelburne Craft School.
Weaving Can Be Very Simple and Very Complex
I’m hitting home runs here with obvious statements, but it’s worth saying that weaving is, at its most basic, the process of moving one material over and under and over and under another material. That’s it. Simple as that. From that foundation, we can weave the most complex and wondrous images and textiles imaginable. But it all starts with interlacing whatever it is we are weaving with. Isn’t that marvelous? Weaving is for everyone. It can be taught to people as young as nursery school age, and there is no age limit. In fact, weaving can help those dealing with the effects of stroke, dementia, and Alzheimer’s disease, as it has been shown to strengthen and encourage neuroplasticity in the brain.
When We Get to Do Things We Love, We Are Living the Universal Dream
Disclaimer: This is my view based on a whole lot of things. Feel free to take it or leave it.
If we are doing what we love at least sometimes, we can experience ourselves and share with the world our inherent gifts. There are no losers in this set-up. (Of course, I’m assuming that doing what we love doesn’t include hurting other people or living in a way that disregards others’ autonomy and integrity.) When we share what we love with others who are interested, we are giving from the place of our truest selves, because what we love is connected to who we are; the spark connected to our creativity is born from energy itself, and it interlaces with others’ creativity, like a cosmic dance. It’s amazing!
Whether it’s weaving, dancing, sculpting or singing, writing, building or baking (the list goes on and on), if we love what we are doing and sharing it with others in some way, we are putting some good energy into the world. And my friends, the world needs that big time.
Doing what we love = good medicine.
I hope whatever you are doing today includes you sharing the spark you have with the world in whatever way feels great to you. Until next time.
I feel like I should just begin each post with: It’s been a while…
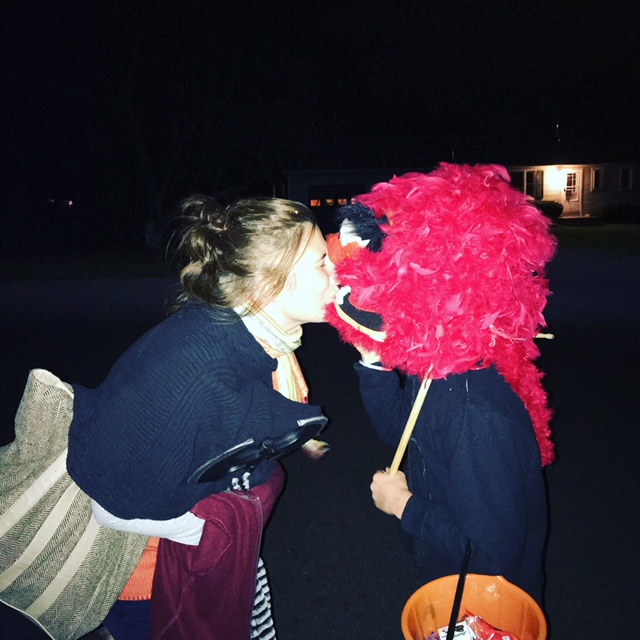
Rather than detail all of the reasons why keeping up with writing has been difficult lately, I’ll show you one thing I spent a considerable amount of time on in the last couple of weeks. It’s crafty. It’s funny. It’s… Animal.
Animal from the Muppets~ this is the real puppet, not mine!
Remember Animal, from the Muppets? I loved him when I was a kid, and I love him now, after spending a bunch of time considering all of the subtleties of his face, his expression, his noisy look. Of course, my animal does not come close to Jim Hensen’s, but oh, I love him still.
My son and I got the idea of him dressing up as Animal for Halloween one evening when he was playing the piano, very dramatically. He was cracking me up, swaying his head back and forth, his longish hair flying everywhere. He reminded me of Animal’s crazy drum playing ways and then and there, we decided it needed to happen. My boy needed to be Animal.
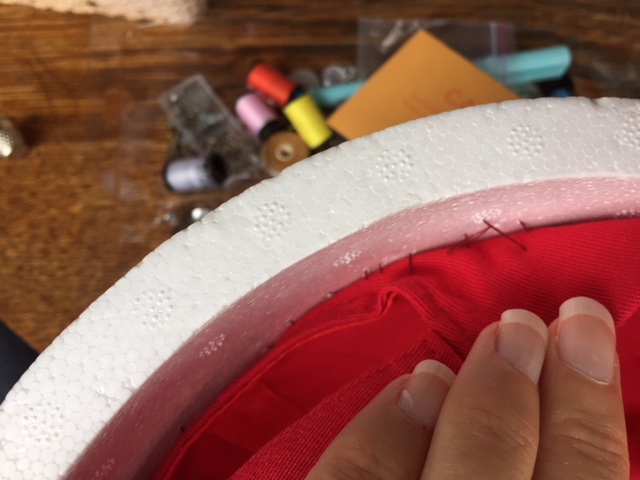
There’s no easy way to just get an animal costume. Can you believe that?! There’s not. Once we figured that out, my fantasy was too far in. I couldn’t reverse course. So, noodling around online, I took a gander at other people’s animal costumes. Paper maché seemed to be something folks tried but that intimidated me. I don’t know why but I think it just seems unruly and like I would just make a big heap of mess instead of a mask. I also found a post about a woman using a baseball helmet as part of the head support. It was from that idea that my mask was born.
After ruminating on the costume for a few days, I went to Michael’s craft store and walked around, hoping to find things that looked like they’d work for costume construction. I ended up with: styrofoam balls, three large and two small red feather boas, fun fur, black, red and orange felt, a styrofoam bowl, a red baseball cap, and glue.
First, I stitched the baseball cap to the styrofoam bowl. The idea here was that the head needs to be large, and there is a bit of a lip where Animal’s upper lip and nose protrude. The rim of the baseball cap provided the structure for that. The stitching here was tricky; if I pulled too hard on the needle, the thread would at times pull right through the styrofoam. Knowing it was going to be totally covered with feathers, I didn’t care about it looking great. It just needed to be functional. The cap, by the way, was fitted on my son’s head before I sewed it into the bowl.
Then, I glued the bowl edge onto the rim of the hat. What in the world did people do before glue guns?
Once that was dry, I began the fun process of wrapping and gluing the feather boas around the bowl. A little messy at times, it’s good to have wet paper towel on hand to get glue off fingers. Feathers seem especially attracted to glue.
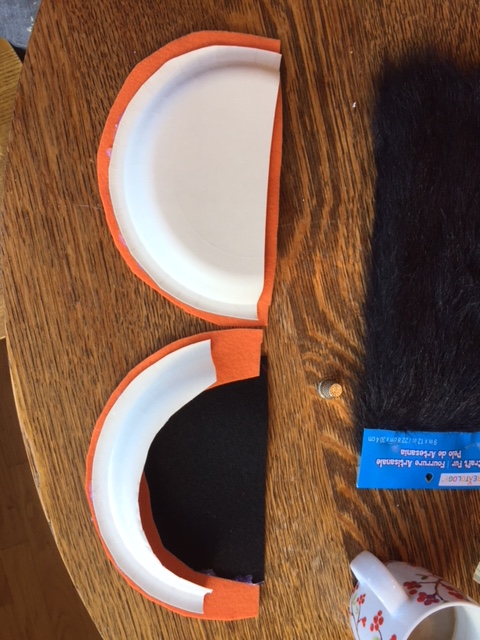
Once I got the bowl covered, I had to start tinkering with the mouth and how it would attach to both the head and to my kid. I apologize now for the lack of pictures of the rest of the process. I tried a bunch of different things. Finally, I settled on using thick paper plates for the structure of the mouth.
I eye-balled the plate size against the bowl/rim of the baseball hat. The idea was that the mouth would attach to the rim of the hat, and my kid’s face would be behind the mouth. Originally, I thought I’d cut out eye-holes in the black felt I used for the dark part of the mouth, but I changed that later.
I cut a plate in half and then cut out the flat part of the plate, leaving just the rounded edge of the plate. After a couple of experiments, I opted not to trim the rim of the plate itself (this is not pictured).
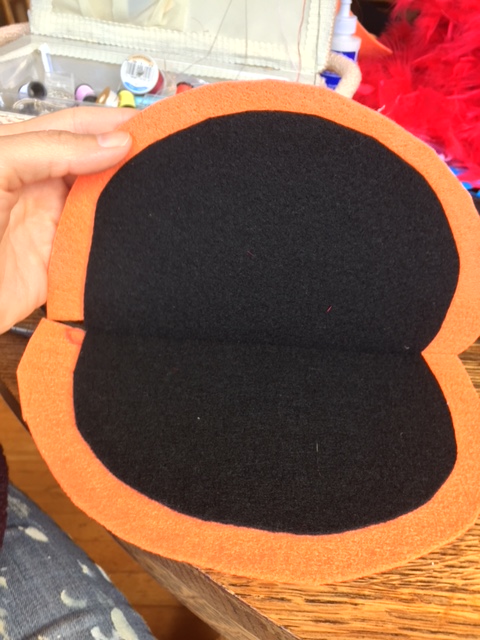
Then, I eye-balled the orange felt lips Animal has against the rim of the plate, and after that, the black inside of the mouth. Those pieces were glued to the plate rims. Now, below you see the full mouth where I used the black felt. I ended up using black meshy fabric instead. I included both pics here because some might prefer the darker felt for the mouth. I opted to switch to the see-through mesh because I wanted my son’s face to be fairly free and open, and for him to be able to see easily at night. I made the same kind of paper frame for the structure of the mouth, glued the black mesh onto the paper rim, then the orange felt lips on top. I placed black felt just on the bottom half of the mouth, on which the tongue could be glued.
Below is what I ended up with.
Now, the major tricky part was how to make the head full and round looking. Remember, the head up until this point was just the bowl, which only came halfway down the back of my son’s head. The top of the mouth was glued to the rim of the hat (so sorry there are not more detailed pictures). That allowed for the mouth to stay strong and in place. The bottom of the mouth naturally hangs down. After a lot of McGuyver style attempts to complete the mask, I almost gave up. I was really having a hard time figuring out how it would all go, until I talked it through with my step-mom. She suggested attaching it to a hooded sweatshirt and then wrapping the feathers around that way to complete the rounded head. Voila! That’s what I did, and it worked great. I sewed the hood to the baseball cap, and then the edges of the hood to the edge of the mask. Around the hood, back and forth, I was able to add more feathers and bring them around the bottom the the mouth.
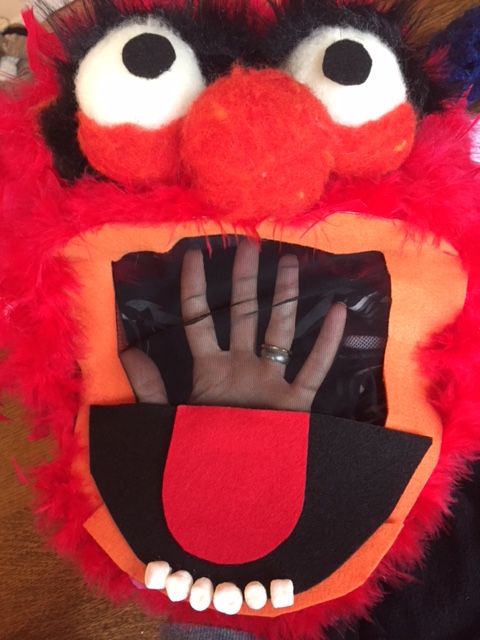
Once that structure was complete, it was time for the fun stuff~ the eyes, the nose, the teeth. For the eyes and nose, I wrapped the styrofoam balls in wool, needle felted them to give them a nice fuzzy look and glued them onto the head. I used black felt for the pupils, fun fur for the eyebrows, and marshmallows for the teeth.
Once Animal’s face was on, I felt so relieved! If I were to do it again, I’d needle felt the orange lips using orange wool, instead of the cut-out felt.
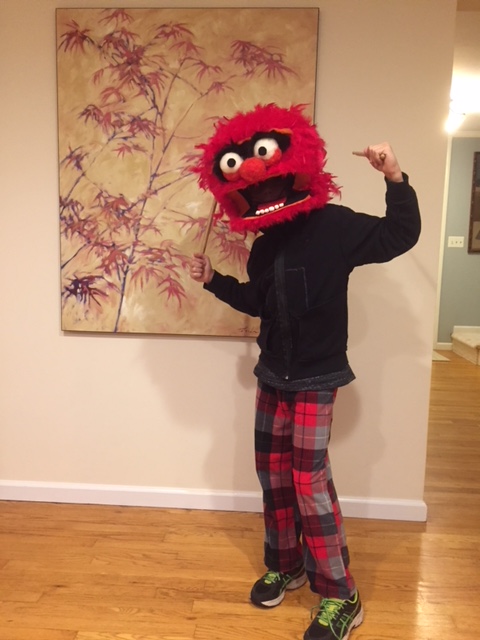
Here it is, all finished!
And here I am, having a loving moment with my Animal.
My life is organized by school years. I’ve not really had much time in my life when that was not the case. I completed my own schooling when I was twenty-five. Then I worked in schools for six or seven years (I already can’t remember that detail), and then I worked for years with kids in my practice who were in school. Now my own children’s school schedules shape our family’s life. The calendar year means very little to me except for a quiet chance for me to reboot and rethink where I place my energies. The school year, on the other hand, shapes most aspects of our lives.
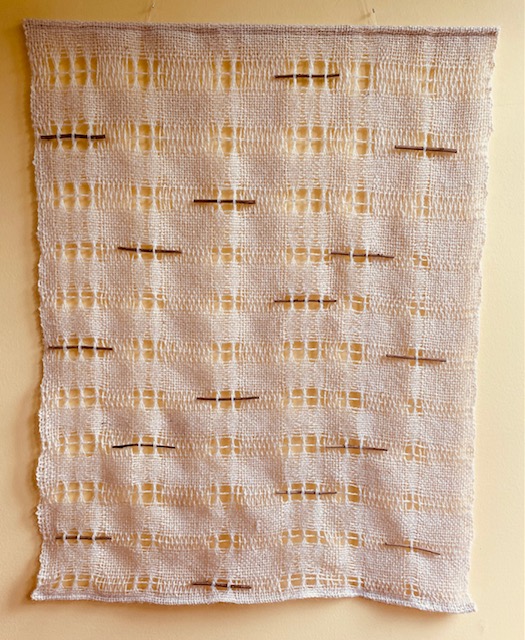
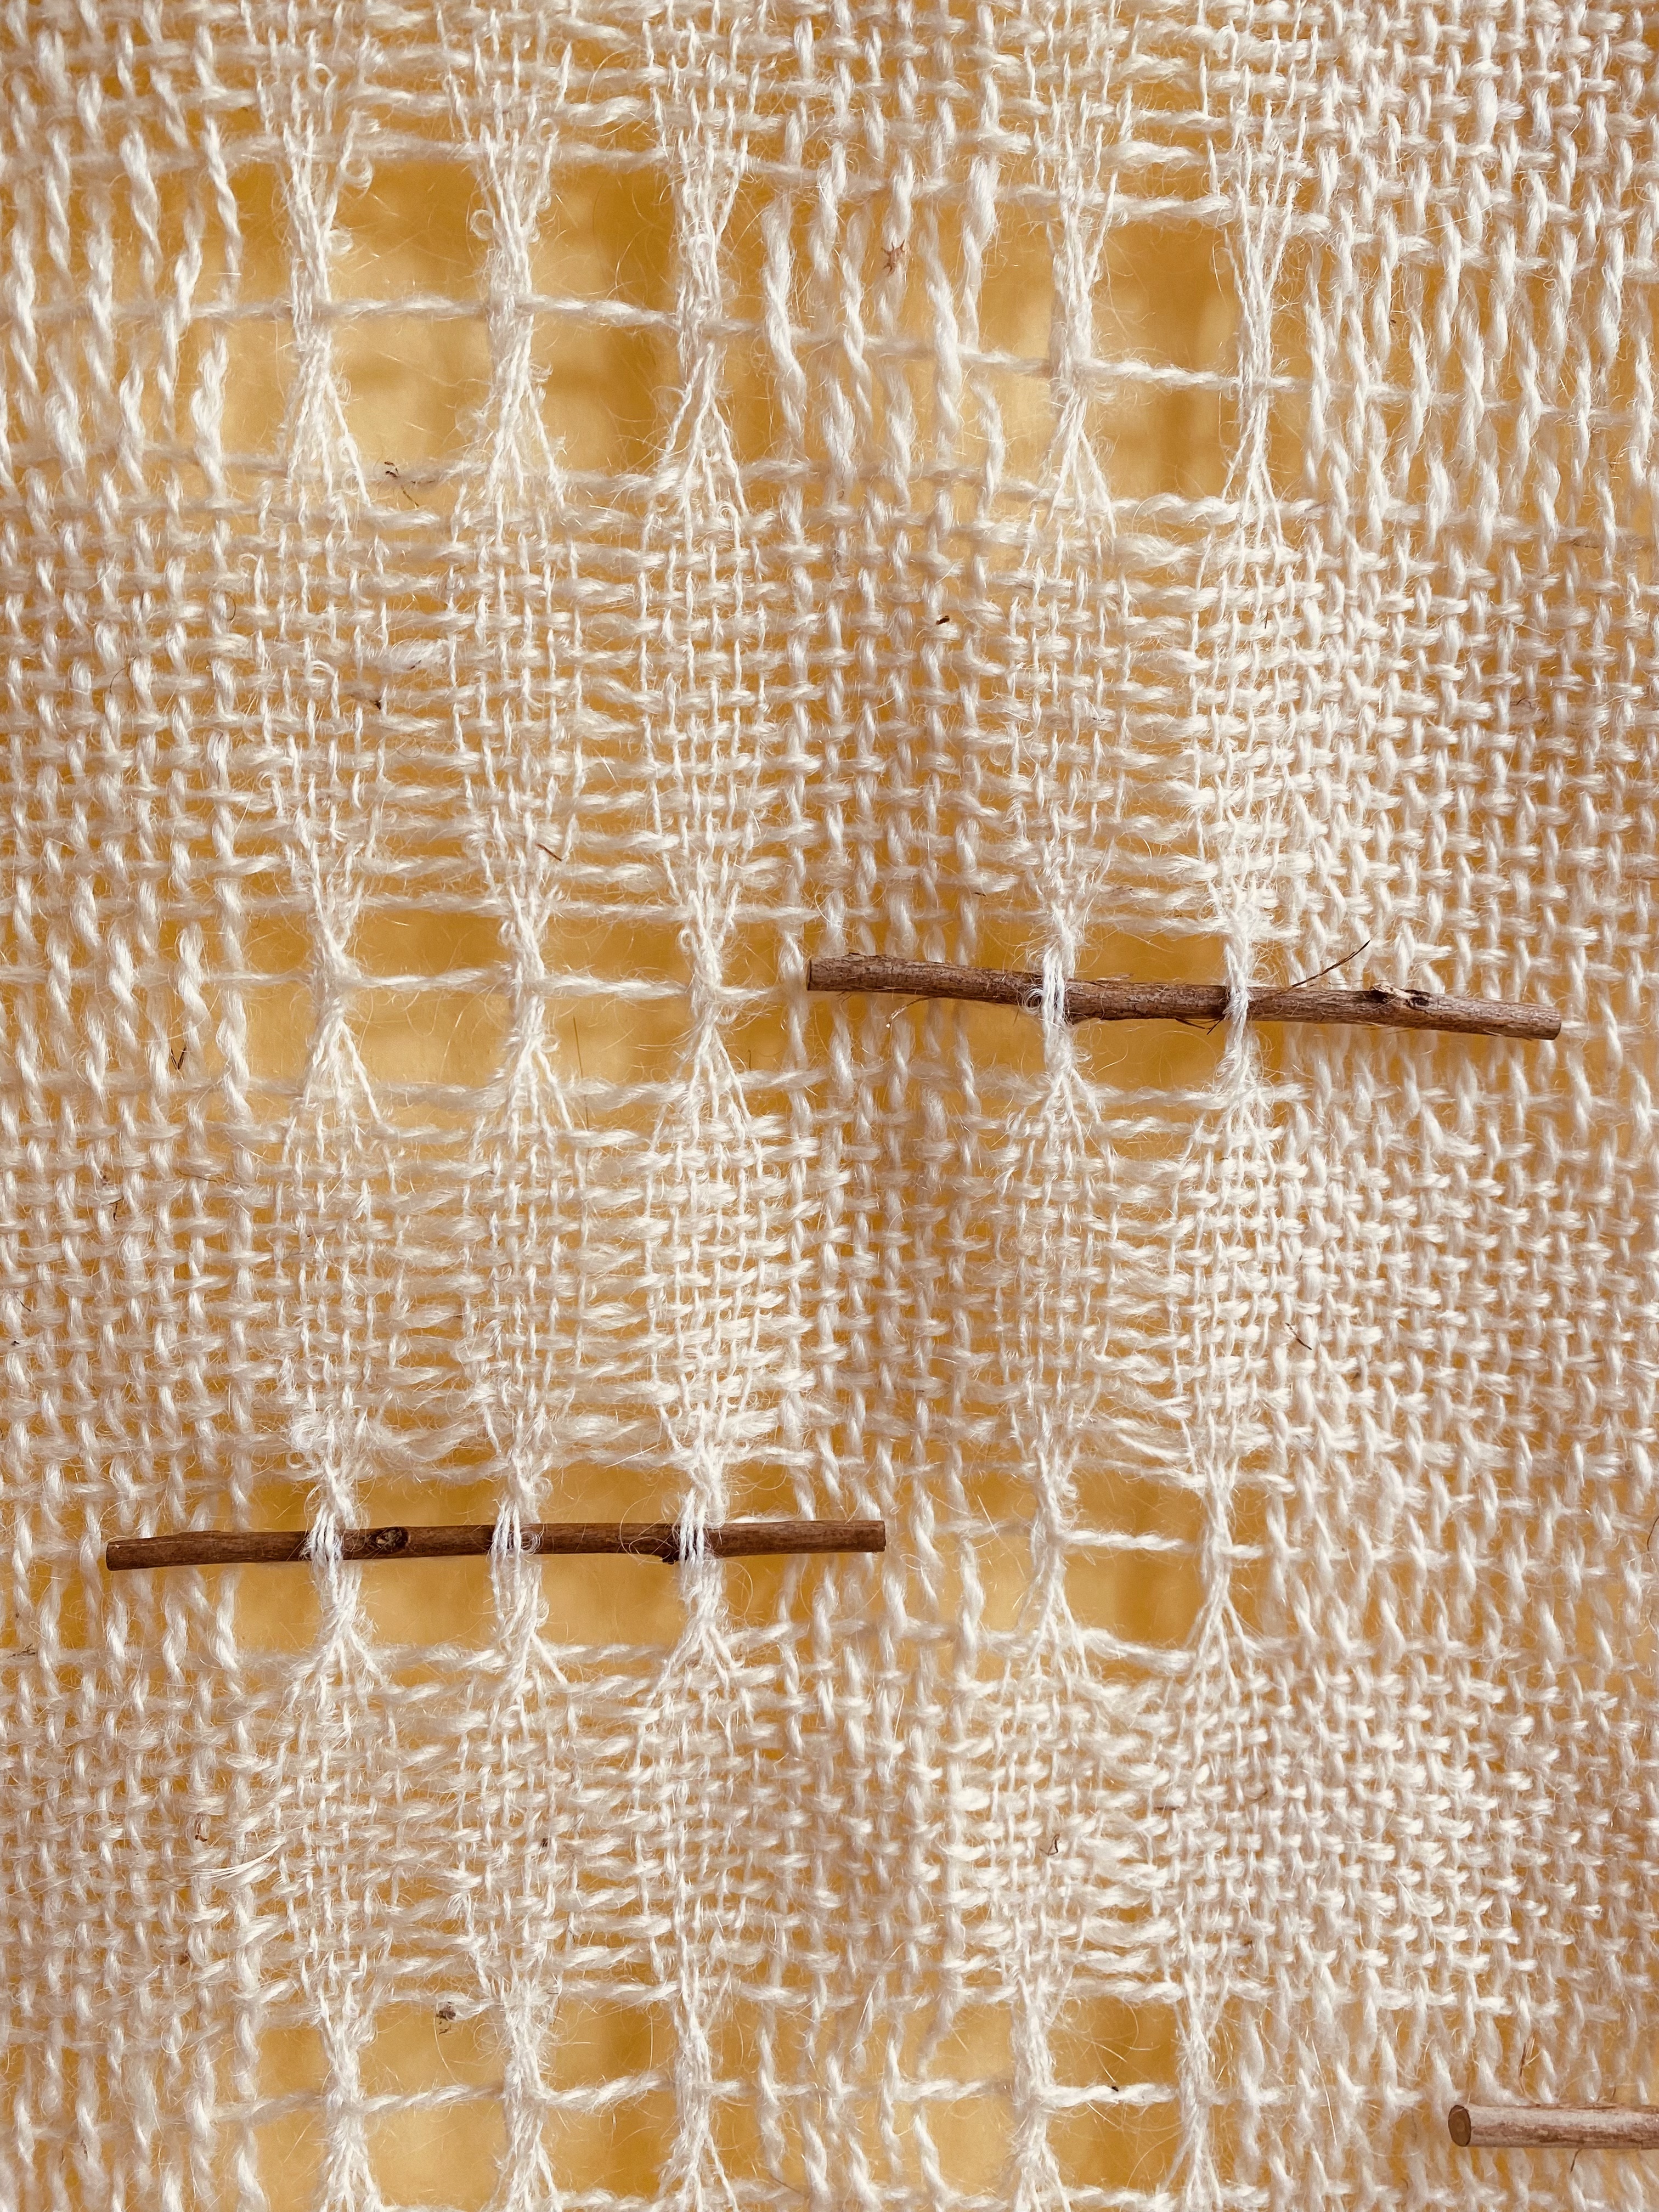
I spent a lot of time in my kids’ school this year. I volunteered in their classrooms teaching the kids all different kinds of things to do with wool, yarn and other fibery crafts. I also taught the same things in a more official capacity in two other classes. I loved it and I plan to share more here about some of the lessons that I taught. One thing I did in both my kids’ classes was leave a loom set up, the simple kind, for kids to work on as they pleased, with the idea that at the end of the year (or whenever it was finished), I’d turn it into something to decorate their teachers’ rooms with. Yesterday, I finished both of these woven pieces. My son’s 3rd grade classroom filled their loom. Almost every time I went in, someone was working on it.
Here’s their finished piece:
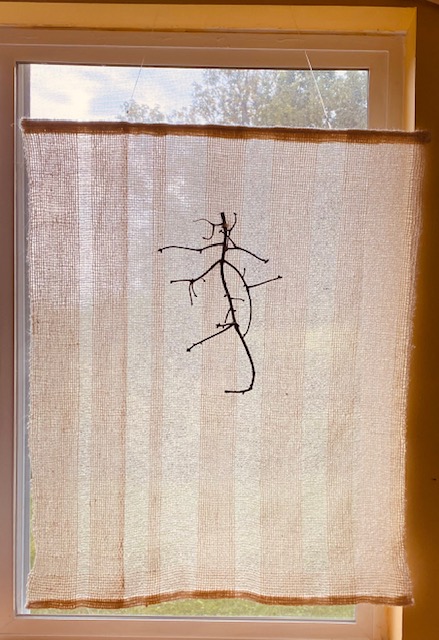
My daughter’s 1st grade class didn’t do many rows on theirs, but I assured their teacher I could make wall-art with it, not to worry. That class also did epically cool stuff with wool they dyed with Kool Aid, wool they felted and wool they experimented with.
Here’s their wool decor:
And, here’s their finished woven wall hanging:
I used antique wooden needles and a sanded dowel to serve as the structure from which the weaving hung. I also had a needle felted little nest hanging around that I opted to attach to the piece. I made that in their class as a demonstration one day and wanted to include it to represent that part of the work they did.
As I worked on turning the woven pieces into wall-art yesterday, I thought about all that has transpired since September, for my children, for me and my husband, for our family as a whole. It’s so much life squeezed into all of these academic months. I reflected on how much my kids learned with their fabulous teachers and with their peers this year, how much more they are doing on their own compared to September, and how much some of our growing pains have been, well, painful. I thought about how lucky I am to have been able to hang out in their classes so many times this year and be given the chance to learn how to teach better, listen better and be more flexible. And, I thought about how much I want to keep doing this. Handcrafting and fiber art are extremely effective mediums for teaching kids about art, history, creativity and themselves. I hope I do this for a long time.
Fueled by that hope, I cleaned off my work desk, and daydreamed about summer break.
I am so very lucky to have standing dates on Fridays when I teach kids how to do things with wool and with yarn. These Fridays are now known as “Fiber Fridays”, and have become a part of my life I am extremely grateful for and proud of. I think about it a lot, why I want to do this stuff with kids. First of all, I have two kids of my own and I relish any chance I get to participate in things in their classrooms. I get to meet their friends, know their teachers and just be part of their school world for a small time, which is amazing. I never leave without internally bowing to teachers, para-professionals, one-on-one specialists, reading specialists, special educators. They make the world go round, in my book. Their love and dedication to the field, and the skills they have, just blows me away.
Okay, so yes, I love being in my kids’ classes. I also love going into other classes and meeting even more kids and answering questions and getting excited about new stuff. It’s just fun and a beautiful complement to my work as a psychologist. I’m not being a psychologist in any formal sense of the word when I am in with children on Fiber Fridays. However, I am sharing something that I truly believe is deeply healing to the human spirit, and is a restorative practice. Handwork/fiber craft tie humans together in a most fundamentally ancient and organic way, and exposing kids to as many ways as I know how to work with fiber has become a prized part of my career.
In one of my first grade classes (the one my daughter is in), we’ve been exploring wool. We started with real free flowing exploration. I brought in big wool batts, smaller mounds of wool in a variety of colors, some fabric, some yarn, and a needle felting tool for just me to use, just in case some quick stick-togetherness was needed. I showed the class first different ways we can play with wool. I pulled it apart, I twisted it, I formed it into shapes and wrapped them in fabric and tied yarn around it. I encouraged them to just play and sculpt and imagine, and I let them know that there were no specific things they had to make at the end. Each table got its own basket of a big assortment of wool and then, it was off to the races! I was actually amazed, and I learned so much that day of free wool play. Children made babies, cradles, nests, birds, balls, clouds, old ladies, and animals. They played and laughed and shared. For some reason I was really worried that they’d be confused or adrift without a specific goal in mind, but I was wrong! They were happy to just go for it! I was lucky to have plenty of help from the teachers and a parent volunteer with cutting fabric, wrapping, needle felting and tying. It was peaceful and joyful. I do believe working with wool is magical.
Two weeks later in the same class, I referred back to our previous experience, and said, “this time, we are going to experiment with wool mixed with soap and water!”. Our project was to make felted balls. Before we began, I first showed them balls I made at home. I also showed them my “oops” items… a disc that was supposed to be a ball… a nest that was supposed to be a ball… a weird creasy ball that was supposed to be smooth. You know, it’s kind of hard, at least for me, to get a wad of wool to felt into a perfectly smooth felted ball with just warm, soapy water and your hands. I don’t know how Martha Stewart does it!
And we talked about having one idea in your head when you go to make something and how sometimes it doesn’t turn out like that. I told the kids that we are learning, experimenting, having fun and seeing what comes out of our efforts.
On the floor I had set up a drop cloth with towels covering it. On that were six plastic mixing bowls, two with soapy water and four with clear water that had to keep being replaced as kids dipped their creations into them to rinse the soap.
Water + Wool + Soap + Being Okay with Oops = Felting
Balls were made. Some were smooth. Some were crinkly and seamy. We got a mushroom, some discs and some wild looking blobby alien life form planets, or maybe coral? I saw a bunch of children totally okay with experimenting and just seeing what happened and I think that right there is a major piece of wisdom gleaned from mindful handwork.
Freedom to experiment and see what happens, within one’s own heart and spirit, is such a beautiful thing, and it’s something that I think we all should tend to as often as we can. I am often guilty of hanging on so tightly to what my plan is that I forget to see what’s actually happening right in front of me. I forget to loosen my belly and breathe and just let things be as they are. It’s so easy to forget that.
You know what else blows kids’ minds about wool and felting? With some simple ingredients and some agitation, soft and fluffy wool is transformed into felt and it is impossible to return it to its original form. I can’t explain why something so obvious is so mystical and amazing to kids, but it is, and I need to meditate on the symbol.
Stay tuned. I’ll be sharing more projects and ideas and insights from this cool gig I have.
I’ll admit to being one very distractible and lack-of-focus afflicted person at present. It is hard to figure out why. Here are some possible reasons: the intense heat has made working with wool mildly unpleasant; the coming to an end of summer vacation fills me with a nagging dread and combating impulses – do as much as I can with my kids and make the remaining days epic-style awesome vs. relax and take each day as it comes and just make sure to swim; anticipation of having time to organize my projects, my work and my goals and a drive to get started, get to finishing, and get organized. I teach at a local college, have a small clinical private practice, I hope to bring fiber art and craft to more kids this year, and I have some writing projects I long to pursue. All of these responsibilities and goals, plus being a mommy to two young ones has me, well, a little all-over-place, and I think that is reflected in my project heap and book pile. I thought I’d share some of what I’ve recently finished, what I’m working on and what I’m reading with those of you who read this here blog of mine. Maybe you, too, find the end of summer to be a little, well, turbulent?
Azel Pullover
~ I finished the Azel Pullover for my daughter. I love it. I truly do. It is not completed just as the pattern was written. It’s a bit shorter, and I modified the cowl neck because the numbering of stitches was off and it was making it wonky, so I ended up just knitting in the round which made a great looking band around the neck. By the way, the creator of this pattern is wonderful, and responded to a question I had about it in a very short amount of time.
~ As part of completing the above pattern, I acquired a whole bunch of new skills in the knitting department: the cable knit cast-on, picking up stitches, making button holes (not elegantly executed this first go-round, but I can get the buttons through them), and fixing big mistakes (I practiced understanding what stitches look like when you have to take out a few rows and get them back on the needles).
~ I also got to use the knitting needles my grandmother gave me. You can read about them here. I am so happy about that.
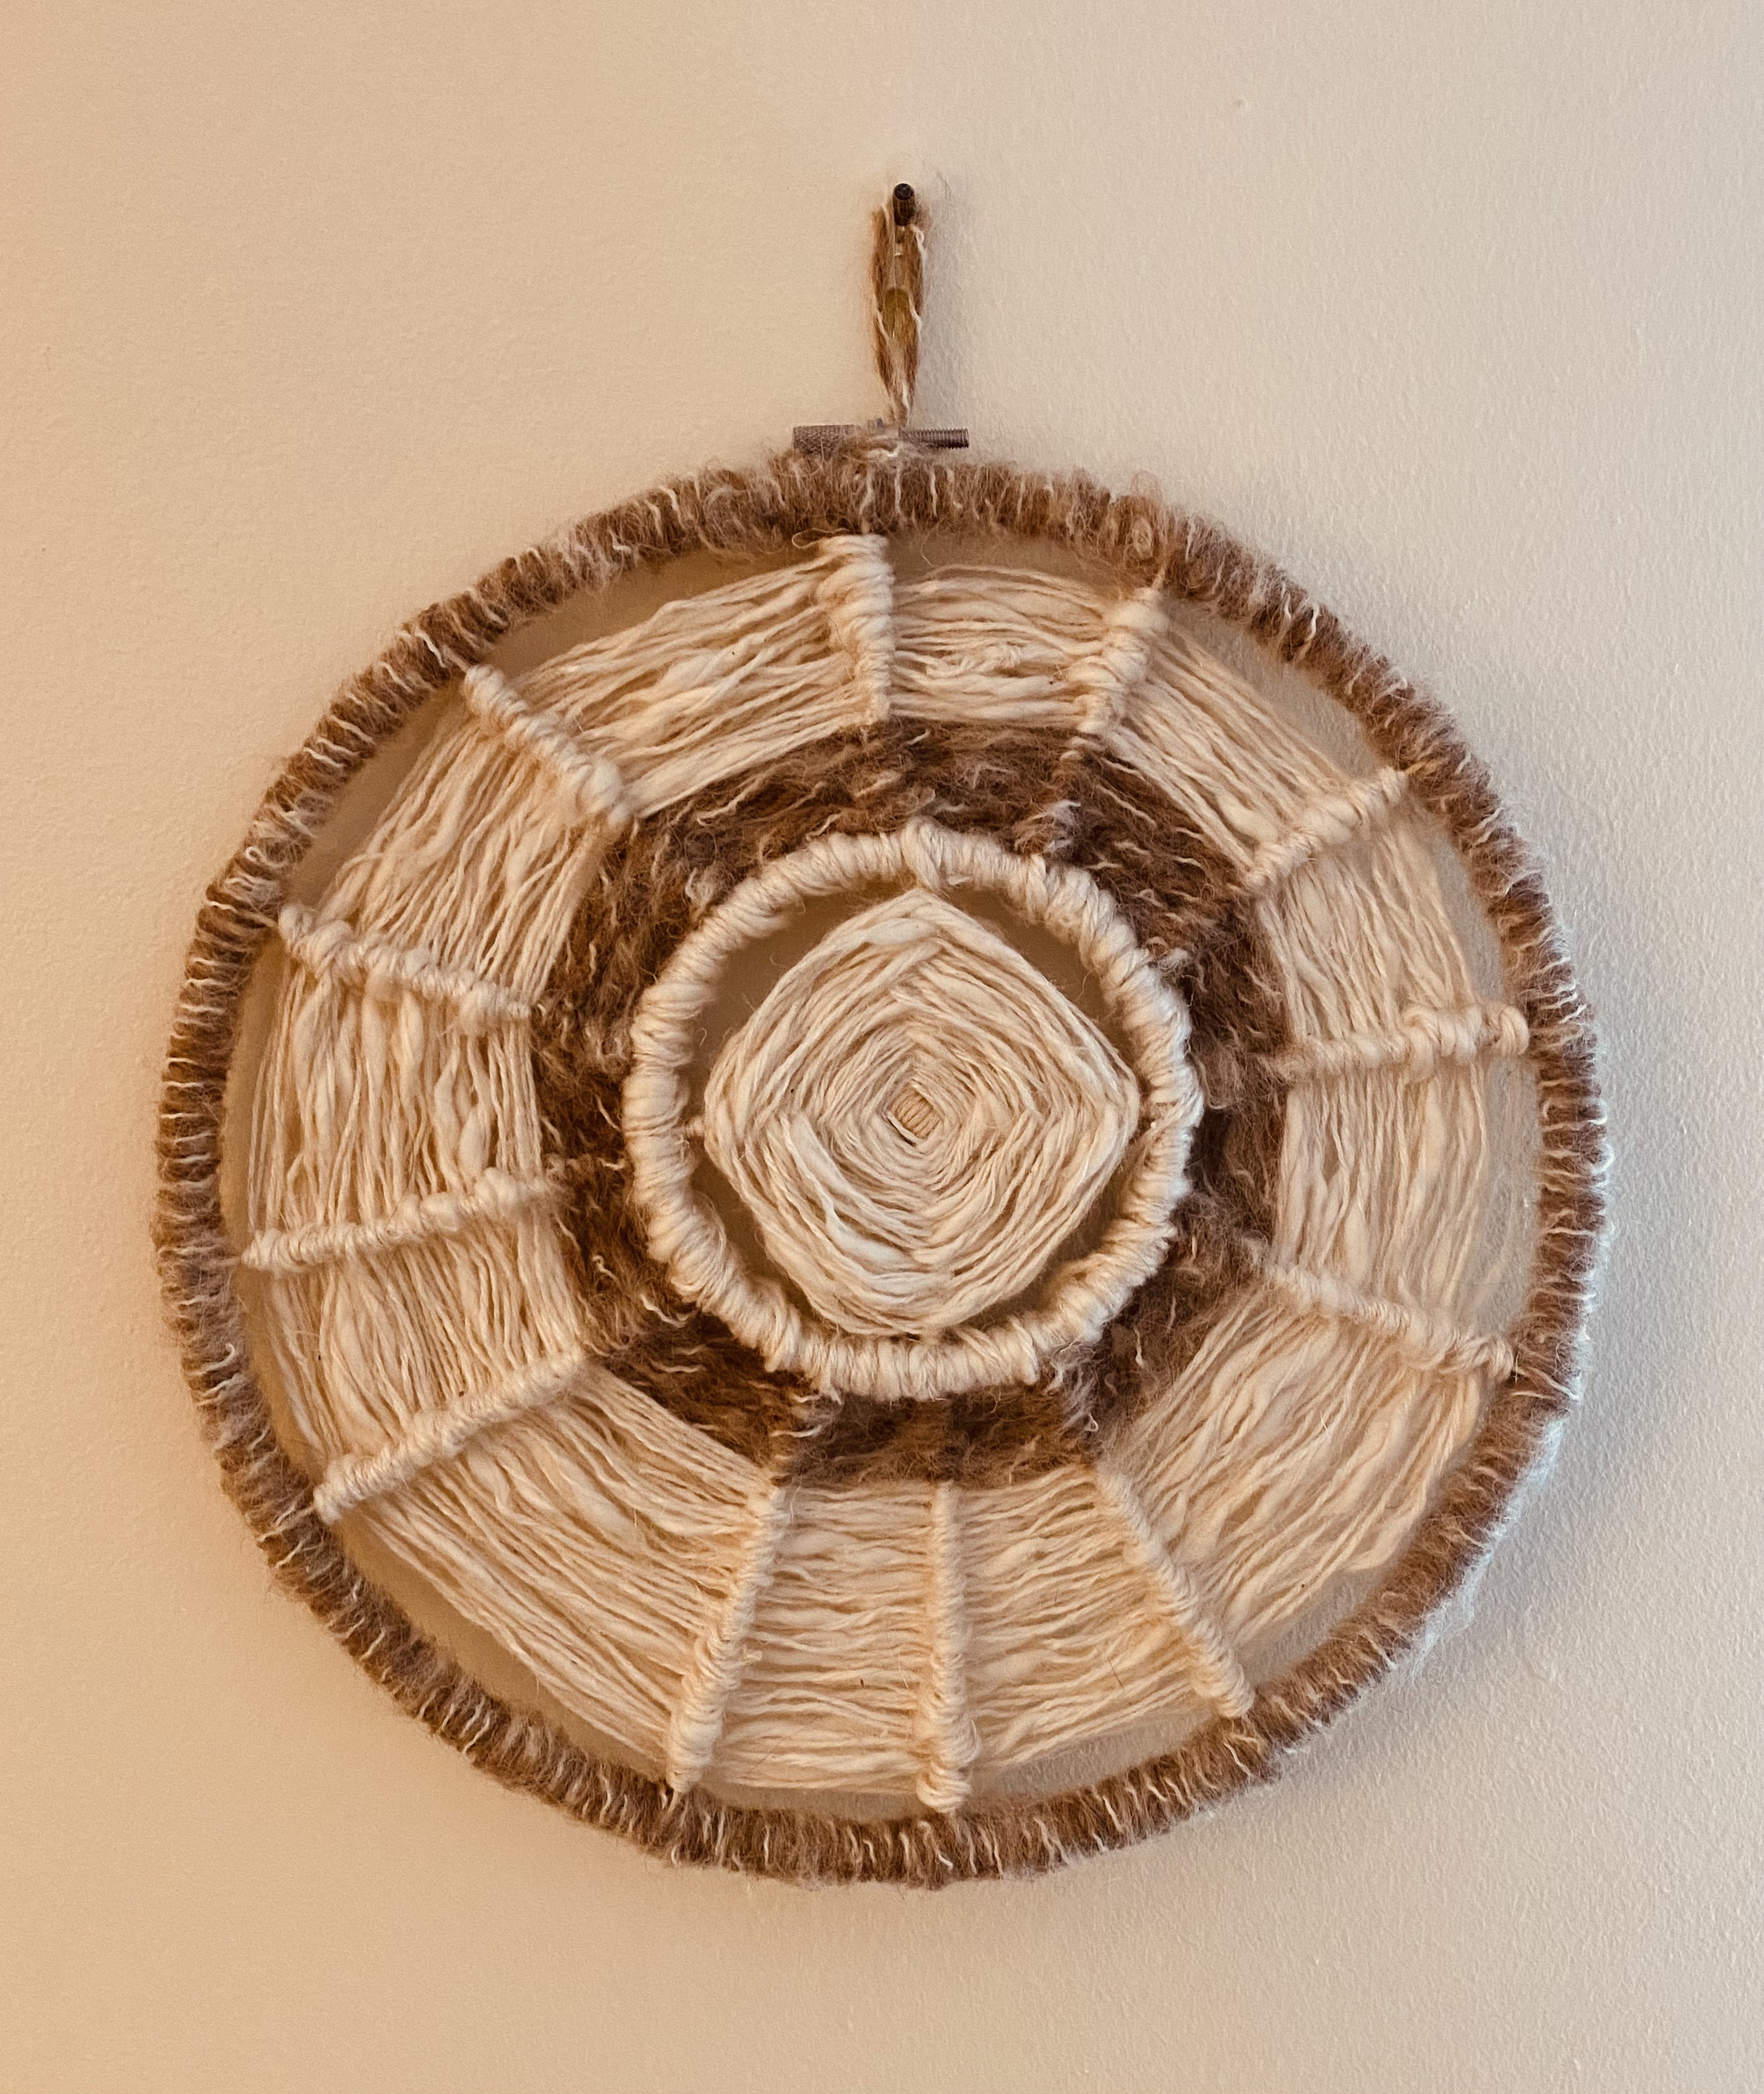
Circular Weaving
I just completed the circular weaving piece that I started a while back. You can read about that here. It was supposed to, in my imagination, lie flat, but alas, it does not and is currently awaiting a super modification that I am actually very excited about. The hoped-for meditation mat will turn into a bowl to hold organic materials I plan to use to spin into yarn or work into weaving pieces.
The weaving looked nice and straight on the loom, but…
Once off, it would not lay flat. I think I pulled too tight on a few rounds of yarn. It seems to want to be a bowl, and I have an idea of what to wrap the outside in, so more to come on this!
Sewing With My Kids
Both of my littles have begun sewing their own little dolls, which is truly wonderful. You know, it is one thing to practice slowing down and exercising patience when it’s just me I’m reckoning with. When I’m working on projects with my children, I’ve realized that it’s best if I have some project in my hands, but one I’m not absorbed with. Nothing kills creativity and learning like impatience from the guide. I’ve been guilty of that and have made a dedicated effort not to let my own inclination towards impatience that I so readily apply to myself destroy these quiet moments with my children. I think I’ve made headway in this department.
I recently read a book to my children called Cloth Lullaby, by Amy Novesky. It is about the artist Louise Bourgeois and especially, her relationship with her mother, who was a weaver and tapestry artist. Louise apprenticed under her mother and later in her life became a renowned artist in her own right. Her giant sculptures of spiders, who were inspired by her mother, are one of her hallmark themes. Spiders create thread and repair and build and, in one part of the book, the author describes how when webs are damaged, spiders do not get angry; they simply repair them. In this beautiful book, I was reminded of an important ideal~ steadfast and calm repairing and steadfast and calm teaching. I was grateful to have read it with my littles.
Organized My Fibers and Garage Space
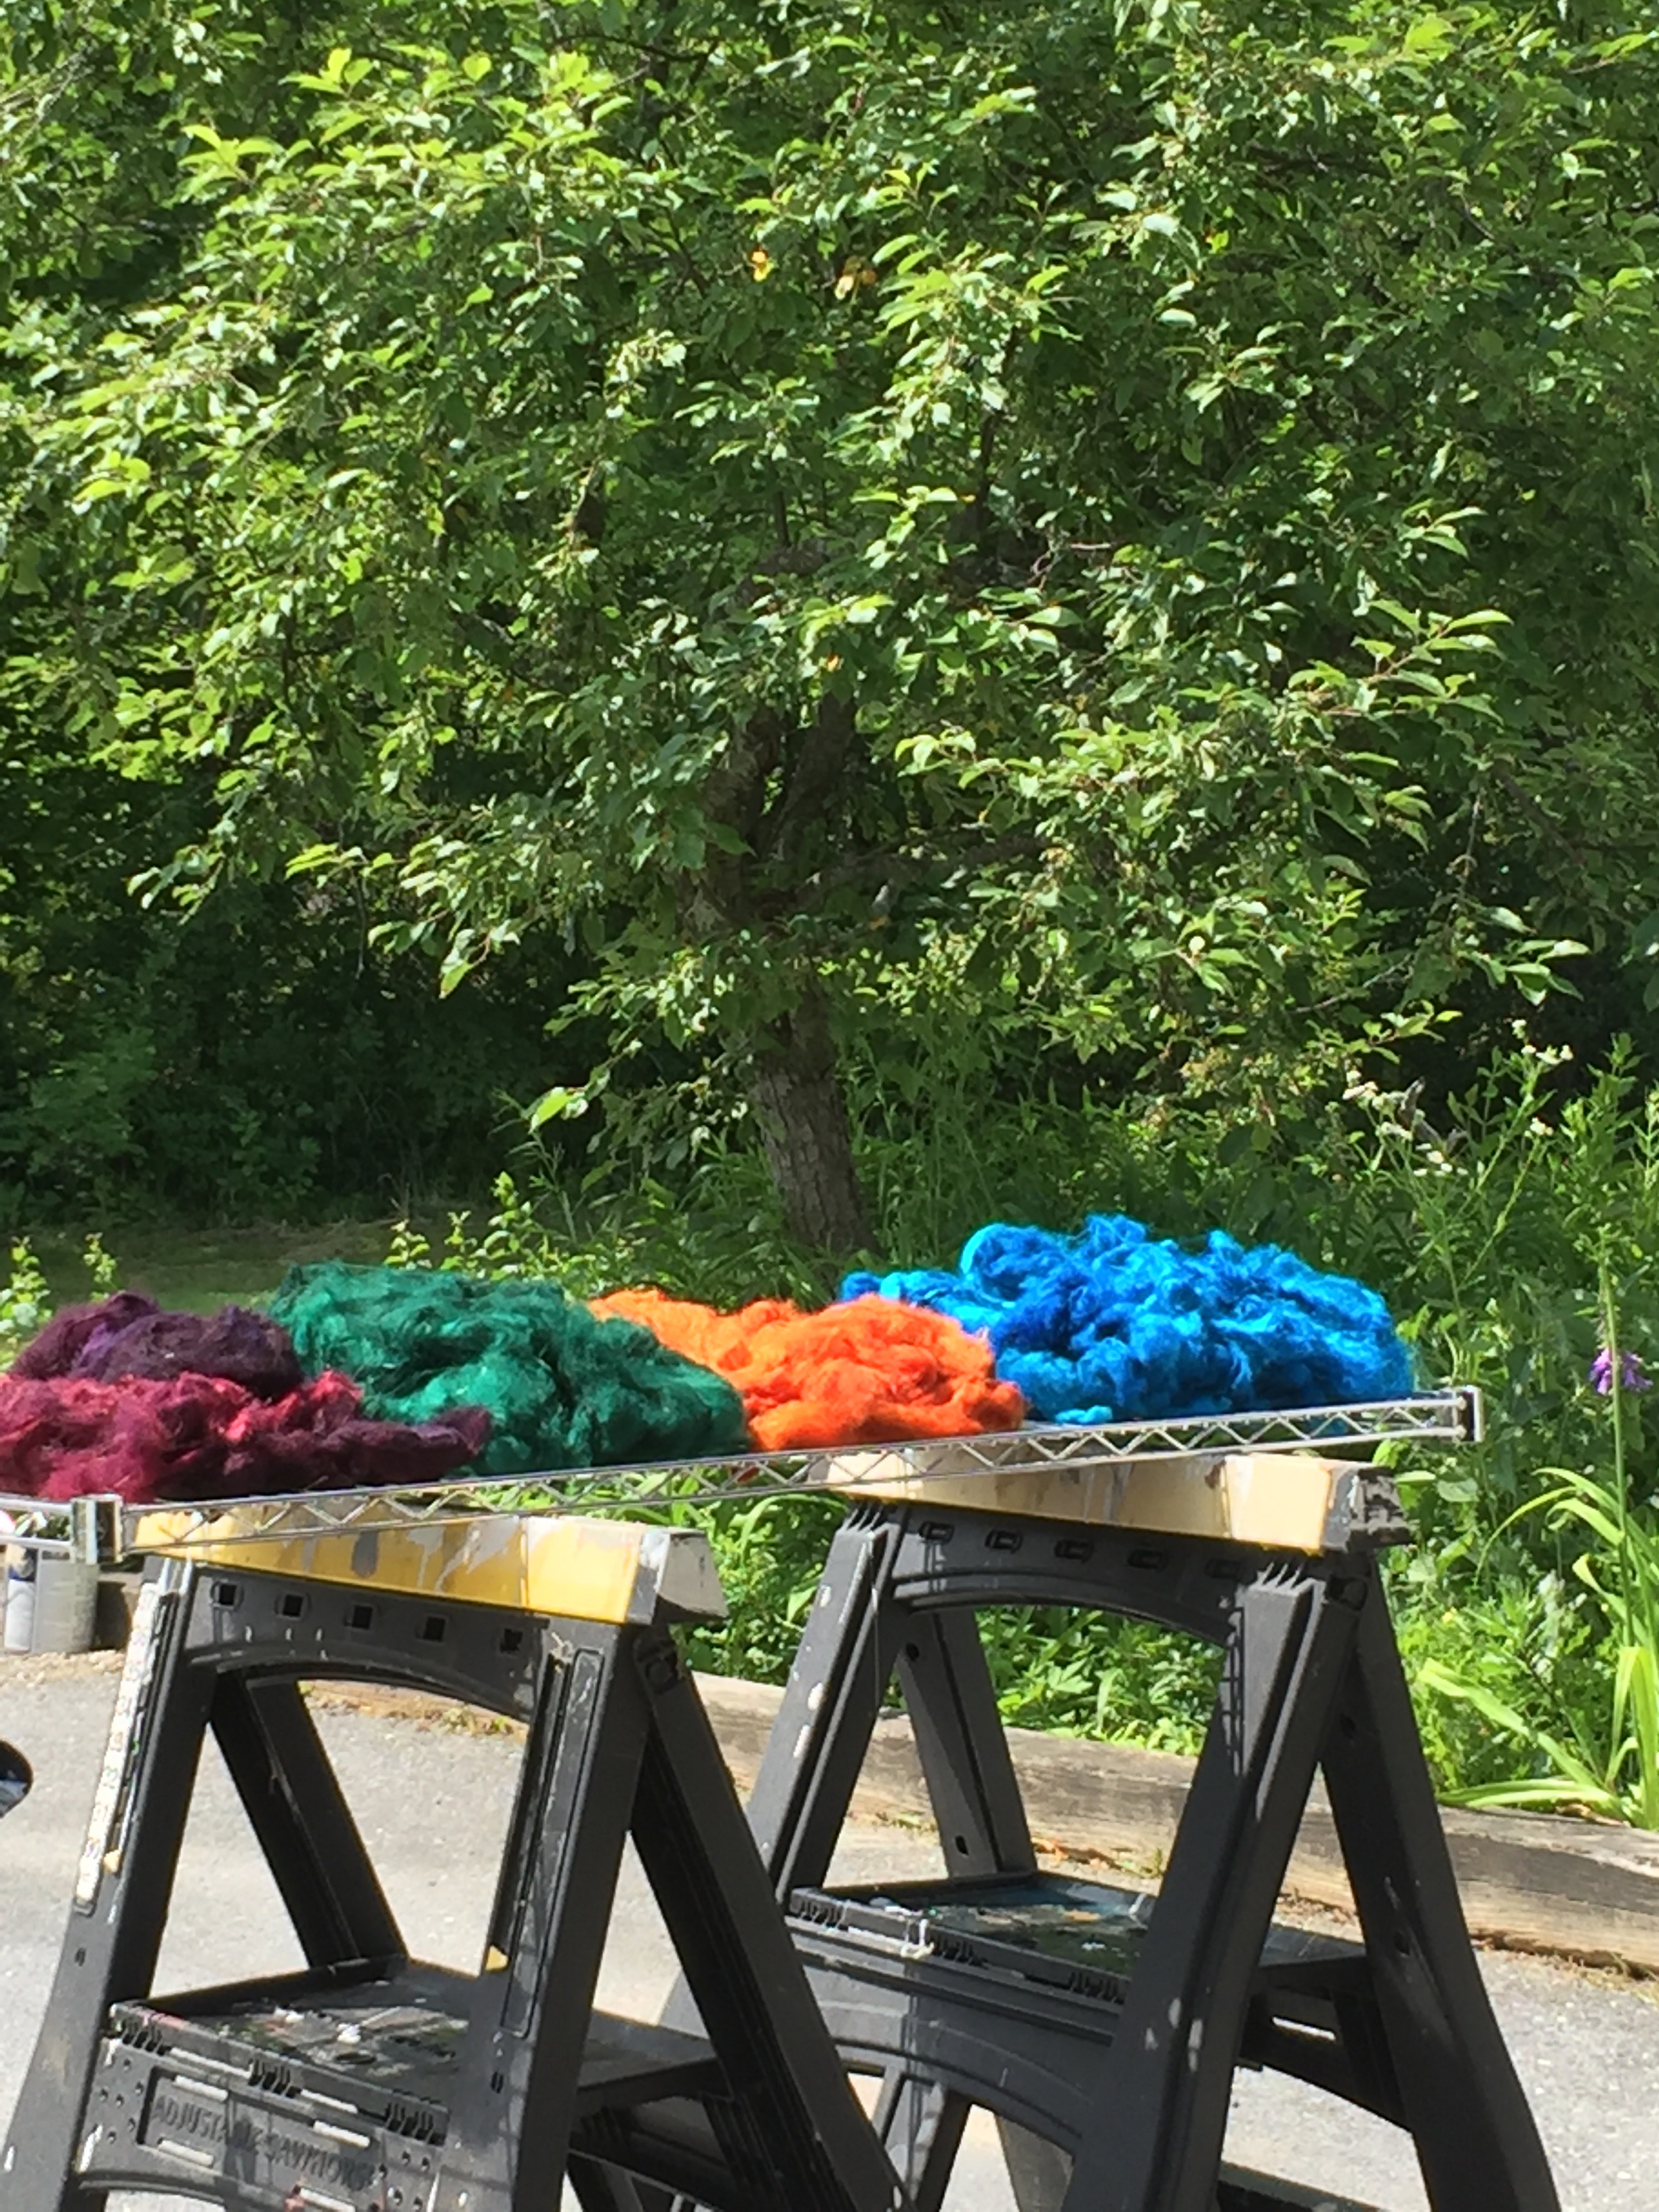
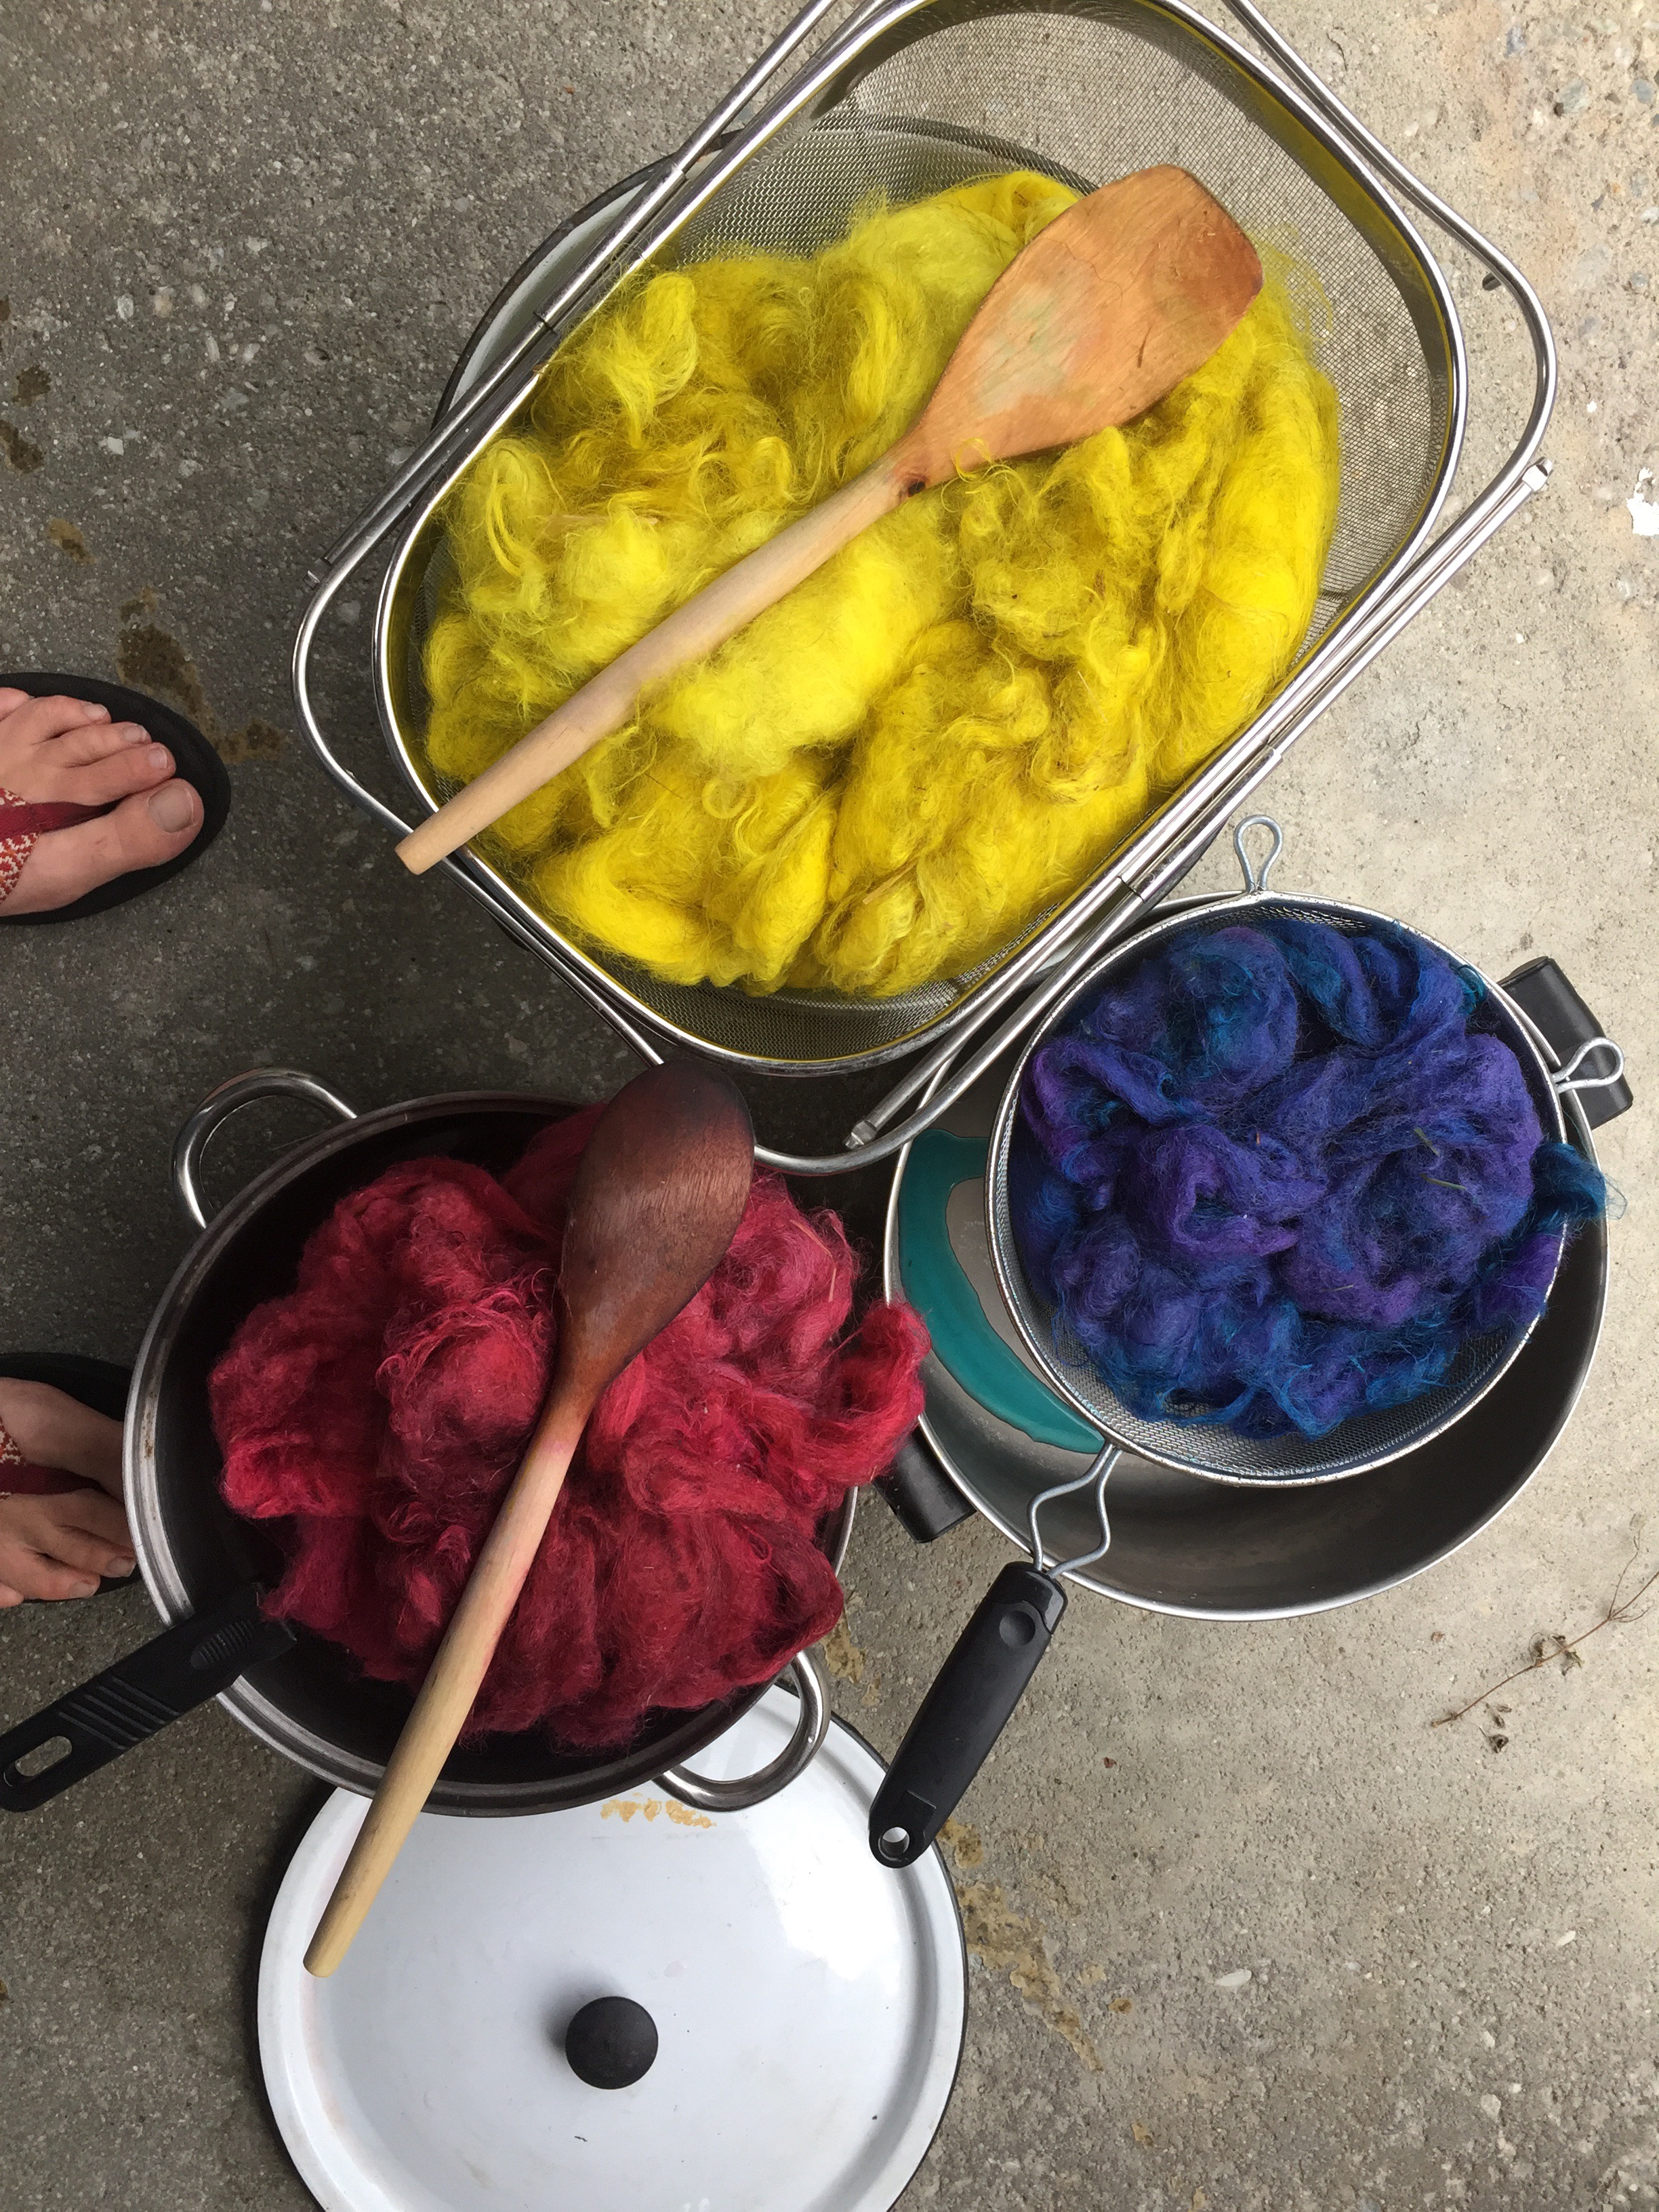
I spent a good amount of time going through all of my materials and getting them organized in a way that will make project planning and gathering much easier in the months to come. I do plan on doing a fair amount of dyeing wool and experimenting in the fall.
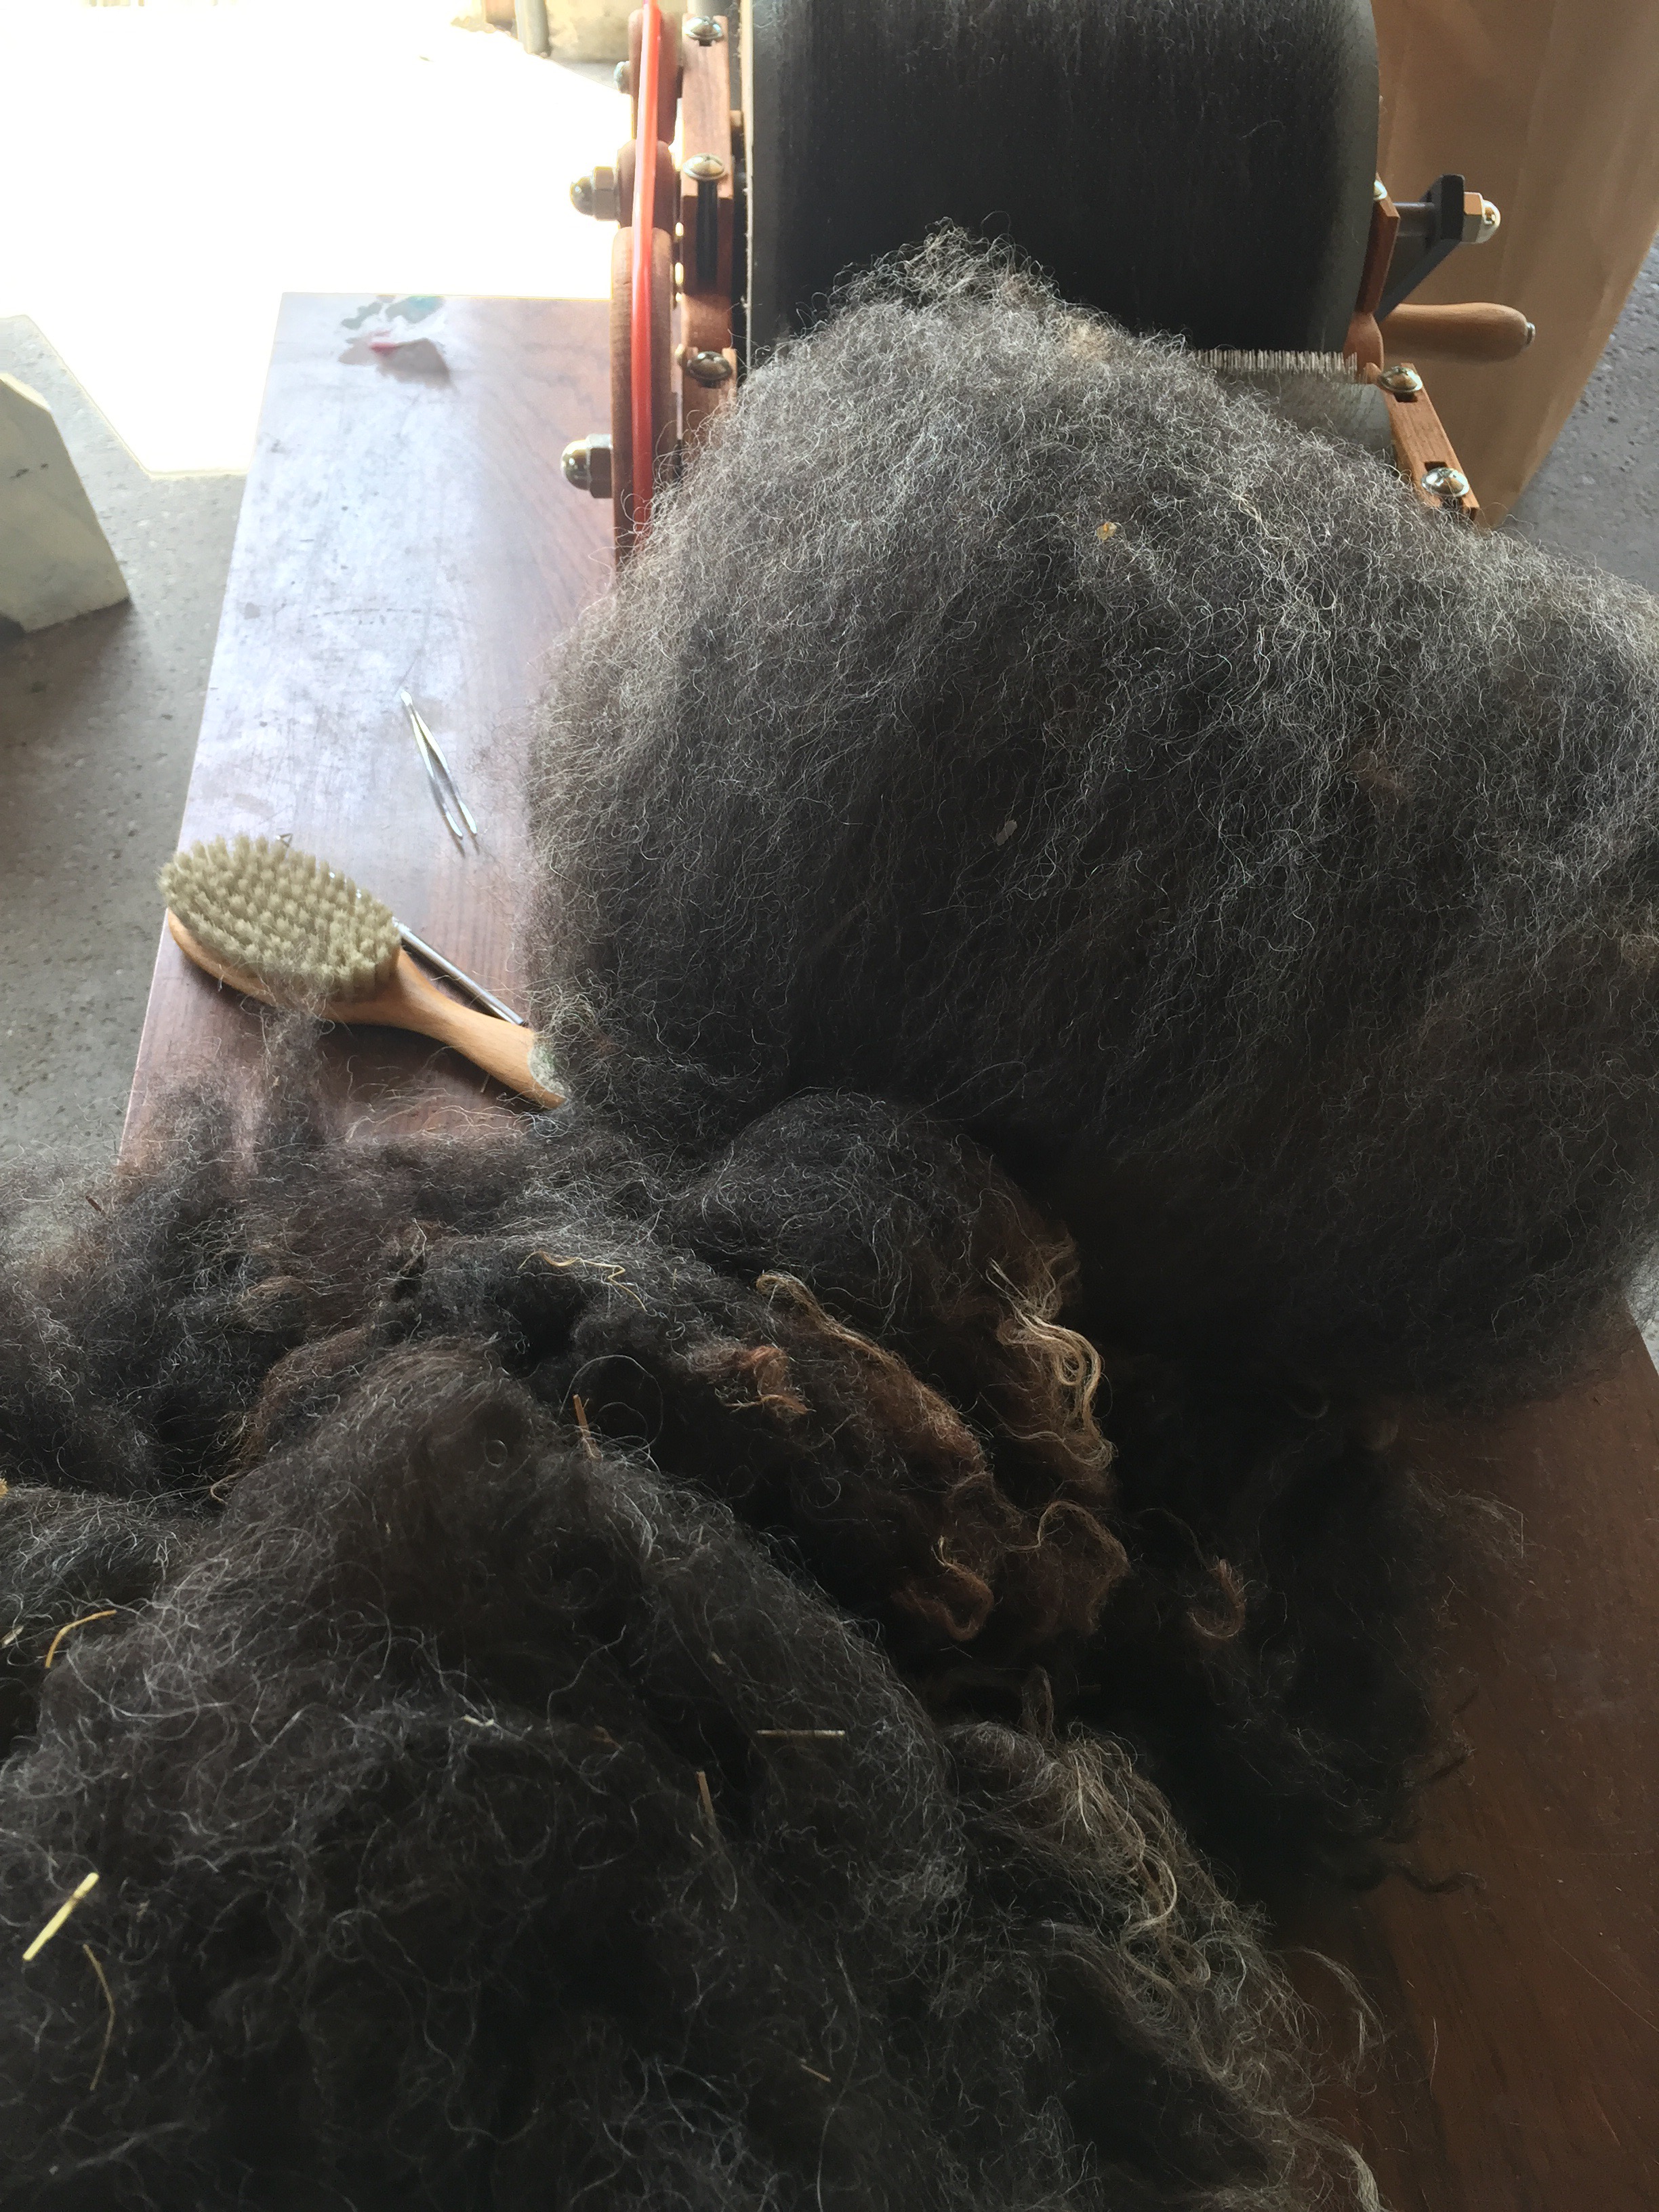
Wool I Dyed and Carded
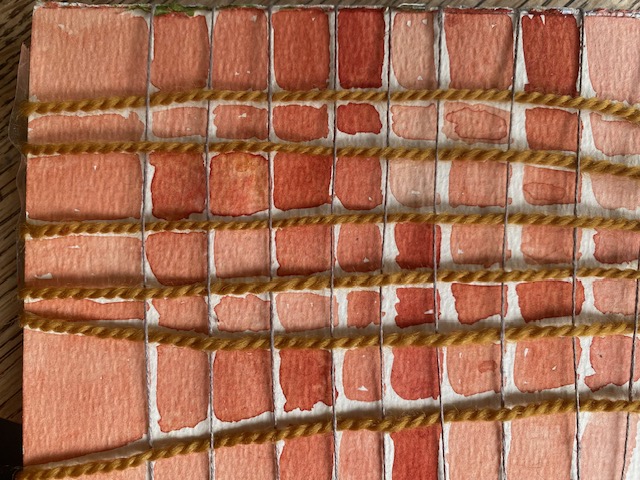
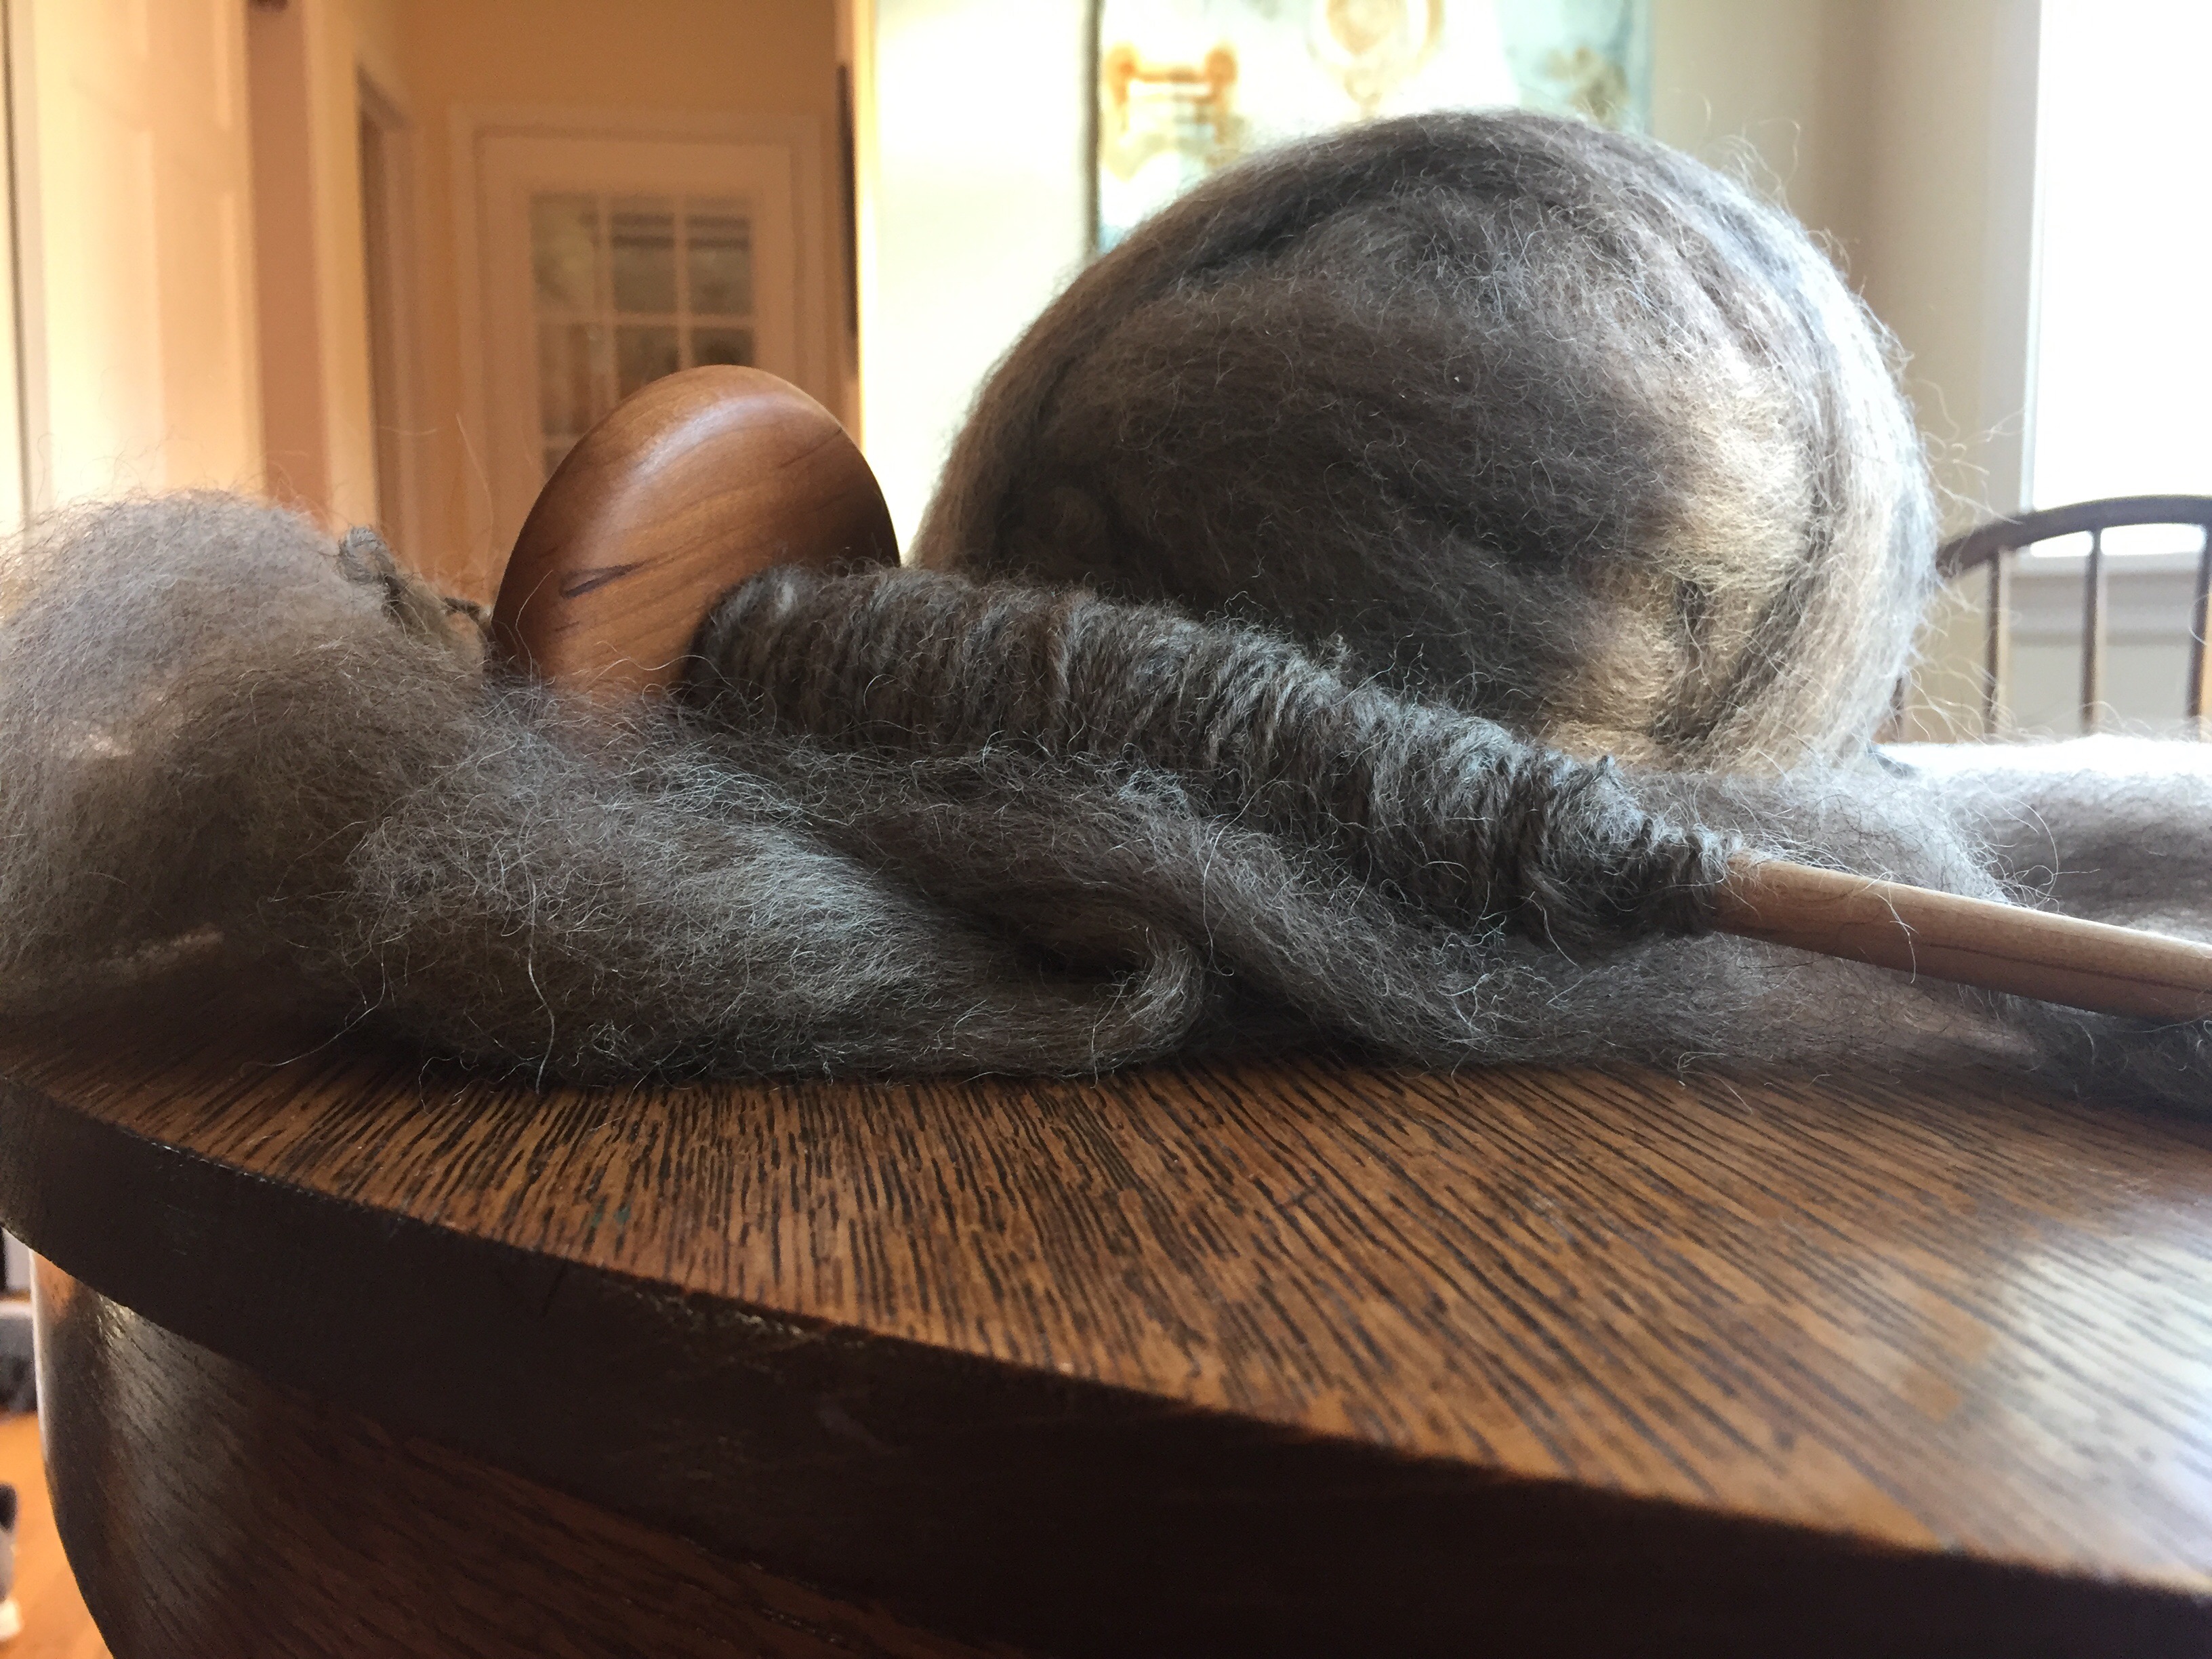
I’m not done with carding all of the wool yet! But here are the results of the washed, dyed and carded Shetland I wrote about recently. It’s so beautiful. Coreopsis is quite the dye plant and is shown on the right. On the left is Shetland dyed with marigold.
Shetland dyed with marigolds. I’m hand carding this with my Ashford carders and plan on getting a nice fluffy woolen yarn after spinning it.
Shetland dyed with coreopsis, carded on my drum carder. The color is absolutely gorgeous.
Books I Am Reading
Bird by Bird, by Anne Lamott~ I love the way she writes about every single thing. I need some writing advice and she’s my go-to for that.
Stitch By Stitch, by Carolyn Meyer~ I really want to know how to do rudimentary needlework. I’m struggling with this because it is a bit of a departure for me, and I’m not sure it’s wise to start yet another journey into another handcraft when I have so many I already love and could get much more proficient at, but have you seen this book –> Slow Stitch: Mindful and contemplative textile art, by Claire Wellesley-Smith. This book inspires me in a way that is almost painful. The colors, the textures and the soothing promise of slowing down is really speaking to me and I want to figure out a way to work this in to what I do both in my own handwork practice and with others.
Would anyone like to do a slow and consistent, chapter by chapter Stitch-Along with me, using Slow Stitch as the guide? Seriously. Write me if you do.
This summer has included many beautiful times with family and with friends, many bike rides and lake swims and creemees, lots of convalescing after some antibiotic side effect havoc, lots of chip eating and garden tending.
Days have been long and night sounds have been welcome and wild. Temperatures have been hot and rain has been scarce. News has been painful and overwhelming. The Olympics have been awe-inspiring. And the days are going on and each one offers a new chance to get connected with the present moment, to breath and to not resist the passing of time. I think in the coming weeks before school starts, that is what I’ll be trying to keep in the forefront of my mind. To look and to truly see, to hear and to truly listen, to touch and to truly feel.
It’s about time I report on how the last Farm to Frame morning went, in my daughter’s kindergarten class. Recall, this wonderful group of little ones started this project weeks before, learning how to wash wool, dye it, and then card it. They worked hard, and were so busy. With each passing class, students wanted to keep their wool, and were amazed by how it transformed in their own hands.
Finally, the day of the project arrived. I wish I could share pictures of the whole thing in the class, but privacy issues are real and I did not ask for permission to post pictures of other peoples’ children. Included here are picture from a slideshow I made to show to the class to detail what they would be doing that morning.
Each student got their own gallon ziplock bag. In it were a bunch of different colors and textures of wool. They all got colors from the batches that they dyed and carded, plus some extra that I already had on hand. Also, they had a piece of pre-felt, the “paper” for their felted painting.
Next, I showed the kids how they could layer the scene. I chose to make a sea creature scene to go along with their recent unit on sea life.
More examples… my daughter got to demo her skills.
I then explained that I’d be securing their pictures using a needle felting tool. It’s sharp! So I emphasized that I’d be the only one using that tool. I wanted to do this before the wet felting part so that it didn’t come apart in the bag.
Once the picture was completed, students could tell me or their teacher, and we’d help them slide it into their bags. Enter some warm, soapy water, and let the felting begin! I encouraged gentle, open handed pressing at first. Once felting began, they could lift their bags and really press/rub on both sides. I let them know that their picture would look different once it was felted! This was important. What goes into the bag comes out looking quite different and I encouraged them to be artistic experimenters, learning about what wool does during felting, and watching their beautiful colors take different forms. This proved to be an important reminder to some.
Above are the examples of finished products that my daughter and I made at home.
All in all the class went beautifully. What I learned was, children love working with wool. They love doing the work of preparing it and learning about about other people around the world who make things with it. They responded to the idea that people have been using wool for functional things since the Middle Stone Age. Time, of course, does not make sense to them in that way yet, but feeling connected to our ancient history is important, and it resonated.
Children allowed themselves to experiment and to create images, some abstract, and some impressionistic. Some wanted to use every last bit of wool in their bags; some only used a tiny amount and brought the rest home. All, I believe, viewed themselves as artists on that day, and allowed for imperfection and mystery.
If I were to do it again, I would work with smaller groups of not more than five children at a time. With sixteen children in class that day, I did not have the time or ability to make it to each child quickly when they had questions or needed help. For me, it felt rushed and a bit stressful. I think I would work it out with the classroom teacher for me to either work in small groups one after the other, or take a couple of mornings to do it. That way, I could calmly help and respond to questions or worries if they came up.
Other than that, I think it was a great success. I loved being with my daughter and her classmates and learning about teaching, connecting kids to natural and renewable resources in their own community, as well as to their shared history with our ancient ancestors.
Stay tuned as I prepare a new project to bring to my son’s second grade class! This time, it will be a weaving project!