Recently I was talking to someone in my studio about a theme he noticed in my work~ I had an image expressed several ways and he wondered at the significance of the image to me. This got me thinking about how this happens in my work sometimes and the best way I can put it is, I let my psyche guide me in what images, symbols or themes I want to follow, and then… I do.
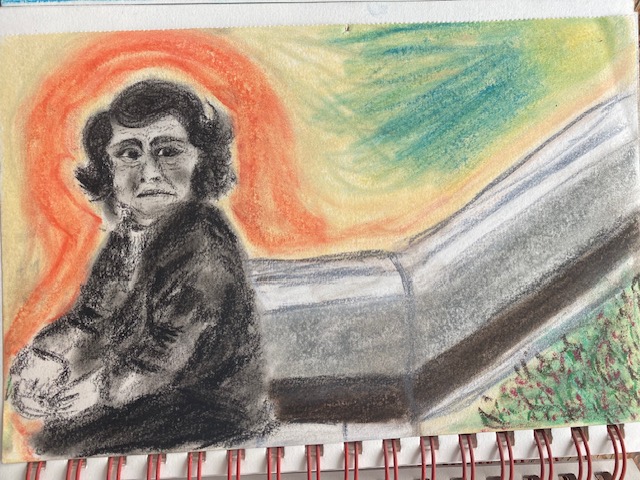
For example, several years ago, I was looking at a picture in a book I have of an image of an elderly woman sitting on a granite sort of bench that was really maybe a retaining wall for a city garden bed, her hands resting on her pocketbook. I loved her face and found myself looking at her and going back to look at her some more. I had all kinds of feelings when I took in her details and conjured stories that might explain her look of sadness.
Then, I decided to try to draw her. (I know I didn’t get her image exactly as she looked in the picture. For one, I don’t know how to draw, but the point of all of what I’m saying here has nothing to do with perfection, and only to do with engaging.)
Then I found myself looking at the face of the woman I drew. And I kept going back and looking at her some more and I remember thinking, who are you?
A year or two after drawing her, I took a tapestry weaving class with Rebecca Mezoff, which I highly recommend. We were tasked with designing a cartoon for a weaving project, and I chose my lady. I knew I wanted to learn how to weave faces, and I wanted to spend more time with her. So, I dove into that and made the cartoon, and then I started weaving her…
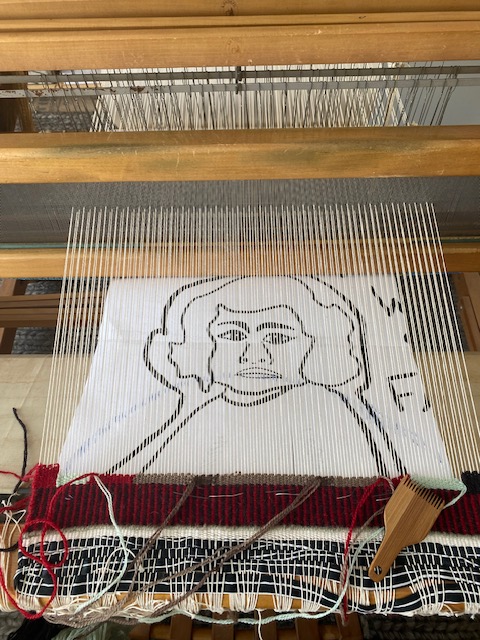
And I wove her…

And kept weaving her…
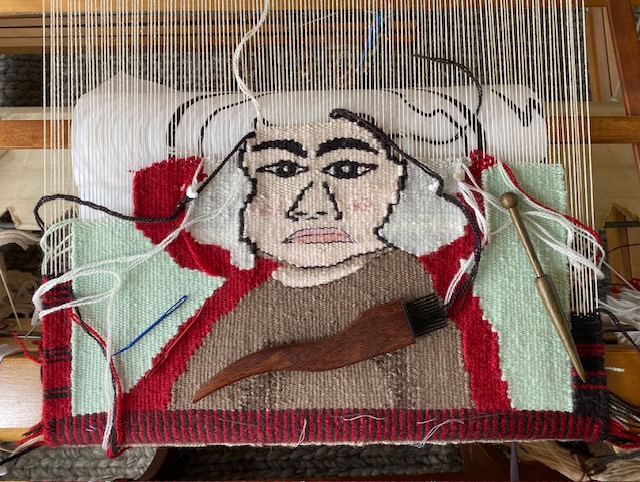
And then I was like, “no really, who ARE you?!” She became ever more important to me. I started to see in her face regret, which is another theme I’ve been following, studying, and writing about for many years. That was interesting. This thread I was following was actually one I’d been engaged with in a more intellectual way for a long time. The theme suddenly dove into new, creative terrain.

Then, I was done with the weaving, but I wasn’t done with the image, so I did a block print of her.
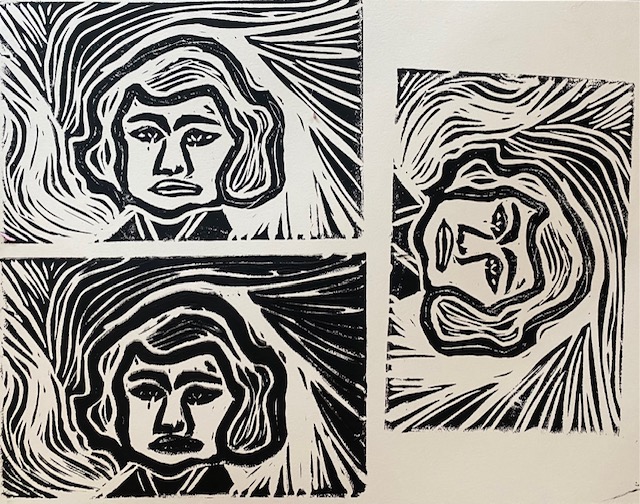

And then, I was done.
So you see… there was an initial spark, and then an idea and another idea and another idea… I couldn’t have planned this all. I just followed the image and let it keep working on me over the course of a few years. There need not be any rush or pressure. There’s no time limit. There’s only an invitation.
Following threads of themes, symbols and images is a really fun and meaningful way to get into something and experiment with different mediums. Fun because you’re literally playing with an idea and letting it work on you. Meaningful because the threads come from your own psyche. No one is assigning them to you.
So, how does one do this?
Start with these questions:
~ What’s on your mind these days?
~ What are you drawn to? Is it a song? A color? A taste? A smell? An image?
~ This thing you are drawn to, how might you engage with it creatively? Can you draw it? Cook it? Paint it? Weave it? Sculpt it?
~ Can you start there? And see where it leads?
~ Can you write about it? What draws you to it or captures your attention?
For example… maybe the color green is really grabbing you or you know it’s your favorite color. You can:
- take out some water colors play with greens; you can blend, use solid colors, or make them so subtle you can barely see them, or pair the greens with complementary colors…
- you can take pictures of all the greens you see in your immediate landscape or your home
- you can wear green
- you can knit/crochet/weave a green-inspired project
- you can read about the color green and see what themes/symbols/stories/myths are associated with it
- you can follow an idea because what might happen is, with all of this attention to green, an image of a way to work with it will occur to you- listen to that and follow it.
- the more you do this, the more you’ll do it – wow, that was deep.
I love seeing how people do this~ please write and share if you are so inclined! And, if you want to keep up on this monthly Creativity Summoning, sign up to receive updates to the site! We’ll keep it going as long as I have something say.
Until next time,
bradie