
Greetings, fellow crafters. In my Fiber Saturday class yesterday, I demo’d how to make a circular loom out of cardboard. Here, I am offering more detailed instructions and a project idea. Many of the kids I have gotten to craft with LOVE circular weaving. In a way, it’s easier than weaving on a rectangular loom because you just go around and around, rather than back and forth (coming back the other way on a loom can be super perplexing to some. What do you do with that end warp thread!) Getting into the flow is easy and you end up with something beautiful at the end.
Quick Disclaimer: I’ve woven many things on circular looms at this point. I’ve often had the experience where I wanted my circular weaving to lay flat, but it curls up instead, or I’ve wanted the piece to be a bowl, but it’s lays more flat than I wished. So much affects the way this project turns out. The yarn or fabric variability really changes things, how tightly the yarn is pulled as it is taken around the loom certainly affects how taut it becomes… Things I always stress with this project are: have fun, the goal is not to adhere to a rigid idea of what you want but rather to play with colors and textures and see what you get! No matter what, it will be beautiful. For elementary kids, the book Beautiful Oops, by Barney Saltzberg, is a great companion to this project. I also love the book Ish, by Peter H. Reynolds.
To make a bowl on these looms, you do want to pull a little firmly on the yarn, especially as you reach the edges of the loom.
One more thing! This is a great project for kids, but elementary age kids will likely need adult or older kid help with the construction of the loom and the step-up.
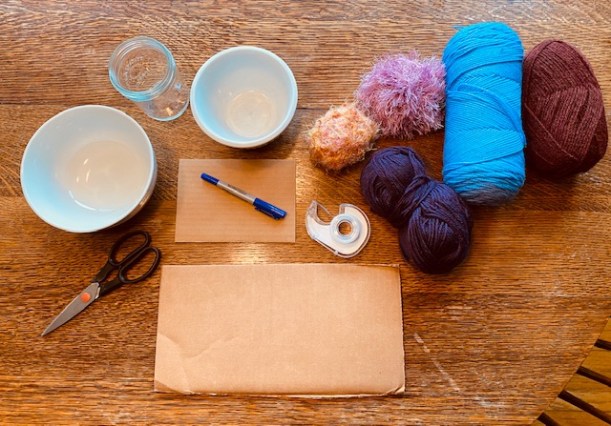
Materials:
- cardboard- the flaps of cardboard boxes are plenty strong enough
- yarn for warp
- yarn, fabric, ribbon, string, jute… whatever you want… for the weaving
- marker
- strong scissors
- tape
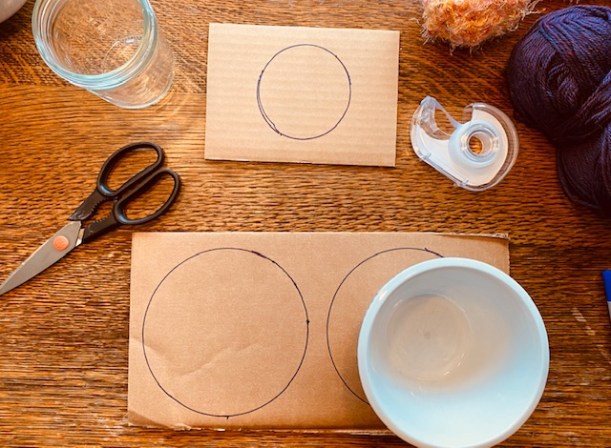
- round things that can be used for tracing a good circle- must fit on the cardboard
- tapestry needle (or a sewing needle with the very large eye, or, you can even use a paperclip- just find the smallest one you have and tie the end of the yarn to end of it)
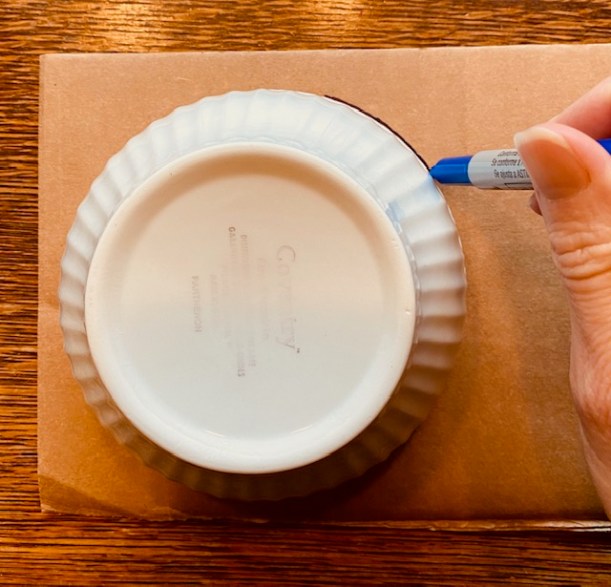
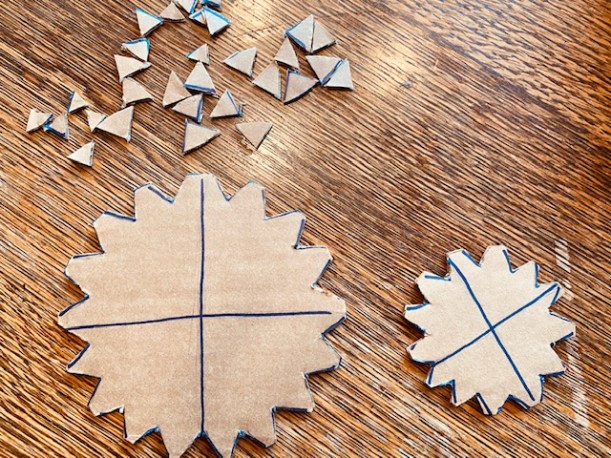
Step 1: Trace your circle. This will be the approximate size of your circular loom.
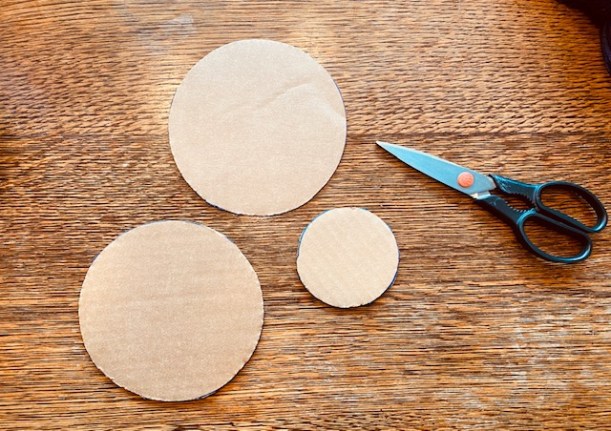
Step 2: Cut out the circles as neatly as you can.
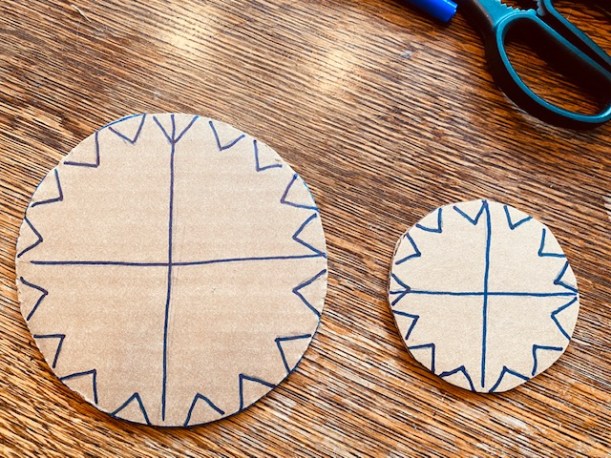
Step 3: Some folks who are really good at being precise might balk at my lack of straight or perfectly measured grid-work here. I get that. BUT, the point is to demonstrate that this does not have to be incredibly perfect. In fact, I think it’s a relief to many to not have to stress about that. You generally want to split your circle into four kinda even sections.

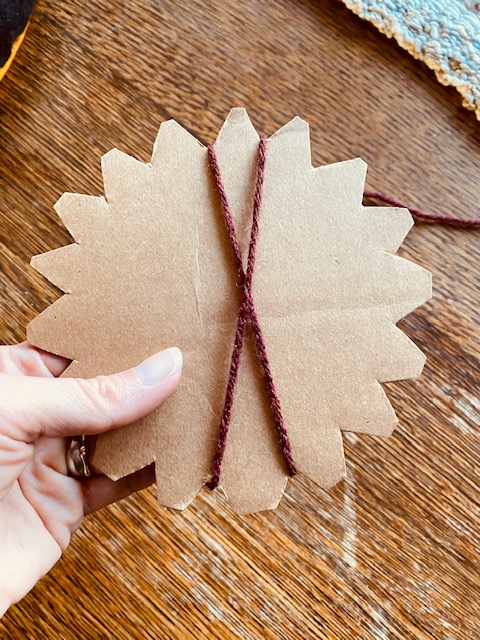
Step 4: Around the edge of each section, you will start to make triangles. These will be cut out and serve as notches for your warp thread to hold on to (the warp is what you weave around). You want the same number of triangles in each section EXCEPT ONE! You can see that in each of my looms below, I added one that straddles a segment line. This is because you need an odd number of notches so that you have an odd number of warp threads. Otherwise, each time you go around the loom, you’ll have the yarn always going under the same warp thread and over the same warp thread. You don’t want that.
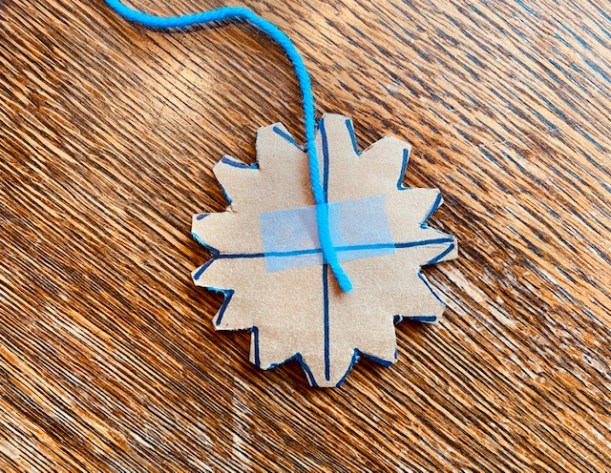
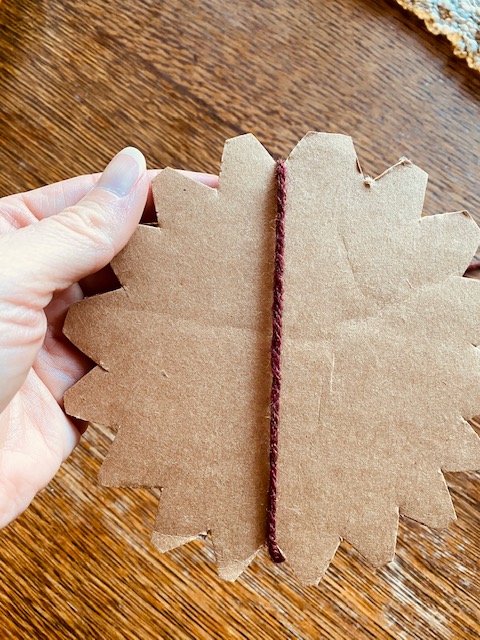
Step 5: tape one side of a piece of yarn to the back of your loom.
Step 6 (warping the loom):
- turn the loom over so you are looking at the front (the front for me is the side with no marker.
- pull the yarn over, crossing the loom to the other side. you have an odd number of notches in your loom… so when you pull your yarn across, it won’t land right in the center, right? So you want an even number of notches on one side and an odd on the other, of the yarn just pulled across, having one more notch on one side.
- hold yarn snuggly and wrap it around the notch, moving from right to left and then turn the loom so it is “up” again, with the notch you just wrapped on the upside
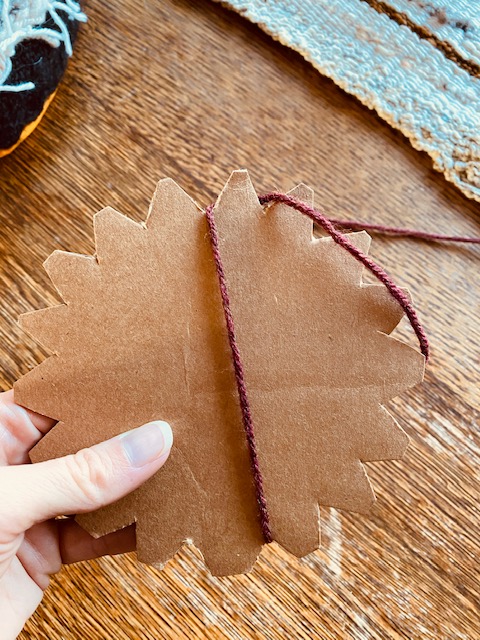
- bring yarn down, crossing in the middle, going to the left of the notch with the yarn in it.
- wrap the yarn around that next notch, again, moving from right to left
- repeat this step until you’ve brought the yarn around every notch
-
cut the yarn from the yarn ball, leaving several inches to work with and use that yarn end to tie around the center of the warp threads, making it neat and organized in the middle.

Warping the loom:
Tying the center of the warp:
Step 8: Then start weaving! I generally weave from right to left, but it doesn’t matter which way you go as long as that is the only way you go as you weave. No doubling back! The same weaving principles apply with circular looms as do with other looms. Bring the yarn over one warp thread, under the next, over the next, under the next, and so on… The first few rounds might not look right, but as you go around, it will become more and more organized and clear whether you are to go over or under.
Step 9: Optional- You can add new colors and textures whenever you want. I usually just tie on the the thread and begin weaving. When the loose ends come up against the weaving as the new yarn starts getting woven with, I gently tuck them under the already woven part. DON’T SNIP THEM! You want them longer so you can sew them in once you are finished and the piece is off the loom.
As I make my way towards the upper part of the loom, I like to use a tapestry needle to weave. It keeps one from pulling on the warp too much and allows for weaving right up to the top.


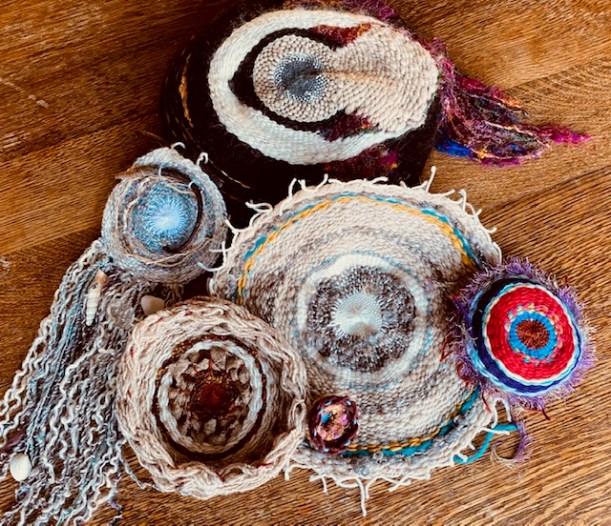
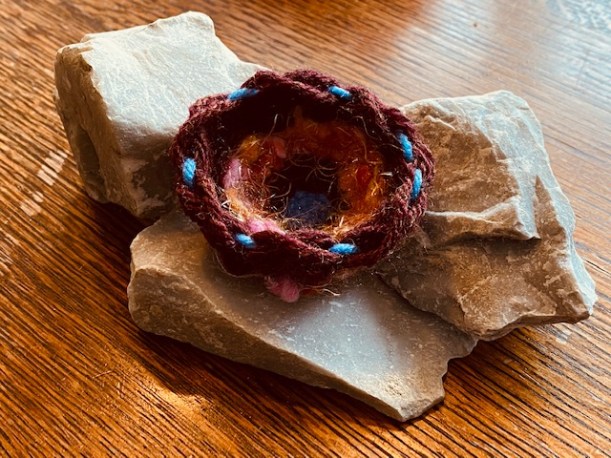
Step 10: Once you feel you cannot weave anymore, it’s time to take your piece off the loom! Gently pull off the tape, and the warp that is wrapped around the notches. You will notice how it is naturally shaped- will it be a bowl, or a coaster/placemat/wallhanging? Does it curl up or lay flat? Assess and gently shape it as you wish.


Step 11: Time to sew in those loose ends with the tapestry needle. I usually sew them into the bottom/underside of the piece. Just gently bring the loose end down through the column of weaving right below and it and carefully snip the remaining bit. It will be completely hidden in your piece.


Step 12: Admire your handiwork! I love my little bowl! I can imagine making several of these and having nesting bowls all over. Or sewing them together in a way to make something that looks like coral, or finding a little stuffed bunny or chick and making this a little nest…
Have fun with this. I’ve done circular weaving with kids as young as 6. And I intend on weaving this way for as long as my fingers let me. It is so relaxing and so satisfying, and you likely have all you need already in your home.
Take care,
Bradie