I think it was around fifteen years ago now that I re-found my love of making things. That energy had been in some kind of limbo state, emerging at times through writing, experiments, and gardening. For these last fifteen years, though, I’ve been in a steady state of learning about all sorts of fiber craft and art. A main passion has emerged, and that has to do with weaving.
The interlacement of all things is an idea, or a reality, that just grabs me. It’s simple and obvious. But it’s also profound and true. I recently wrote this in an instagram post:
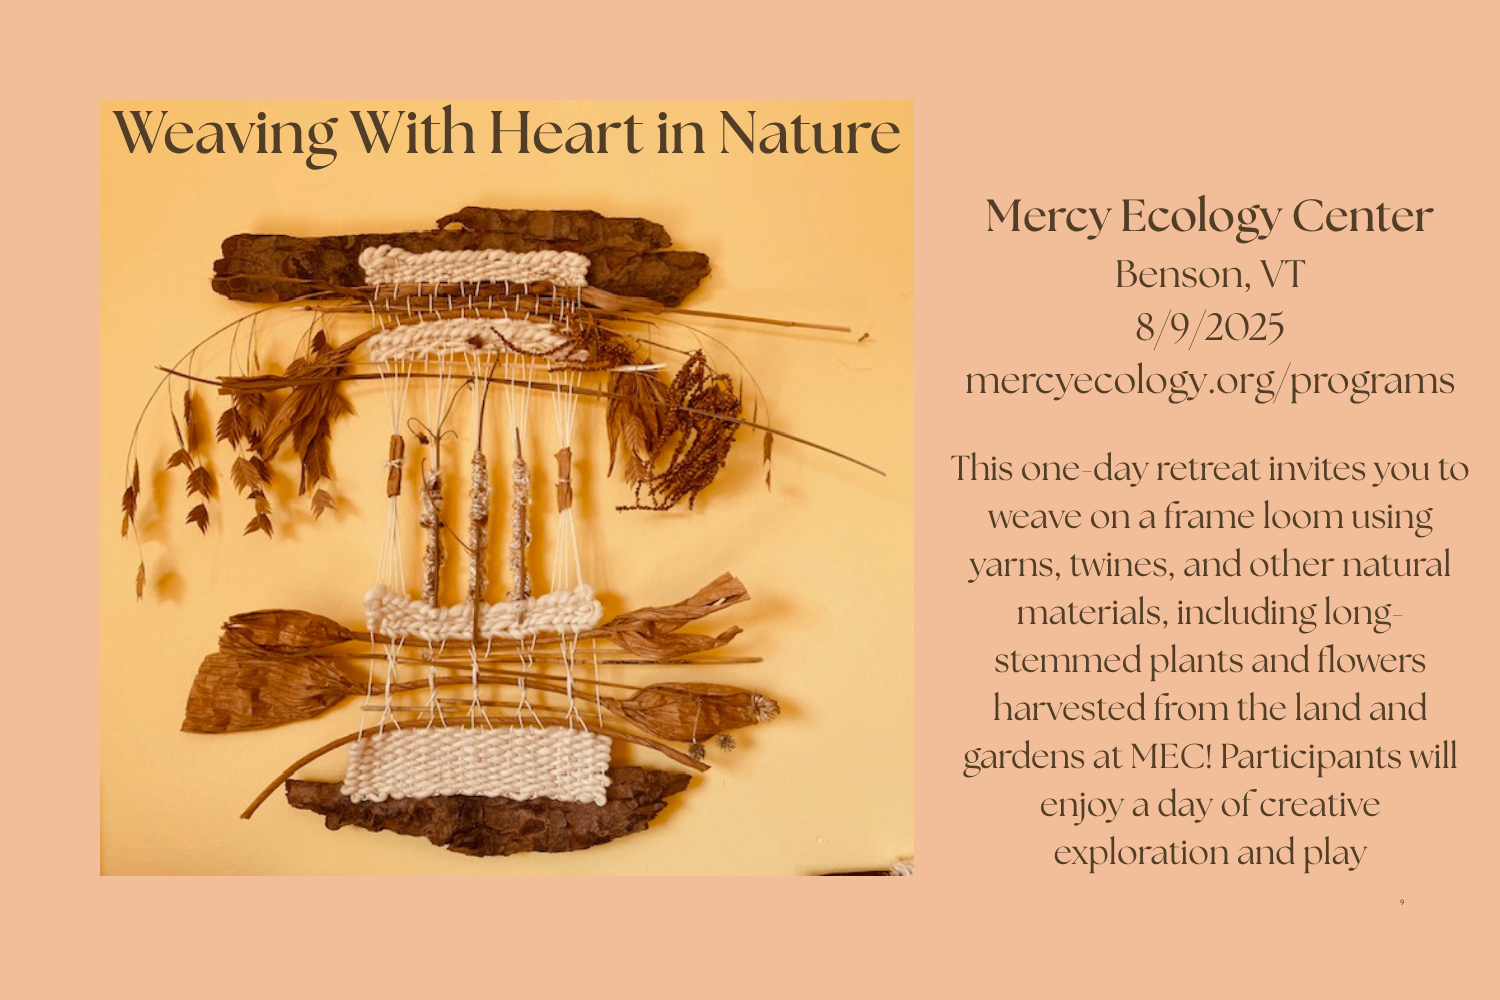
One of the things I love about weaving is that is invites our minds to work with our bodies. We can be with humble tools and materials and through the simple act of interlacements, something beautiful can emerge.
To interlace materials is to simply join them in an over and under rhythm. Suddenly, elements are joined when they were otherwise separate. Weaving for me has been a way to be with myself and my thoughts. I follow the directions of the materials and let myself flow with the process, rather than try to control the process from start to finish.
This has been true of my experiences with grief. The more I tried to control grief, the more I suffered. As I have learned to move with grief and let the waves of it interlace with all of the other truths about me and my life, the more I’ve been able to grow with it.
If you told me fifteen years ago that I’d be invited to lead a weaving workshop at such a wonderful place as Mercy Ecospirituality Center, I’d have looked behind me, assuming you were talking to someone else. If you are within a reasonable drive to Benson, VT, and feel like spending a day playing with interlacements, please come! I promise, you will end up with something that you didn’t expect, and that it will mean something to you.
Because I’m getting ready to teach my first online class that involves a lot of videos. And, as I’ve been editing them, I’ve realized, wow, I really do say “ummmm” a whole lot. It’s such a good place holder for my mouth when I need to catch up with my thoughts, but not ideal to listen to! I’m very grateful for iMovie editing features!
I’m also extremely grateful for…
~ The chance to bring Weaving Your Story to more people~ this is a class I built, drawing together my passions from years of work and study, both as a therapist and as a weaver. I feel so strongly about what weaving offers to people, aesthetically, emotionally, in community.
~ The Shelburne Craft School, and especially its director, Heather Moore, who right out of the gate expressed interest in the way I use weaving in my work with people, and wondered if we might build a class around it. And that’s just what we did! Through that process, I’ve learned about writing grants and partnering with other organizations, while expanding my own skill set as I’ve offered this work to a larger group. I’ve also gotten to teach a dear friend and colleague, Ali Waltien, how to offer Weaving Your Story in her work. How amazing!
~ An anonymous donor who has made the class available to even more people.
~ Weaving Your Story participants who take the leap into weaving… well… their stories! This takes courage, patience, trust, and flexibility, and with every single group, I learn and grow.
~ My daughter who has been helping me learn how to make and edit videos, export, upload and put into the airwaves the online version of the class.
That all reads like an acceptance speech! Seriously though, I’d be remiss to talk about the Weaving Your Story classes without expressing all the gratitude I feel for those who have given so much to me, so there we are.
Now, back to editing my videos! If I can reduce my “ummmmms” by 75% or more, I think it’ll be okay.
Weave me a rope that will pull me through these impossible times.
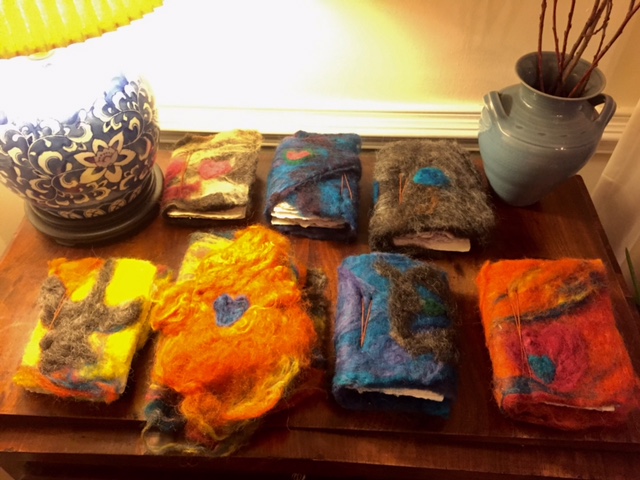
This summer was a time of taking a few risks, including putting my fiber art teaching love out into the universe in a different way. I’ve shared already the camp I offered to do with weaving. You can read about that here. The second camp I offered was all about making a book from scratch. It’s important to me for kids to know and be frequently reminded that they can make stuff, really cool stuff, with found items, recycling and a little ingenuity. Art supplies are expensive, as are art classes, but if you know how to get your hands on materials that are free or inexpensive, you have at your fingertips myriad ways to make art, to be an artists, to add your own beauty to the world. So… I was messing around one day after daydreaming about making a book for collage. My first book was the one pictured below. It’s made with handmade paper, wool that I wet-felted for the cover, a piece of driftwood and cotton thread for stitching together. I’ll show you the camp process, mostly in pictures with a little text, because I think the images speak for themselves. This is the project that inspired the camp.
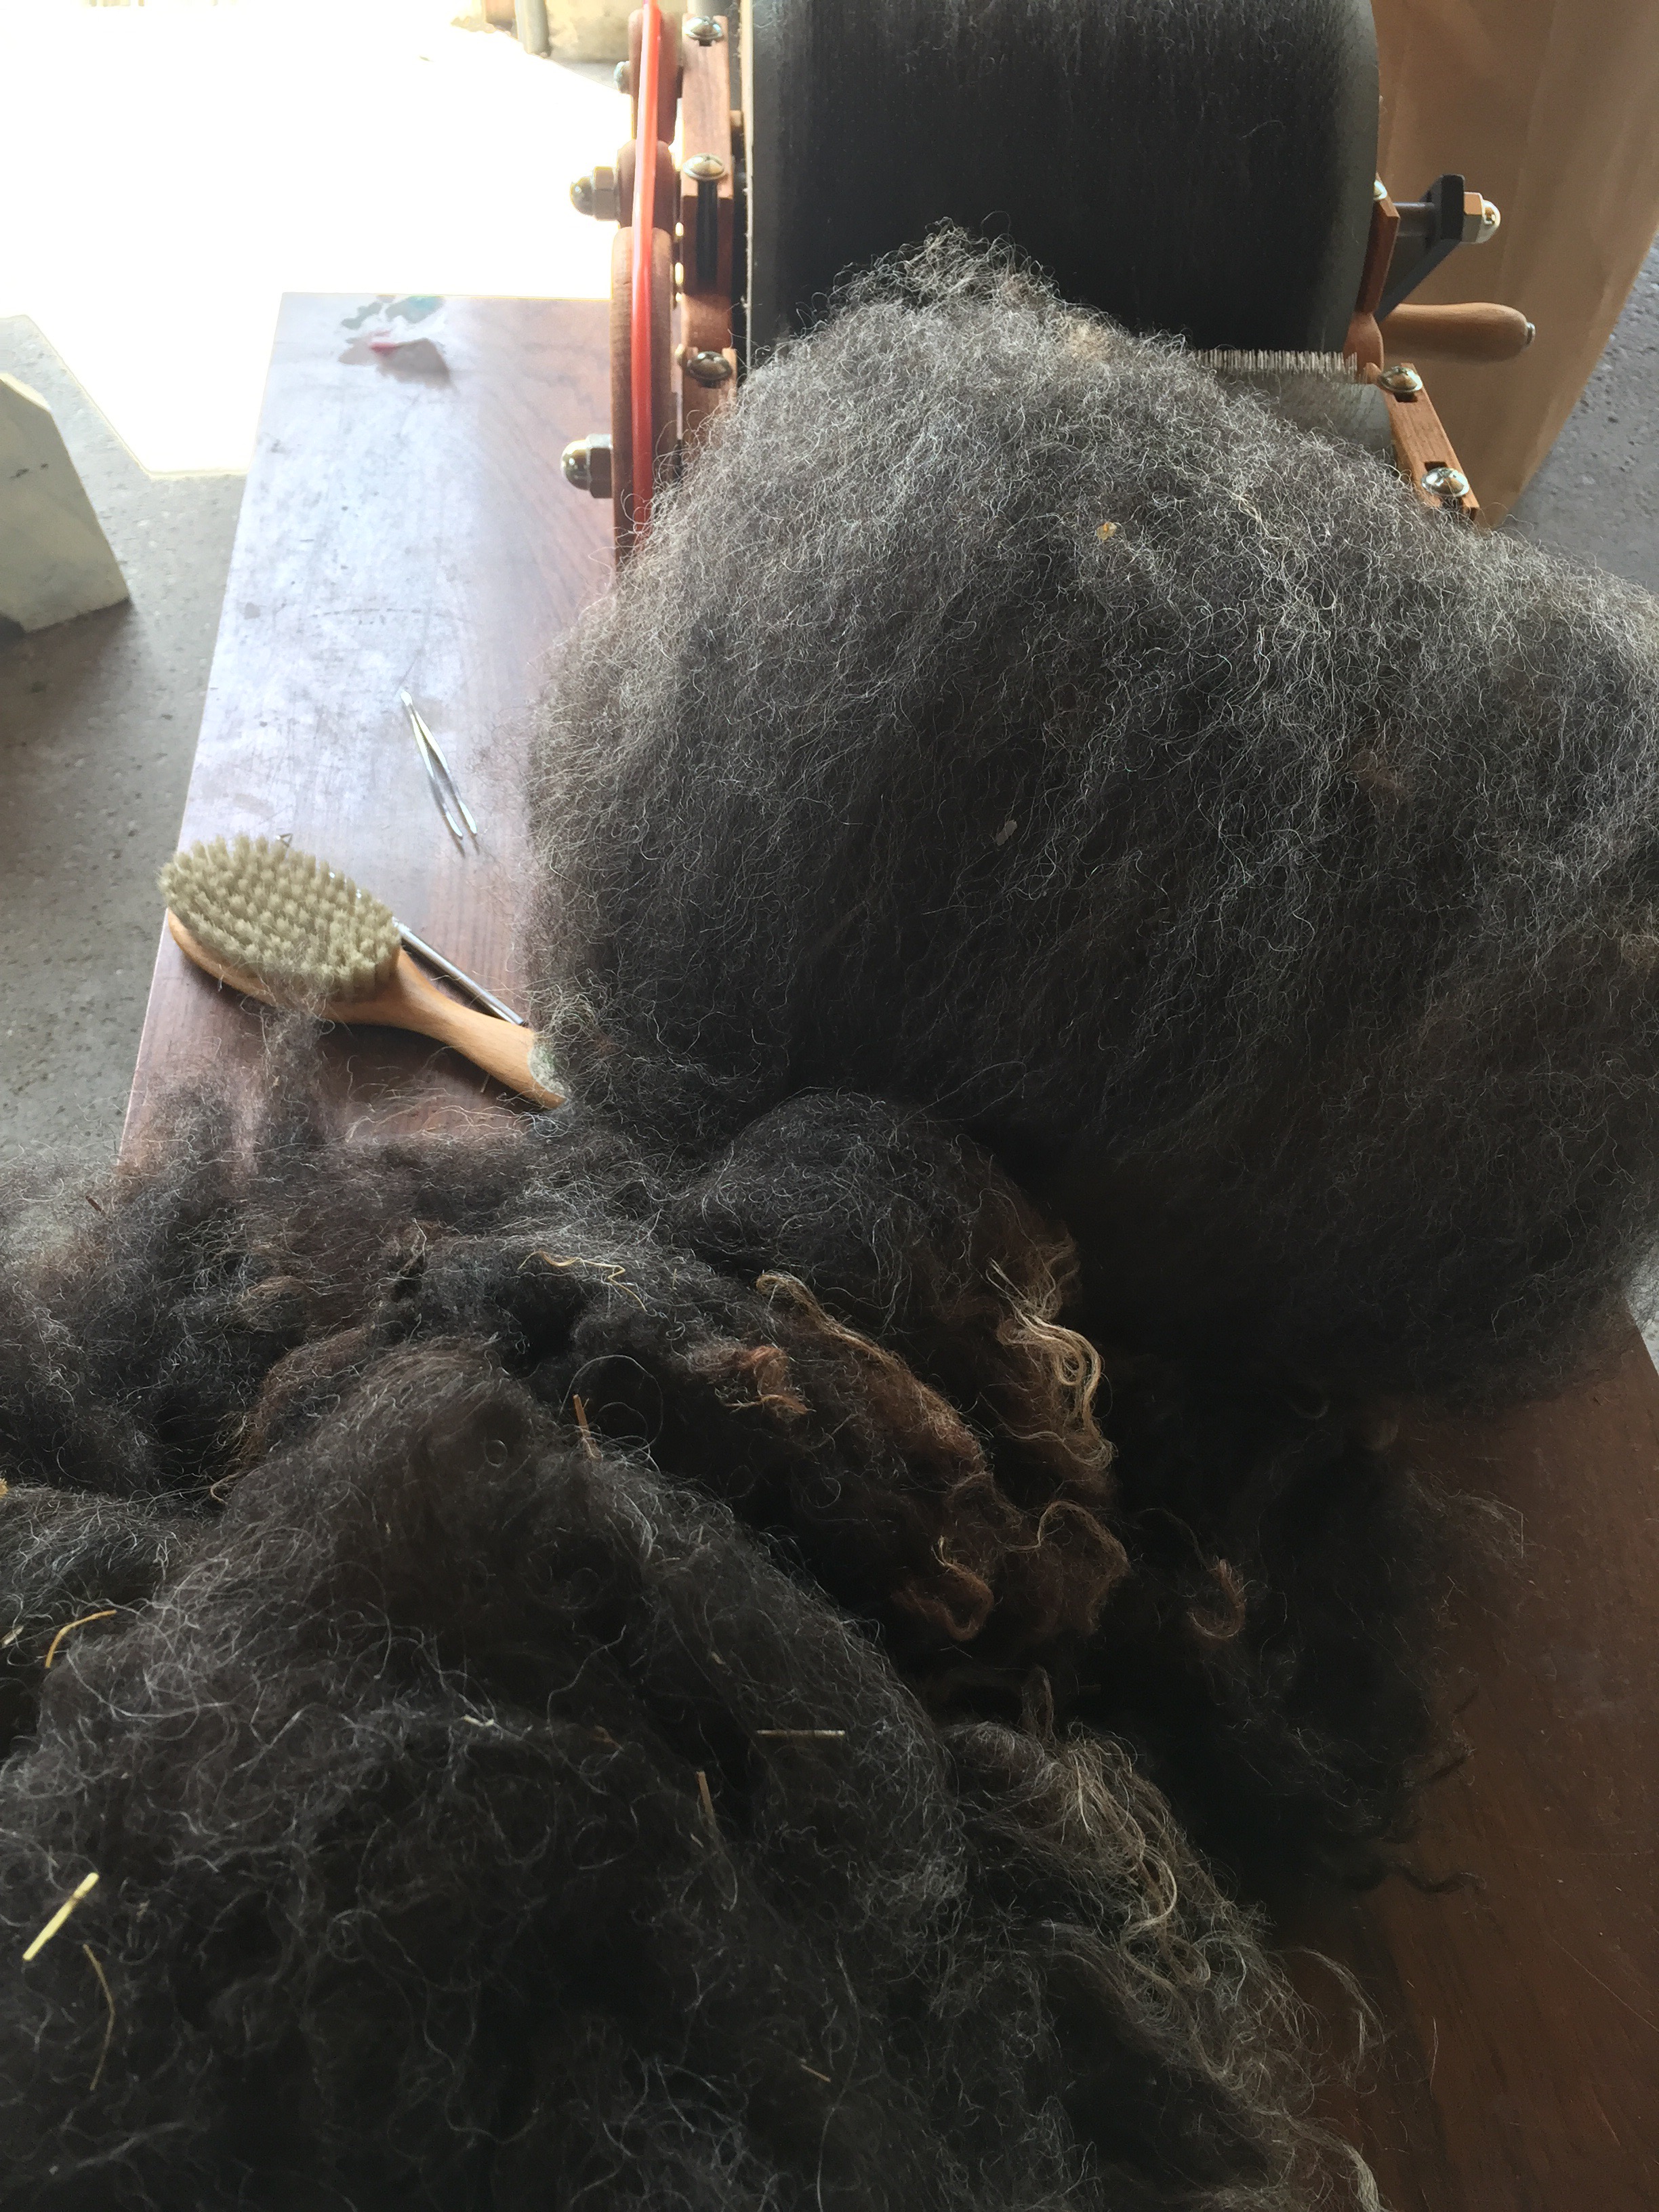
I spent a good deal of time before camp began prepping some materials. Carding Shetland wool…
Making frames… a word on that: I found wooden frames at Michael’s craft store for $1 each. These saved the day. I had a number of frames on hand that I found at garage sales but I figured that kids are sometimes interested in making sure everything is even and balanced and fair, so, I decided to ensure that each child had the same size frame.
Also, I’ve been trying to find on line the tip I came across for outlining the frames with duct tape. I want to give credit to the blogger that shared that brilliant idea! Doing this makes for much easier removal of the paper once you flip it onto the drying surface. I will always do this now, and if I come across the blogger’s site, I will for sure share it here.
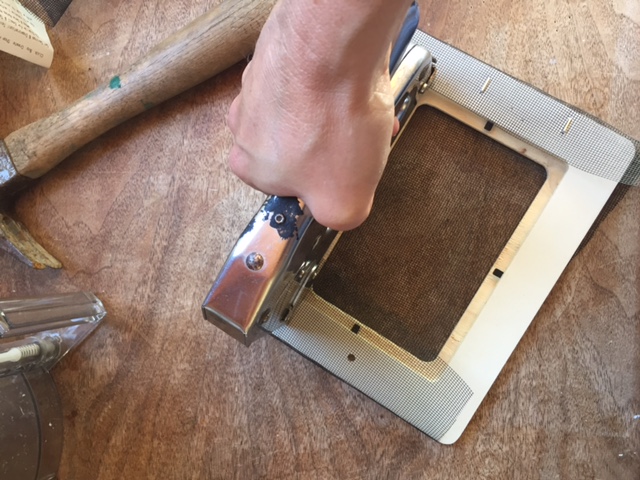
Here’s me stapling the screen onto the frame. I used my mom’s staple gun, which made me think of her. I feel close to her when I’m crafting or creating. You can read about why this is relevant here.
While things go better with kids when things are fair, they go even better than better when kids know which thing is theirs. It’s lucky I had this flashy duct tape on hand. No guess work needed!
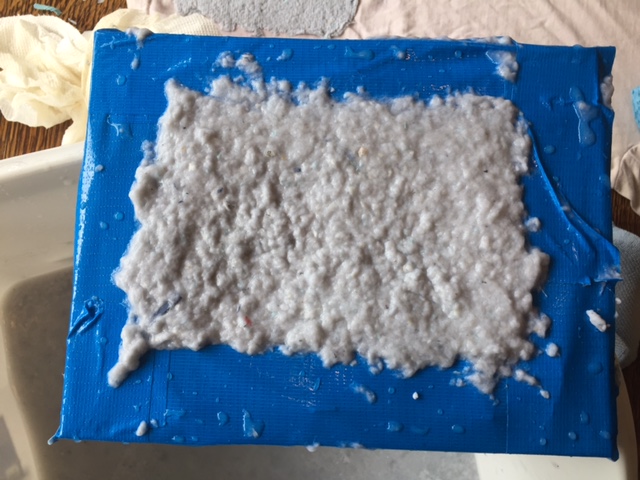
Here’s the thing about paper pulp (made in a cuisinart with recycled paper and water; the paper I put through the shredder first)~ not all kids love touching gooey, smushy, splootchy wet stuff. It’s handy knowing this ahead of time so you can have at your finger tips ideas of what steps kids might enjoy doing in the process, like soaking up the water from the underside of the frame/screen with a sponge, stirring the pulpy concoction, adding flower bits, etc., in the even that full-on hand immersion in paper pulp is out of the question.
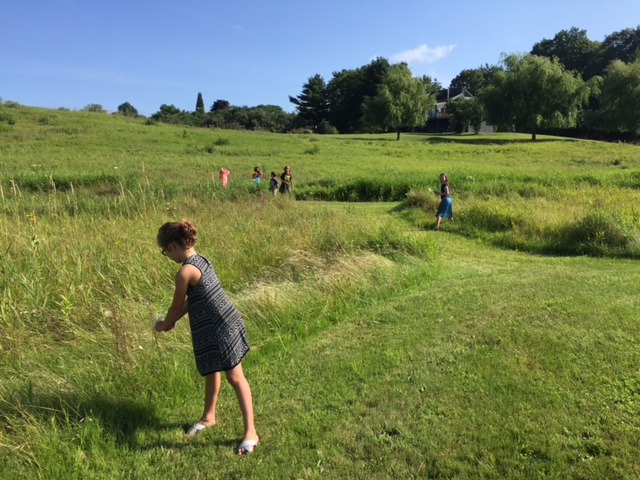
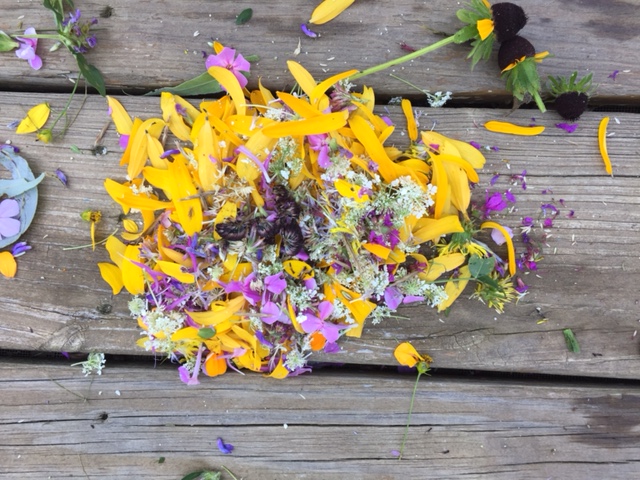
Here’s the kids looking for flowery colorful bits to throw in to our pulp.
If those colors aren’t inspiring, I don’t know what is.
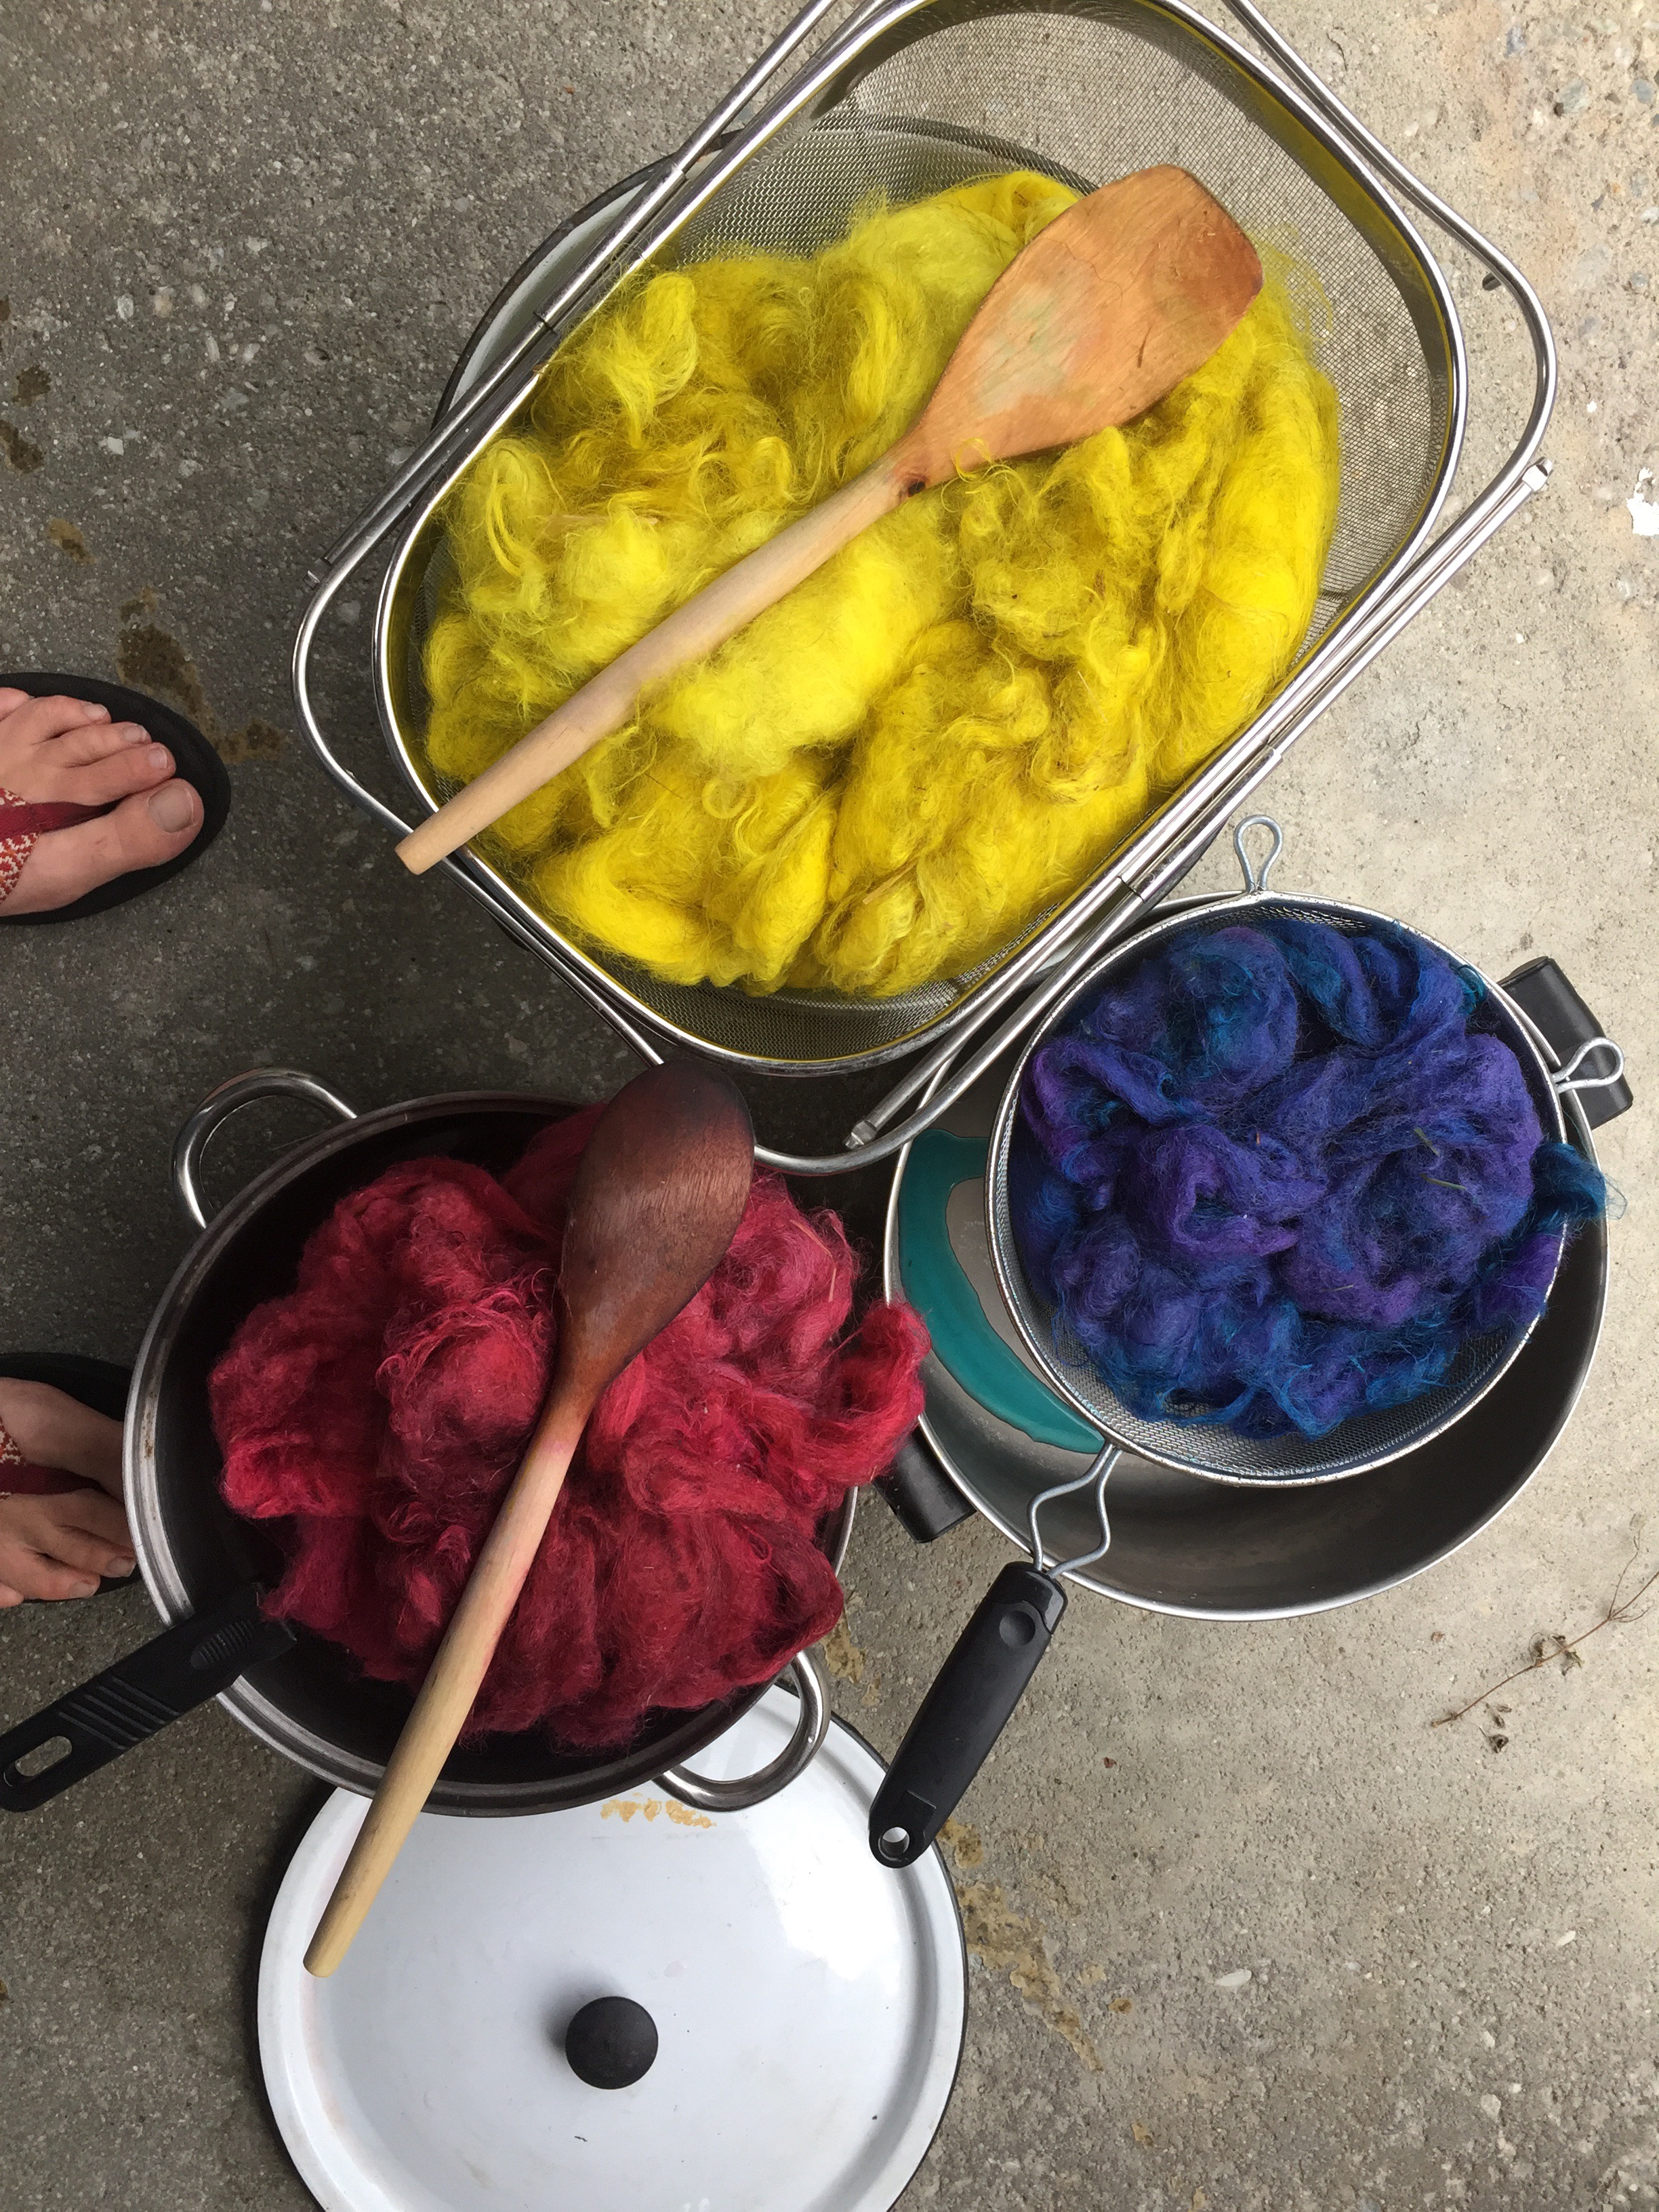
I spent a good amount of time experimenting before camp started…
And dyeing wool…
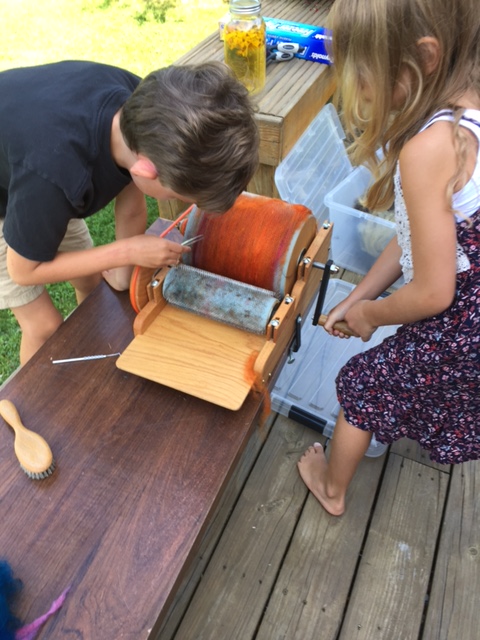
Here’s some kids using a drum carder to prepare wool for felting. This camp included chances to do as many jobs as possible in the time we had. I had the kids pick a lot of the grassy bits out of the wool, fluff it open to prepare for carding, and then card it. There were varying opinions on this. I could sit and pick at wool all day and be fine. I love looking at those tasks as a chance to just chill the heck out and be with my thoughts. Not all kids love that, of course, so some felting was a wee bit chunkier than others, and that’s okay!
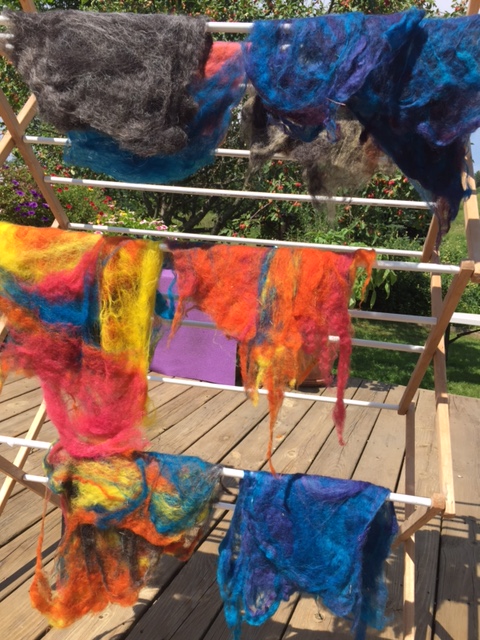
For the wet-felting part, I had the kids arrange the layers of wool they were using to make their book over on a plastic table on top of a sheet of freezer paper. Then, we covered the wool in warm, soapy water, and covered it all again with freezer paper. The paper stayed strong while the kids pressed and rubbed their hands over their wool. Once it was showing signs of felting, they could take off the top layer and use their hands to felt directly. Again, some kids love that textural messy feeling and others don’t. Leaving the freezer paper on for a while longer helped those who preferred keeping their hands free from that specific wet-wool feeling.
Then, once dried, the kids arranged their books as they wanted them, and had a chance to needle felt a design on to their covers. The night before the last day of camp, I sewed the books together. Originally, I’d hoped the campers would do that part, but we ran out of time.
I think these books are all so beautiful. Interspersed between their handmade paper, I included sheets of handmade paper from India that is more amenable to writing. I will keep working on my own paper making skills to see if I can get closer to that quality.
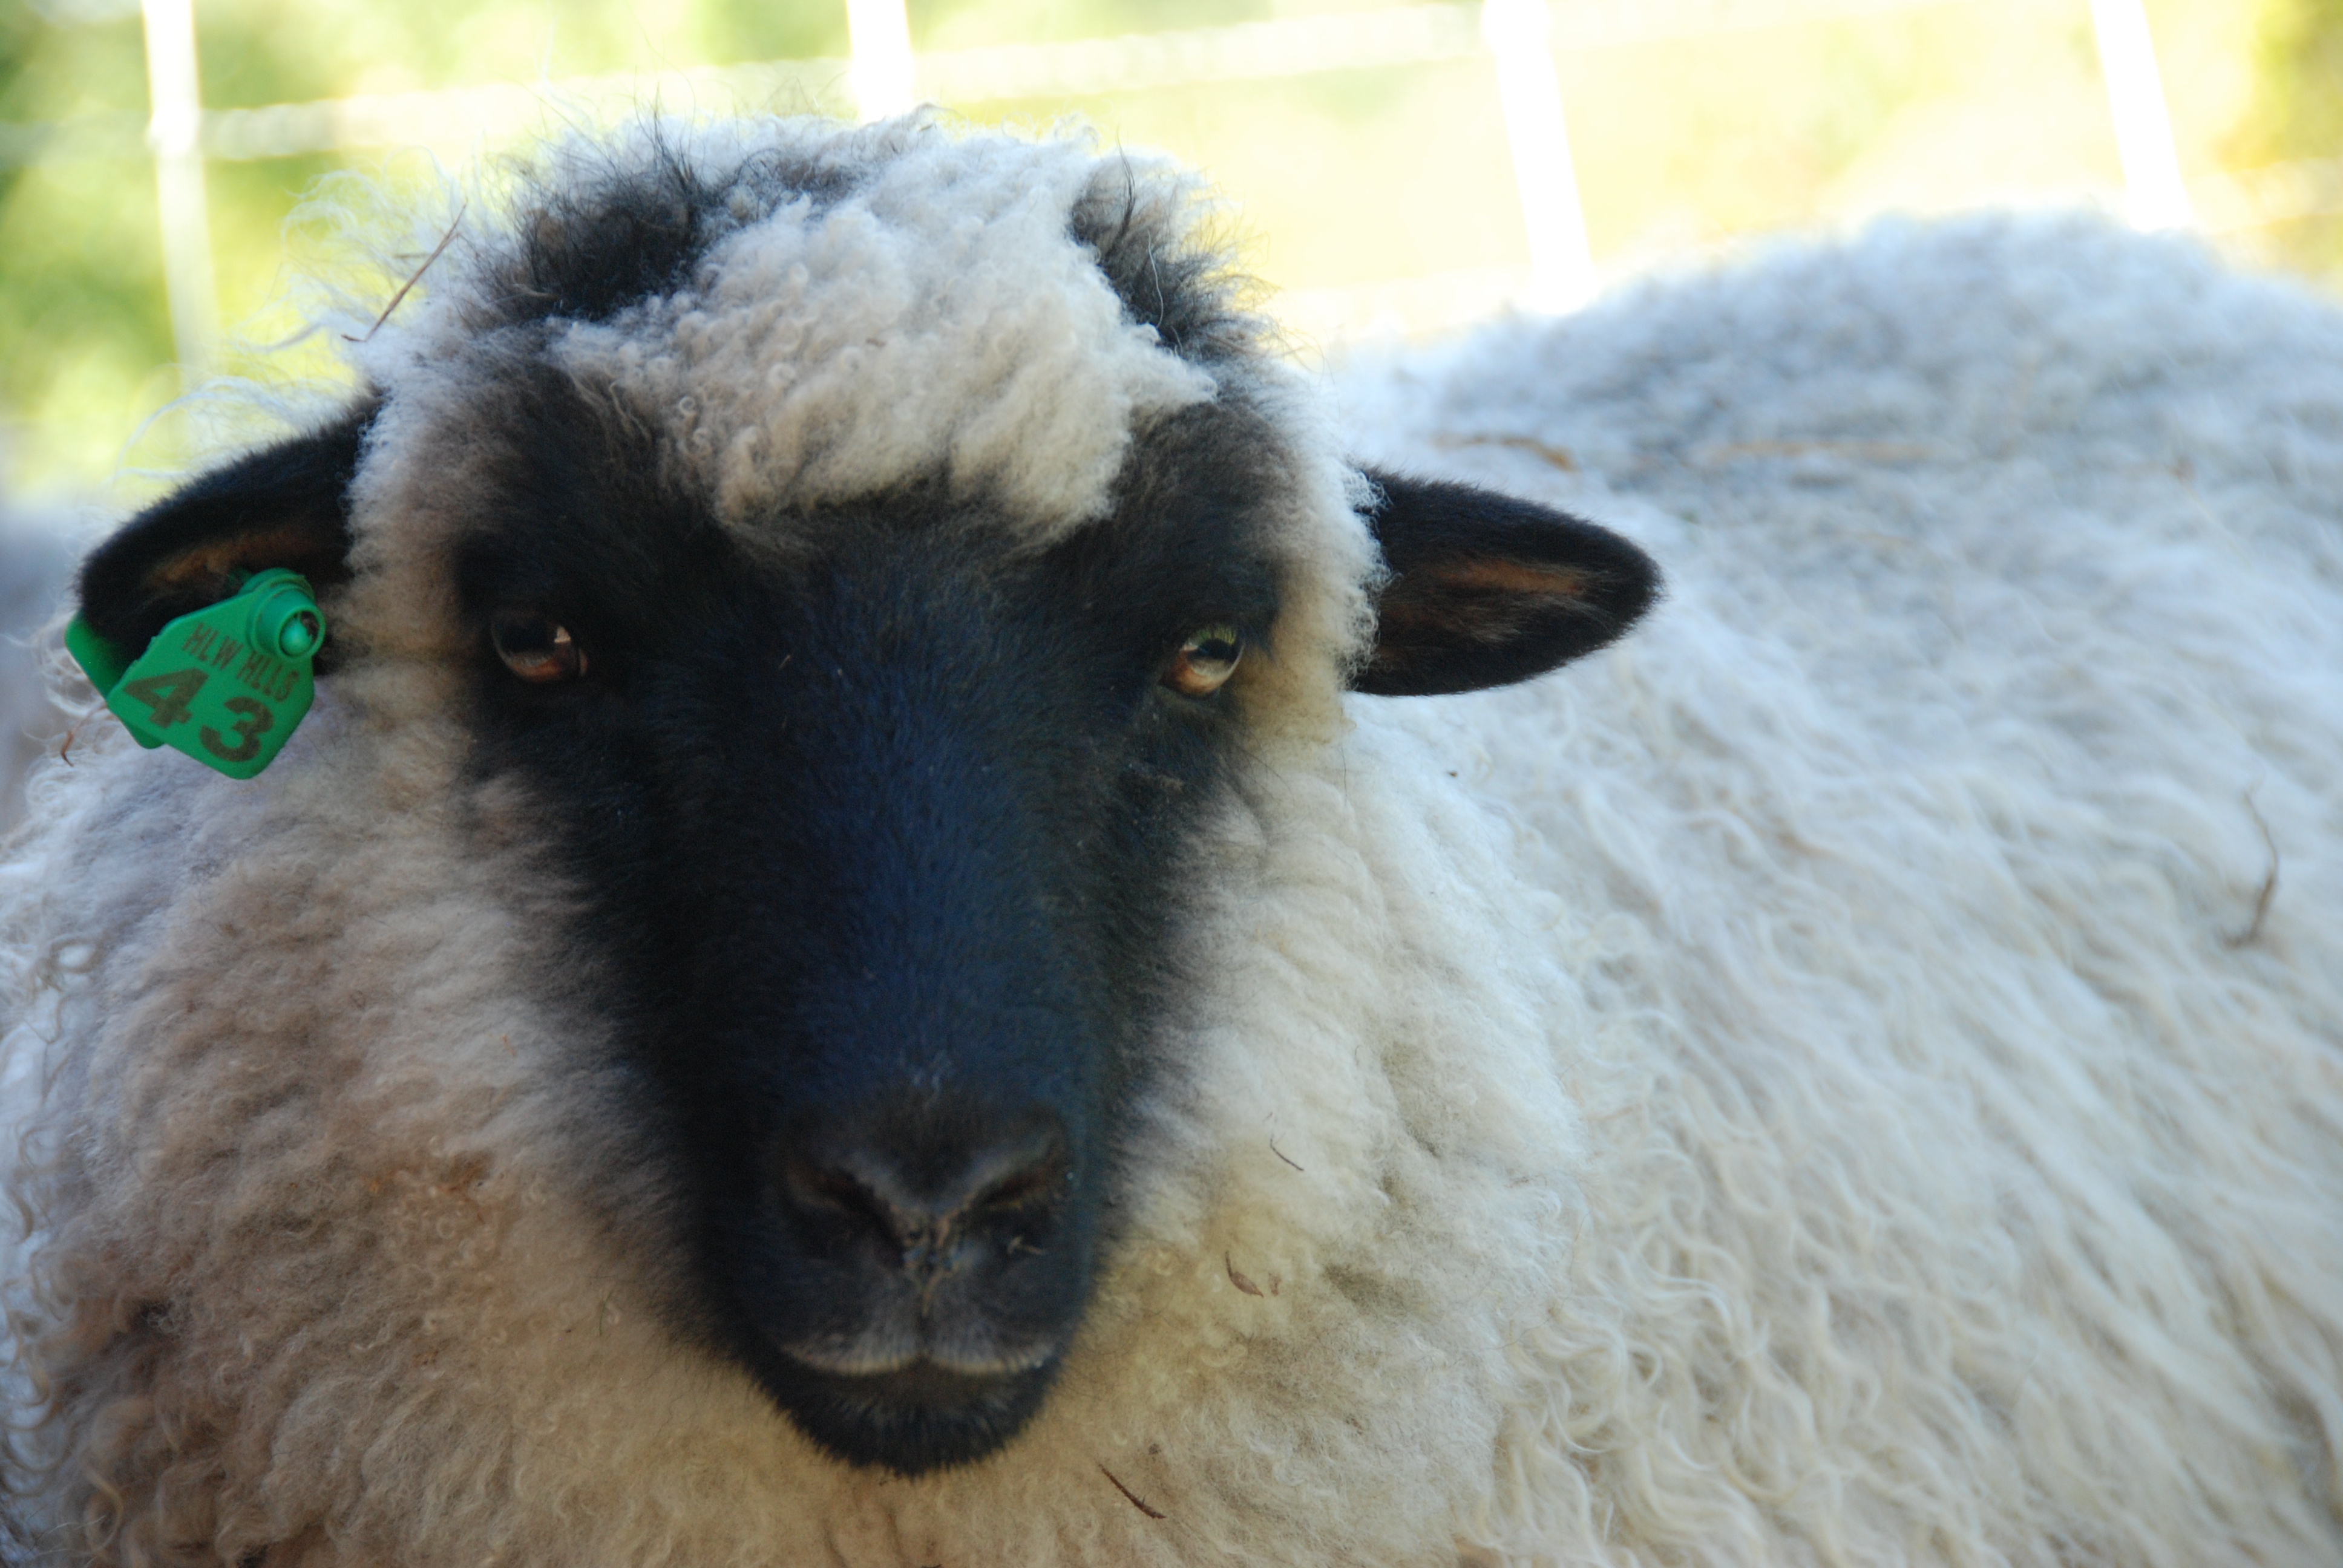
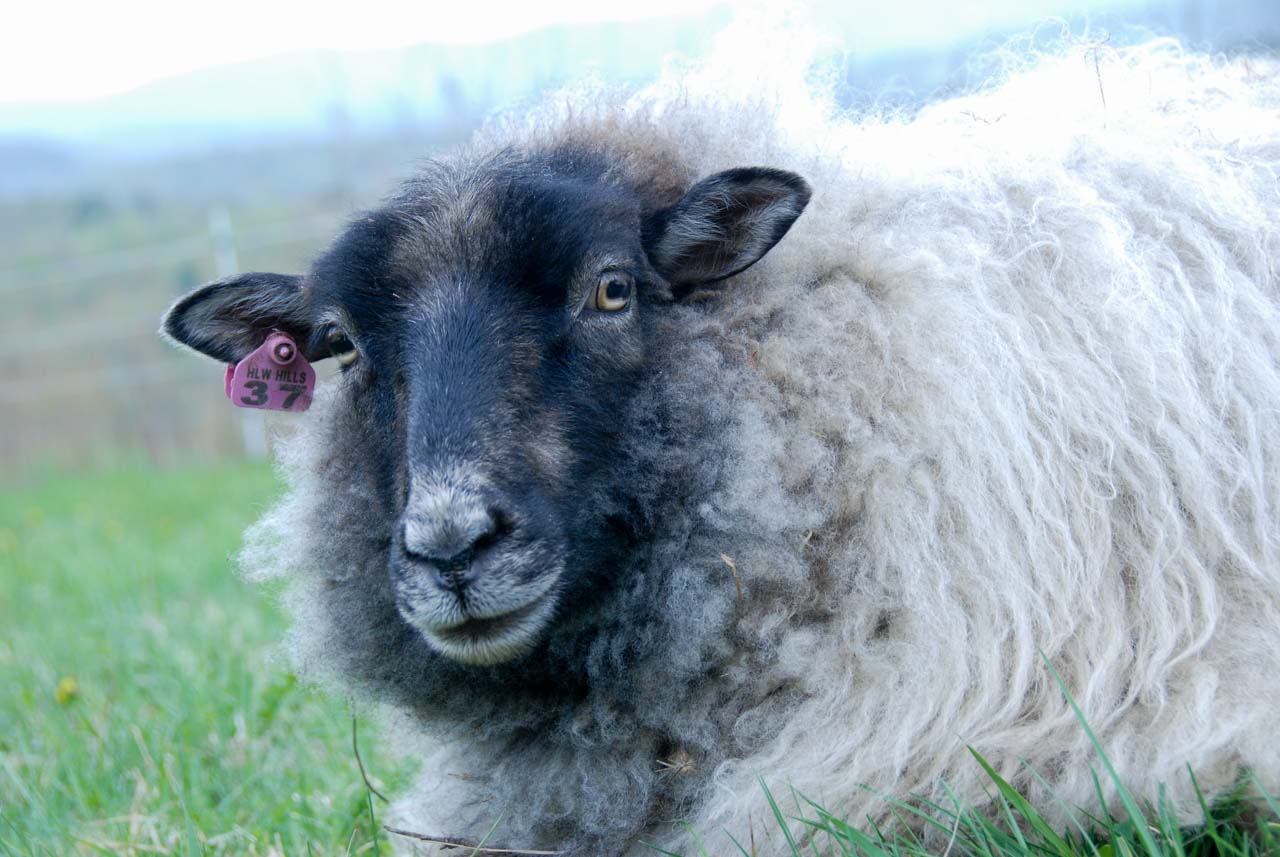
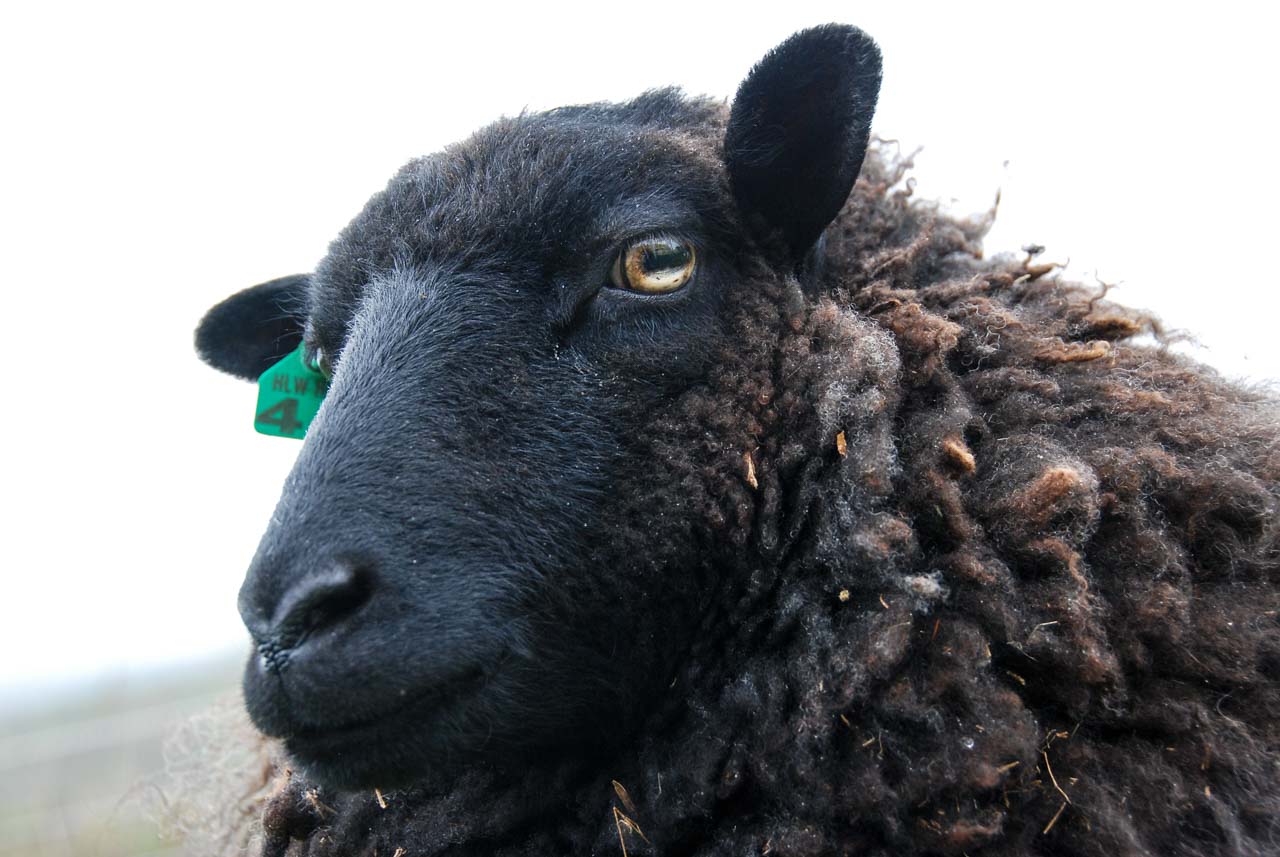
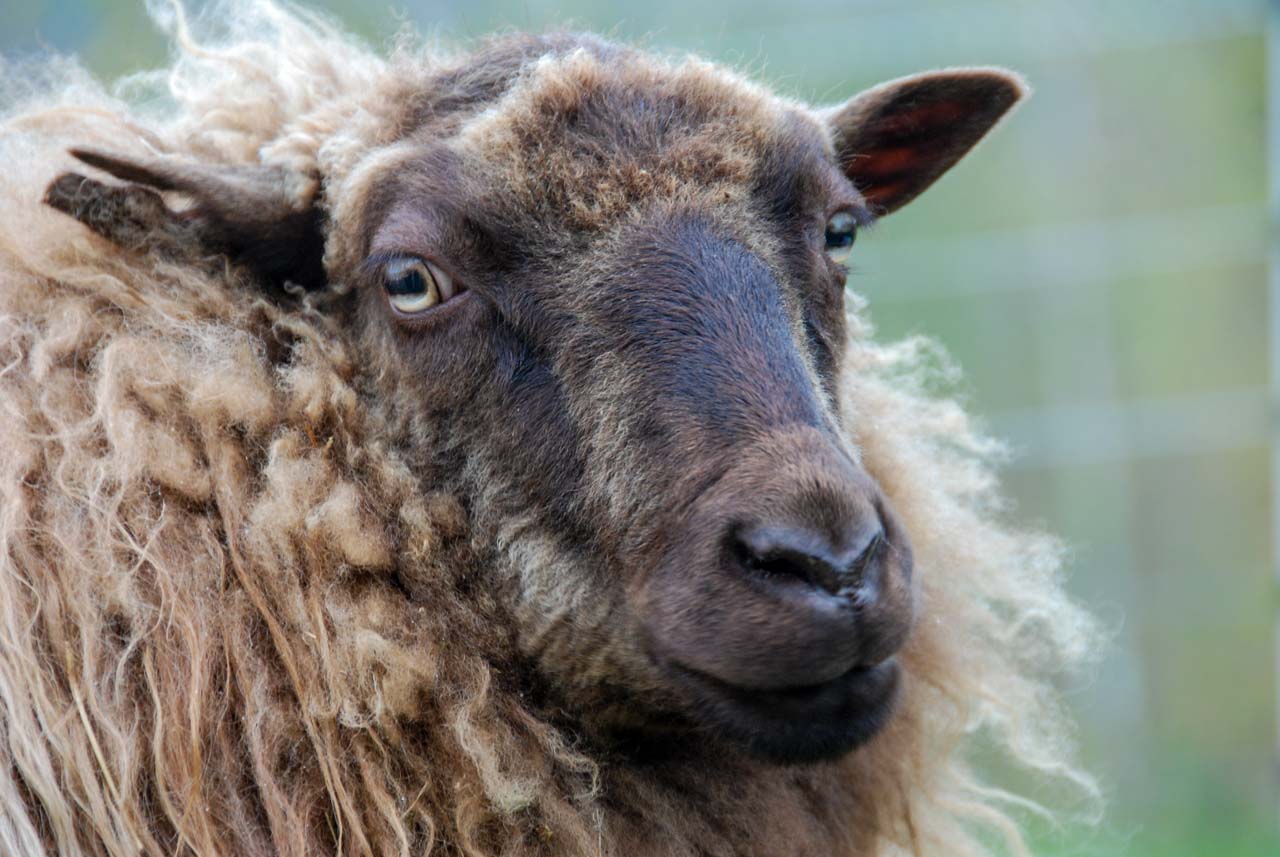
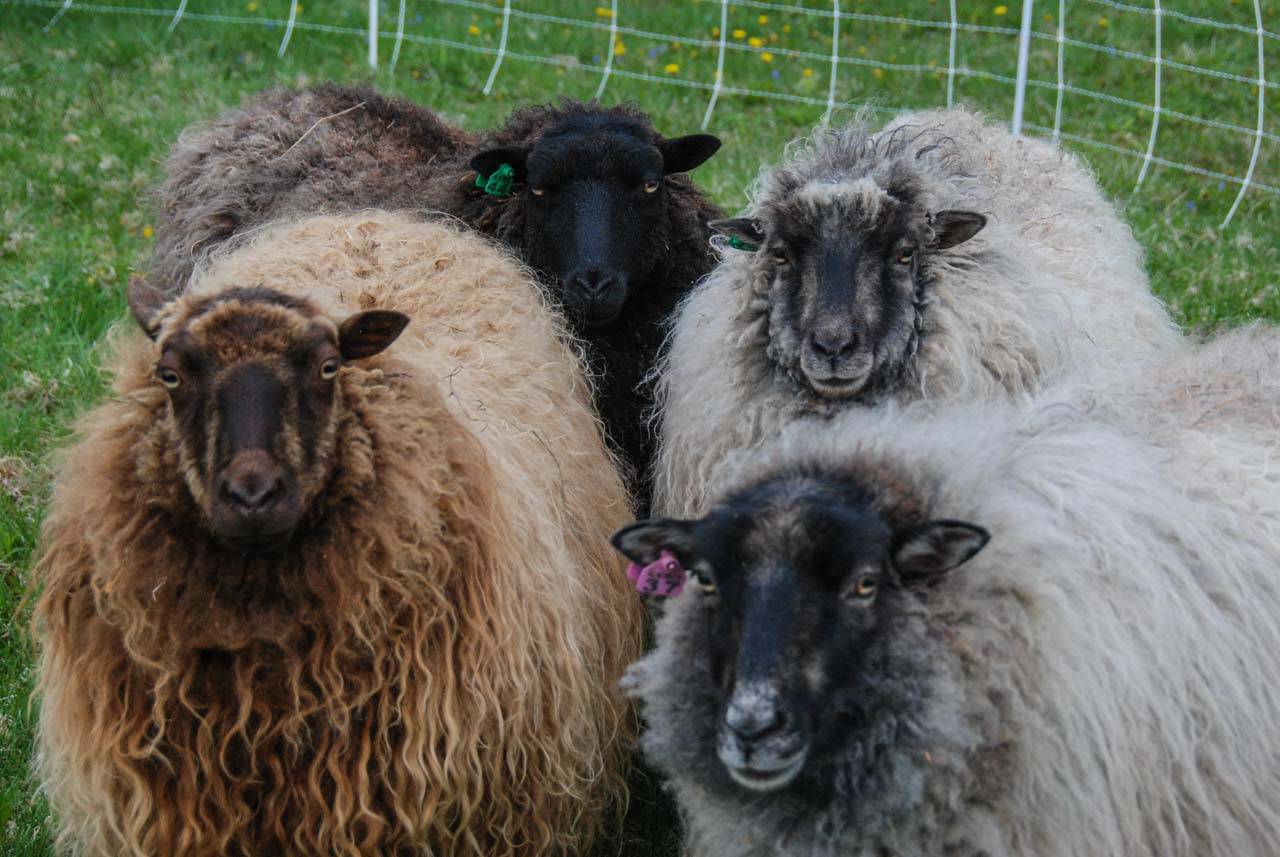
And listen, it’s not right to ignore the behind-the-scenes stars of the show… the sheep! Something I love about being a part of the fiber handcrafting and fiber art community is that I get to meet so many wonderful people. This is the second year that I’ve gotten wool from a wonderful man named Peter Moore, who lovingly cares for his four Shetland sheep. I met Peter because he posted online that he had wool available, and I jumped at the chance. I can say that I would call Peter a friend, now, and I truly don’t know how we would have ever met if not for our mutual love of sheep! Let me introduce his lovely wooly friends:
Meet Dolly…
And Violet,
Phoebe,
And Daisy!
They are all half-sisters and are four years old. Their wool was the centerpiece of this camp (in my opinion), and the kids were champs, learning new skills every day and hopefully leaving with something they were proud of.
I’m sitting at my desk now, listening to the wind blow around the house. The temperatures are cooling and the birds are busy at the feeder. I am looking forward to the cooling down, the bundling up, the quieting of winter. Summer can be a full-on explosion of activity, work and play. It’s the extroverted season. These camps were a beautiful expression of all of that. I wonder what new things I’ll imagine up as I sit in the dark introverted winter. I guess we’ll see next year!
I’ve been meaning to write a post about sock puppets for months! But, you know… life. I was reminded of these hilarious characters when I read through the stupendous thank you notes I received from the kids in my son’s class for all the activities we did over the year. A large number of them said making sock puppets was one of their favorite activities. So, of course I should share what we did!
#1: Gather socks you are willing to separate from. Got any loose ones kicking around, lonesome without their mate?
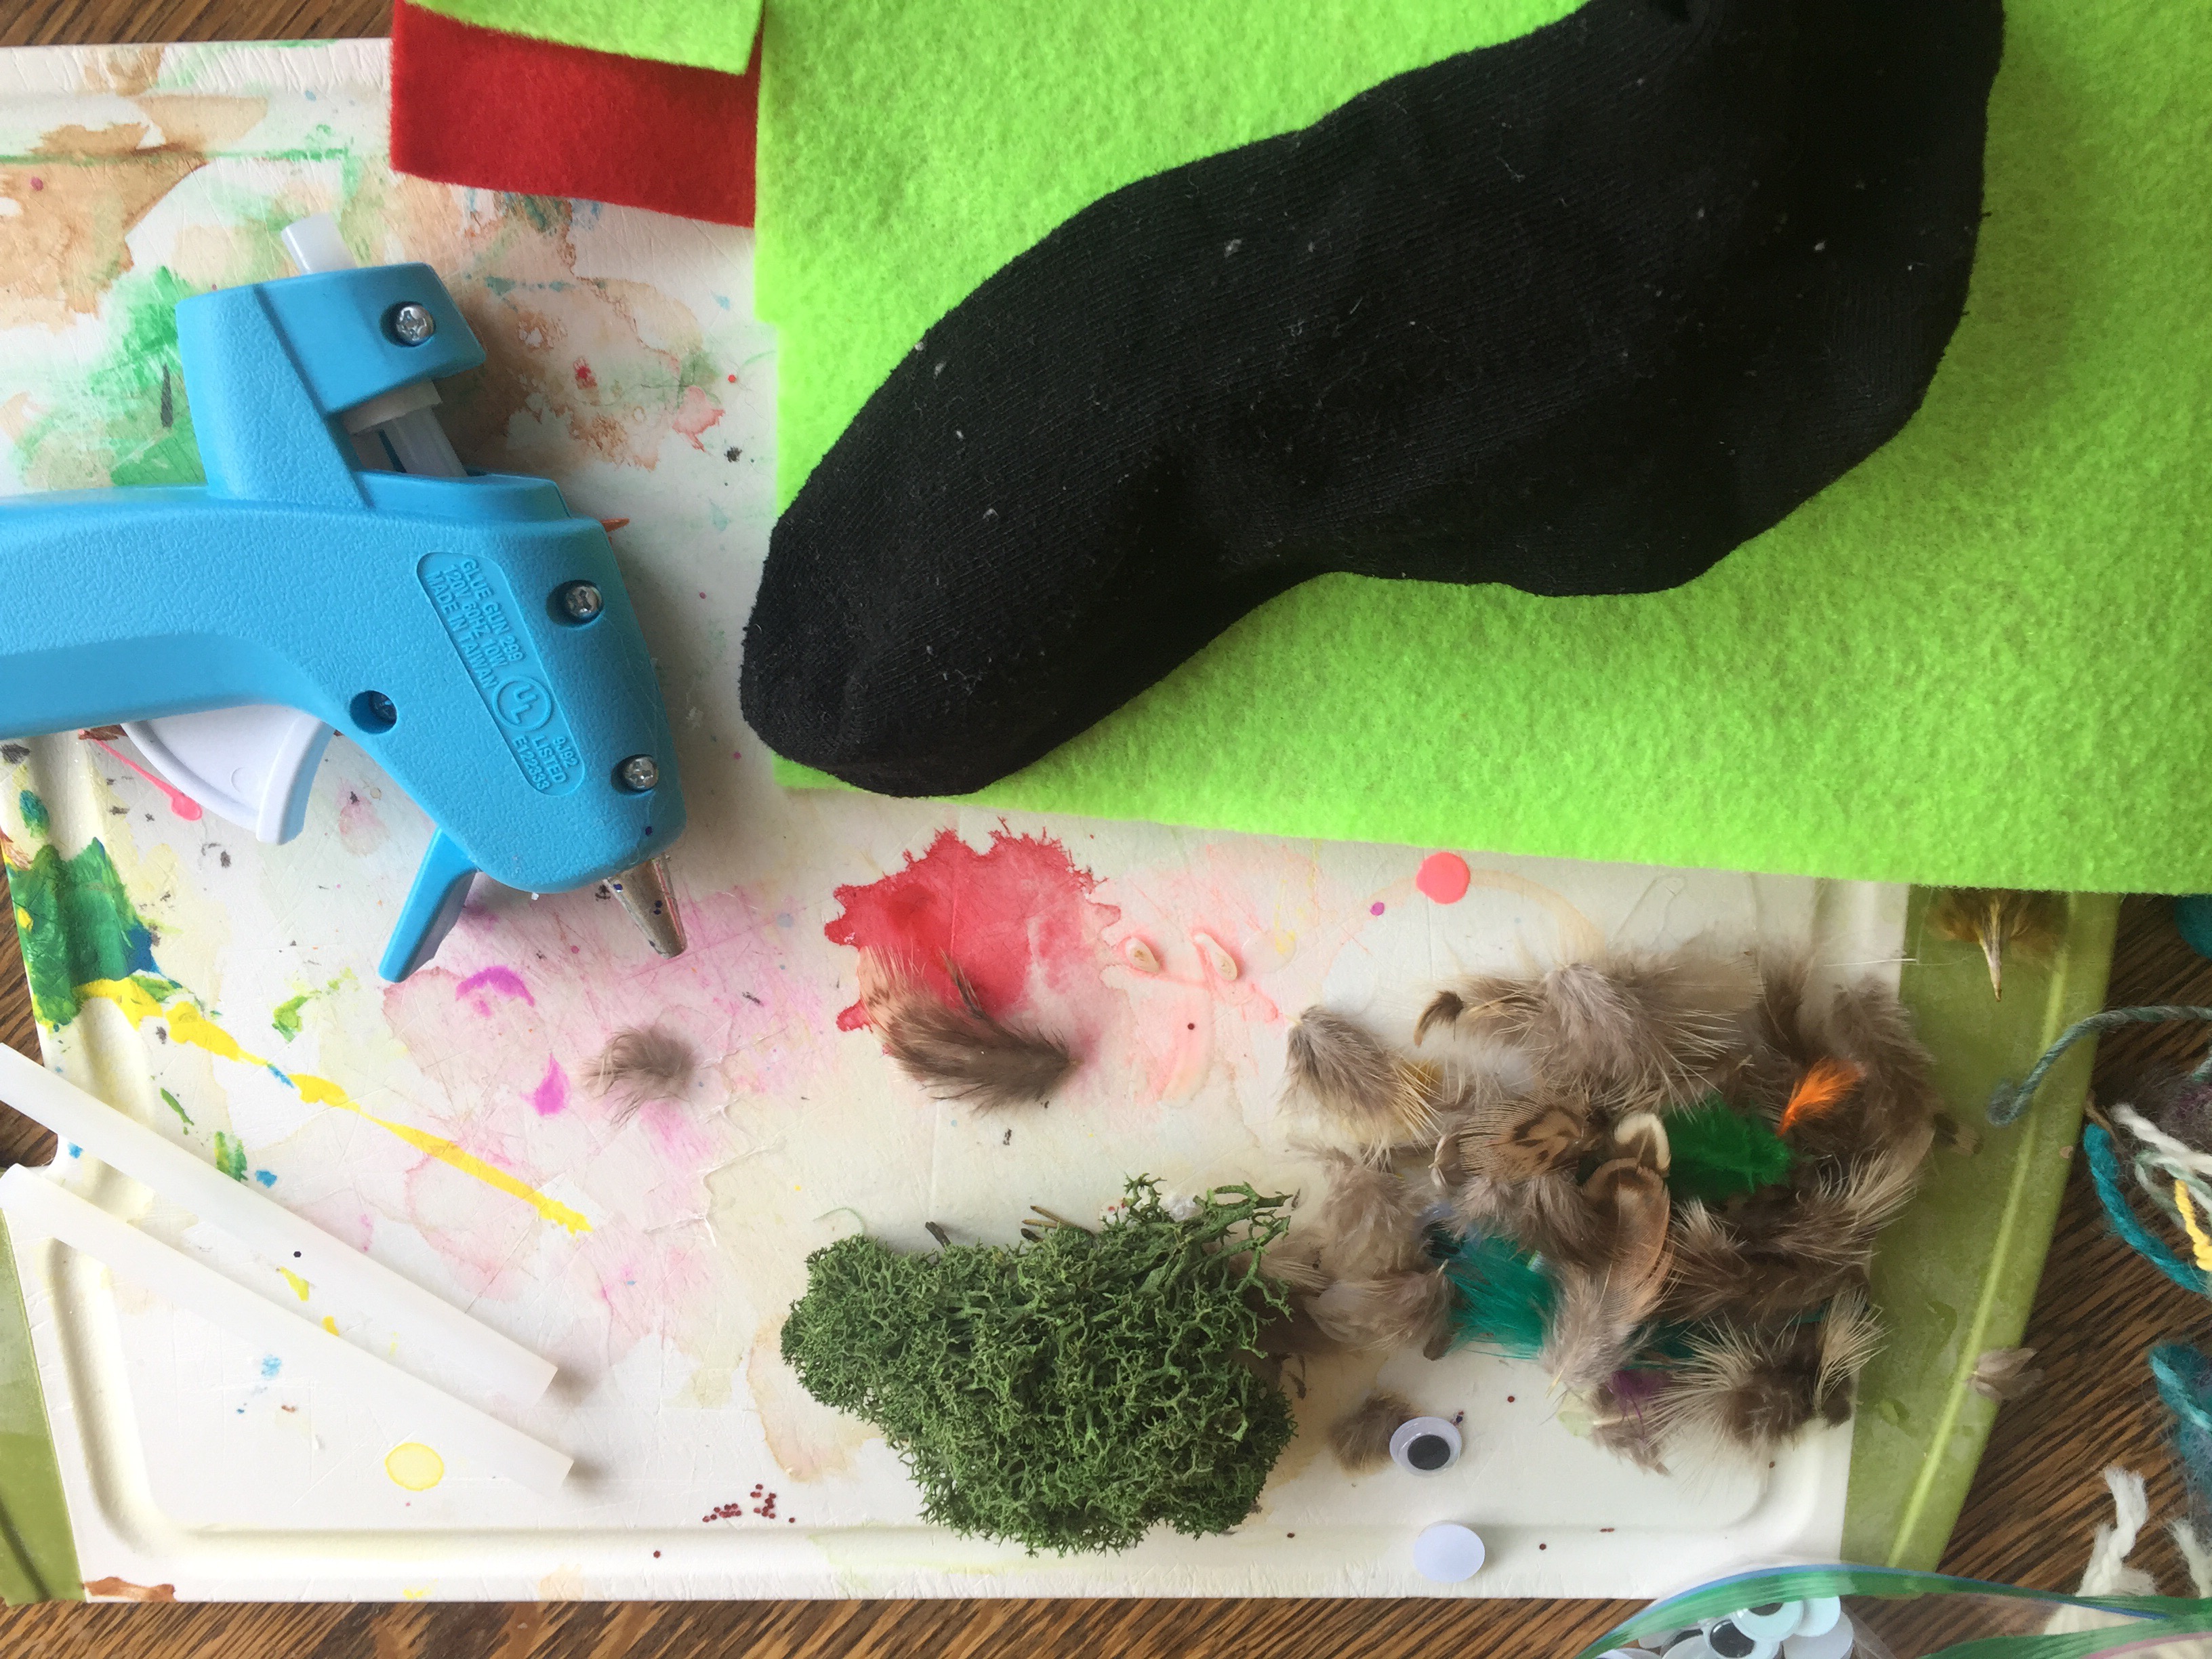
#2: Collect random bits of stuff you have in the arts & crafts category. Pom-poms, beads, googly eyes, moss, old costume jewelry, felt, buttons, yarn…
#3: Get glue ready. I found my glue gun to be the most effective but standard glue works, too. Clear glue is better because you don’t see it once it dries.
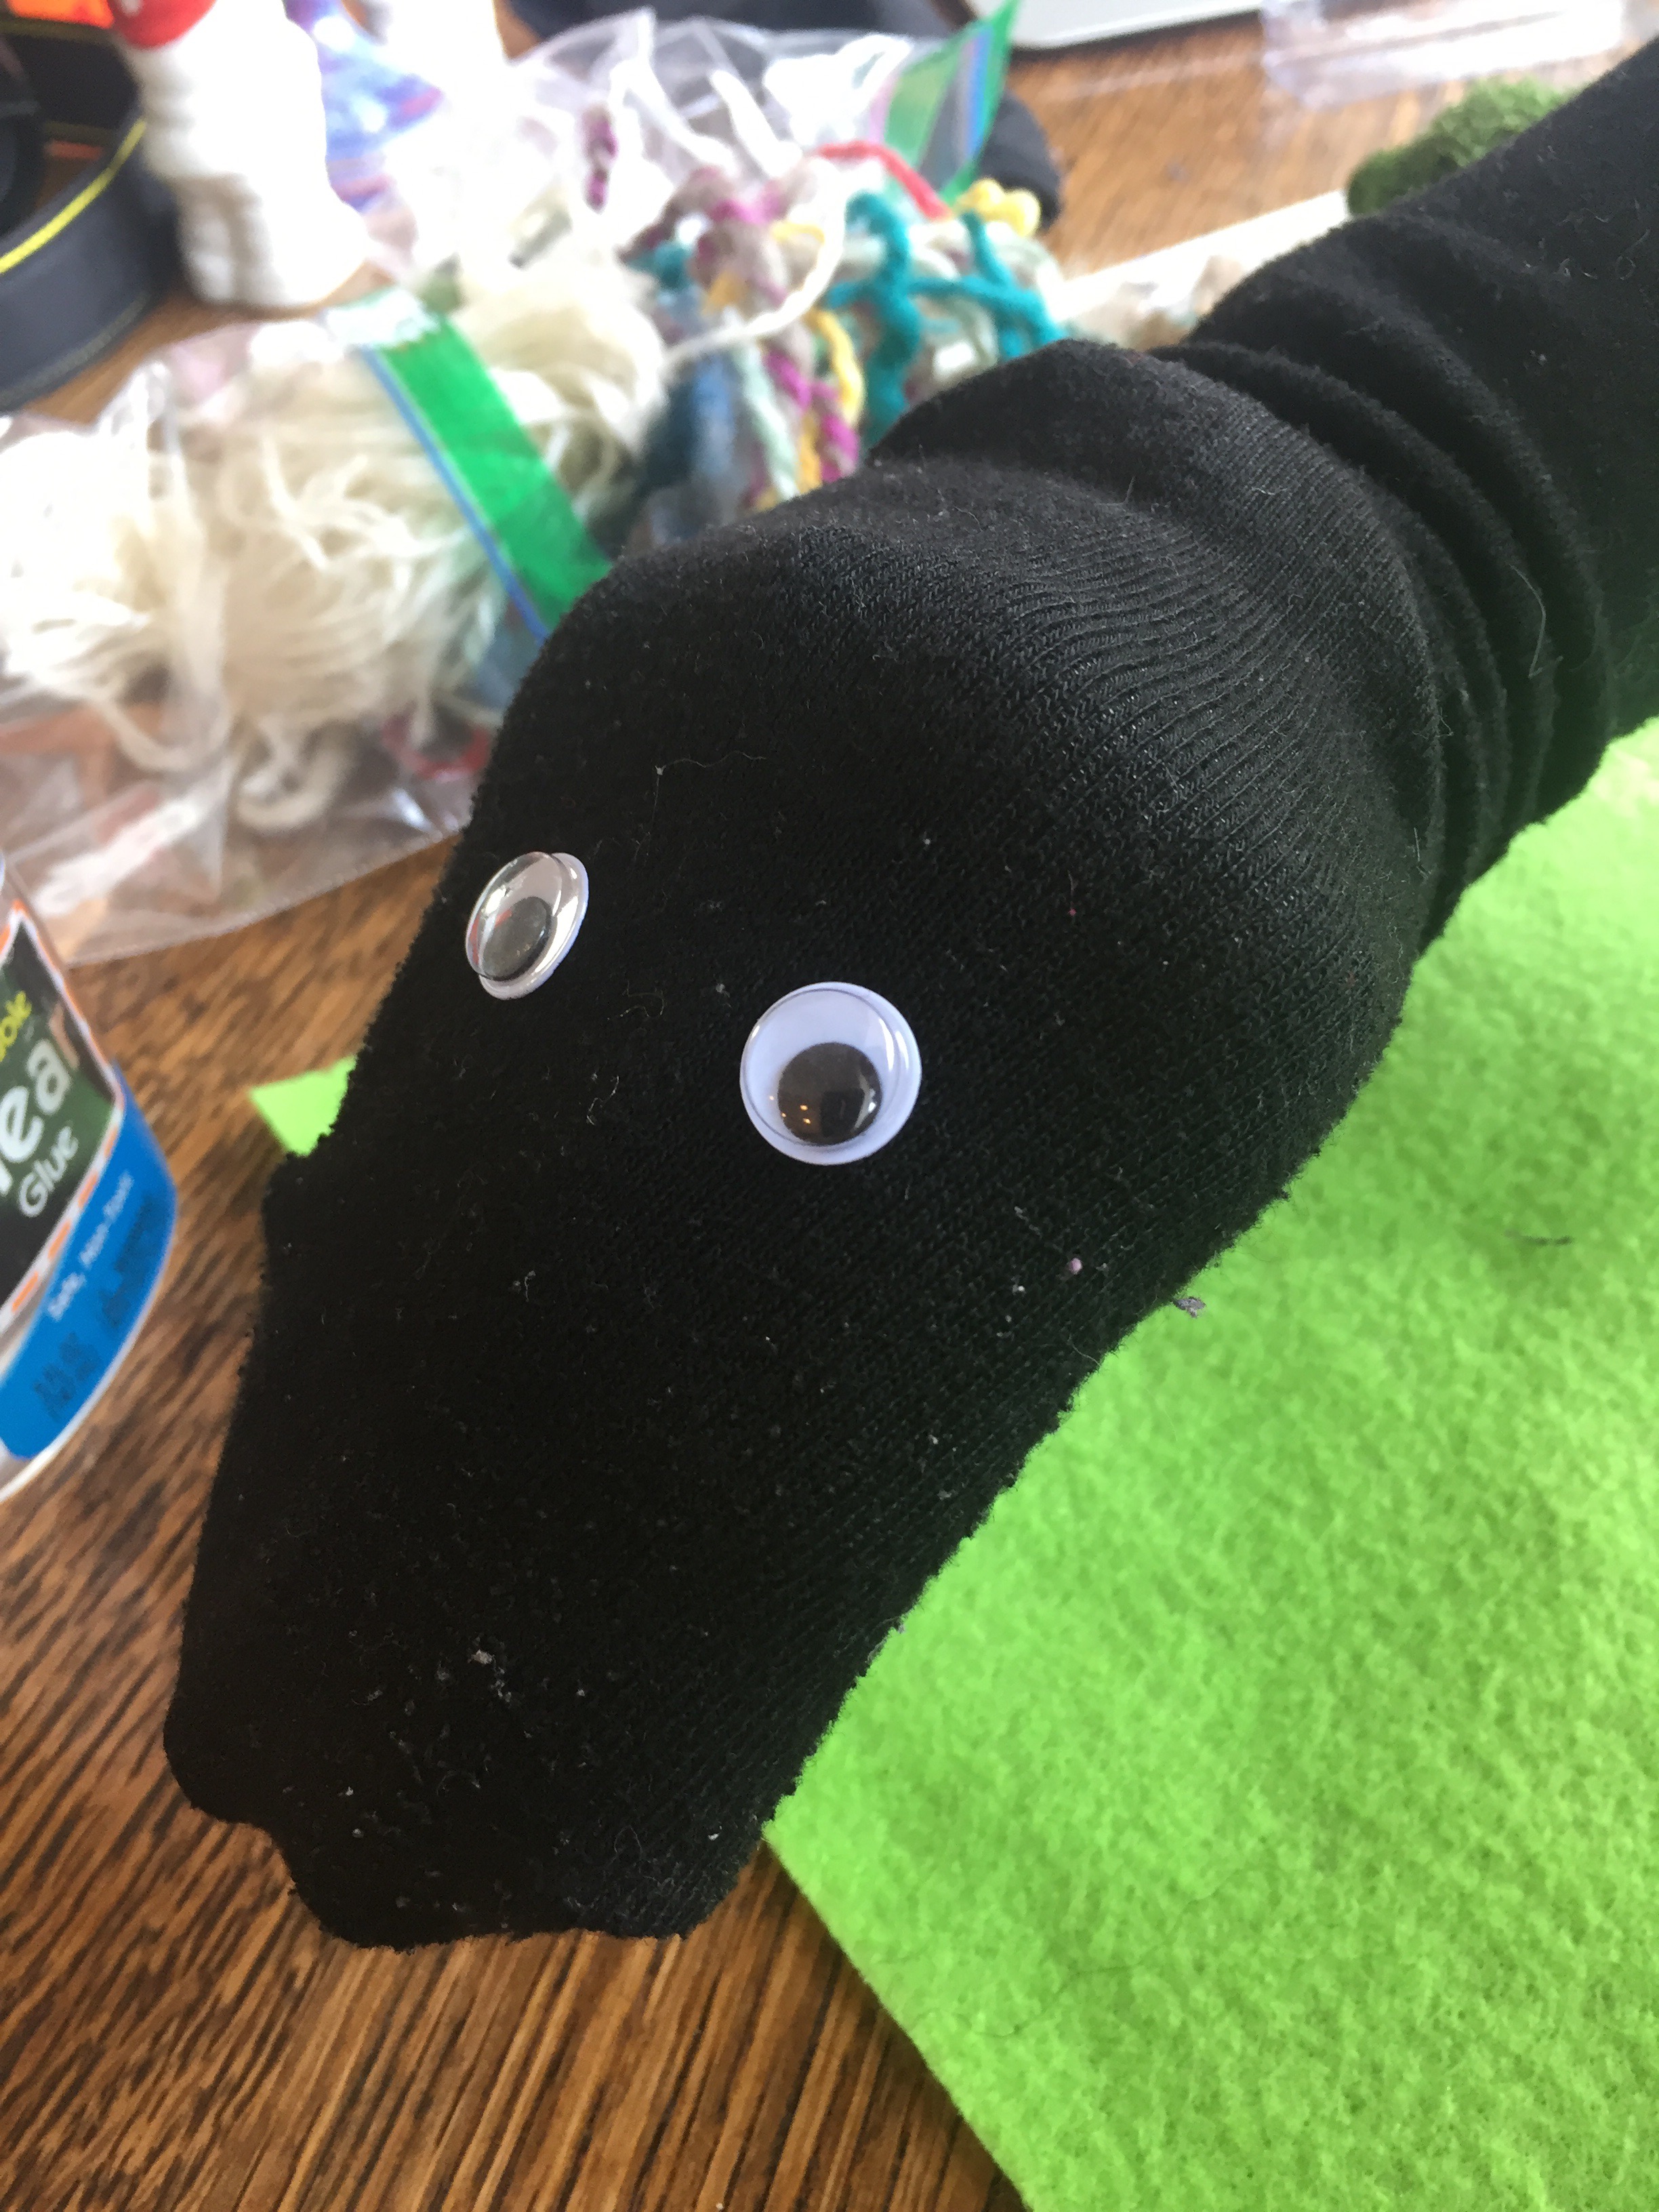
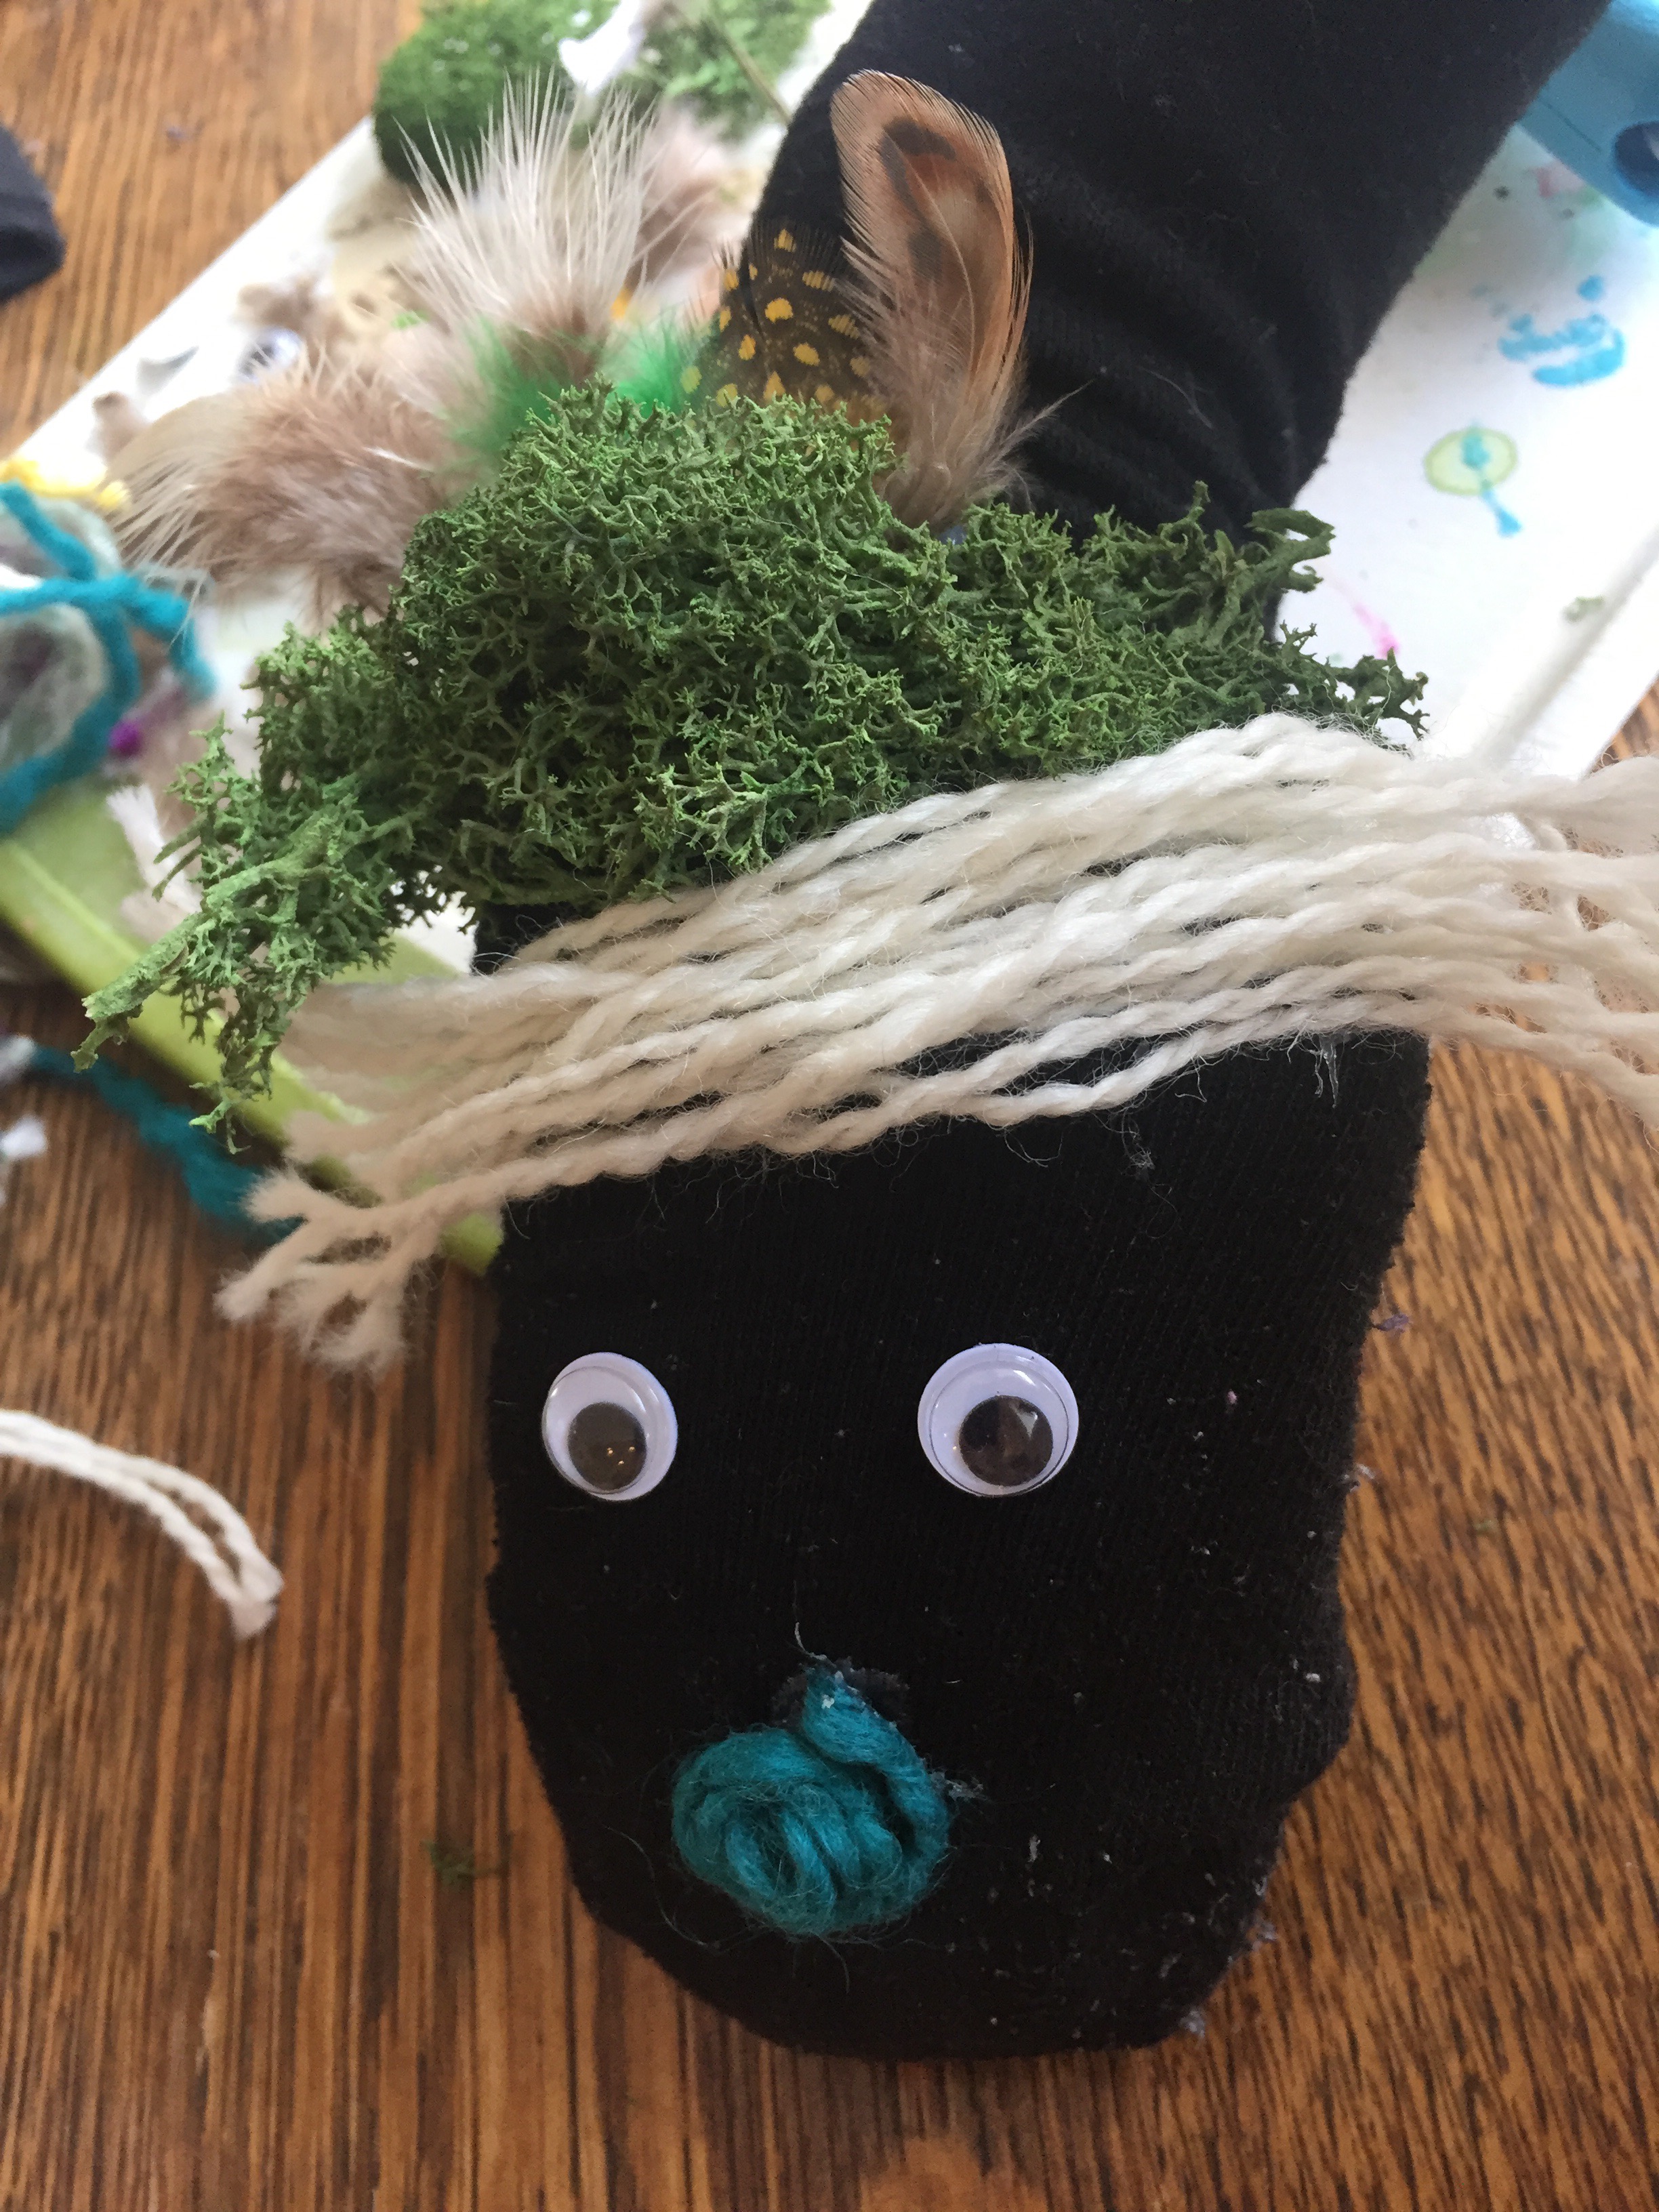
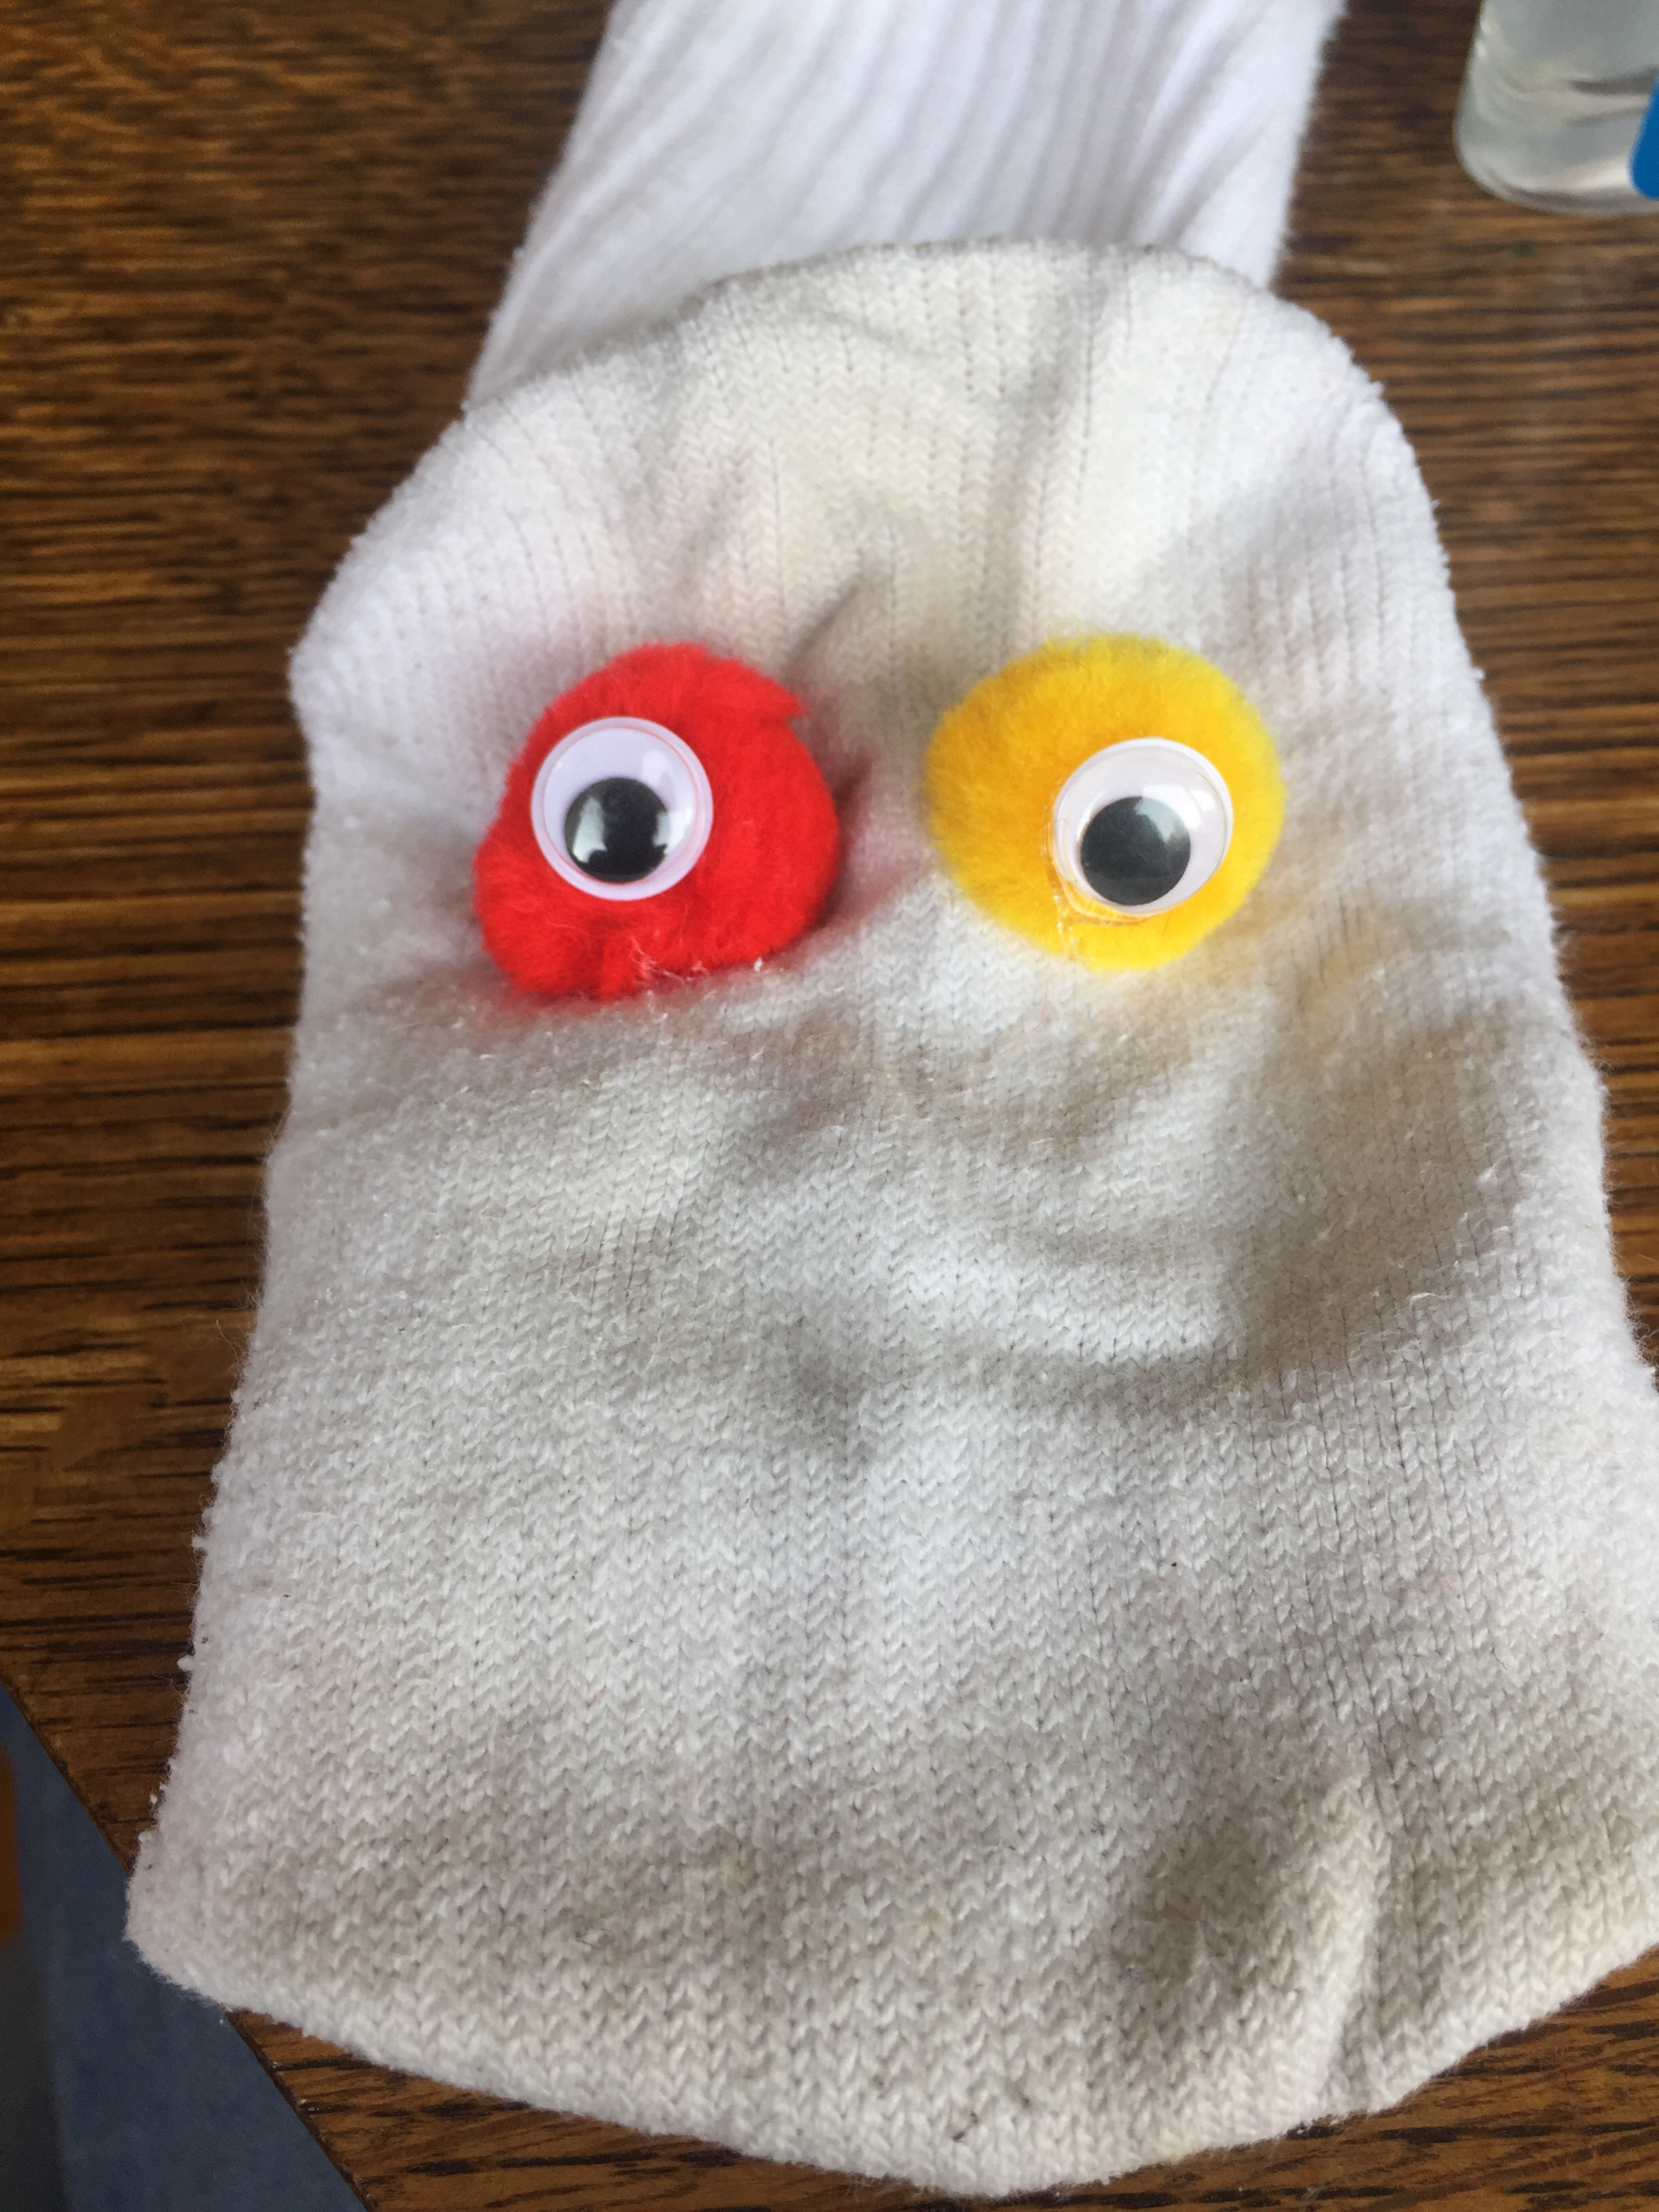
#4: Arrange sock on hand. I find that the heel of the sock fits nicely over the knuckles. When you open you hand, keeping your fingers together and away from your thumb, you can tuck the extra sock fabric that would otherwise be around your toes, into that space, creating the mouth. Close your hand, holding the mouth in place, and glue on the eyes where you want them. Then, gently remove the sock and lay it on the table.
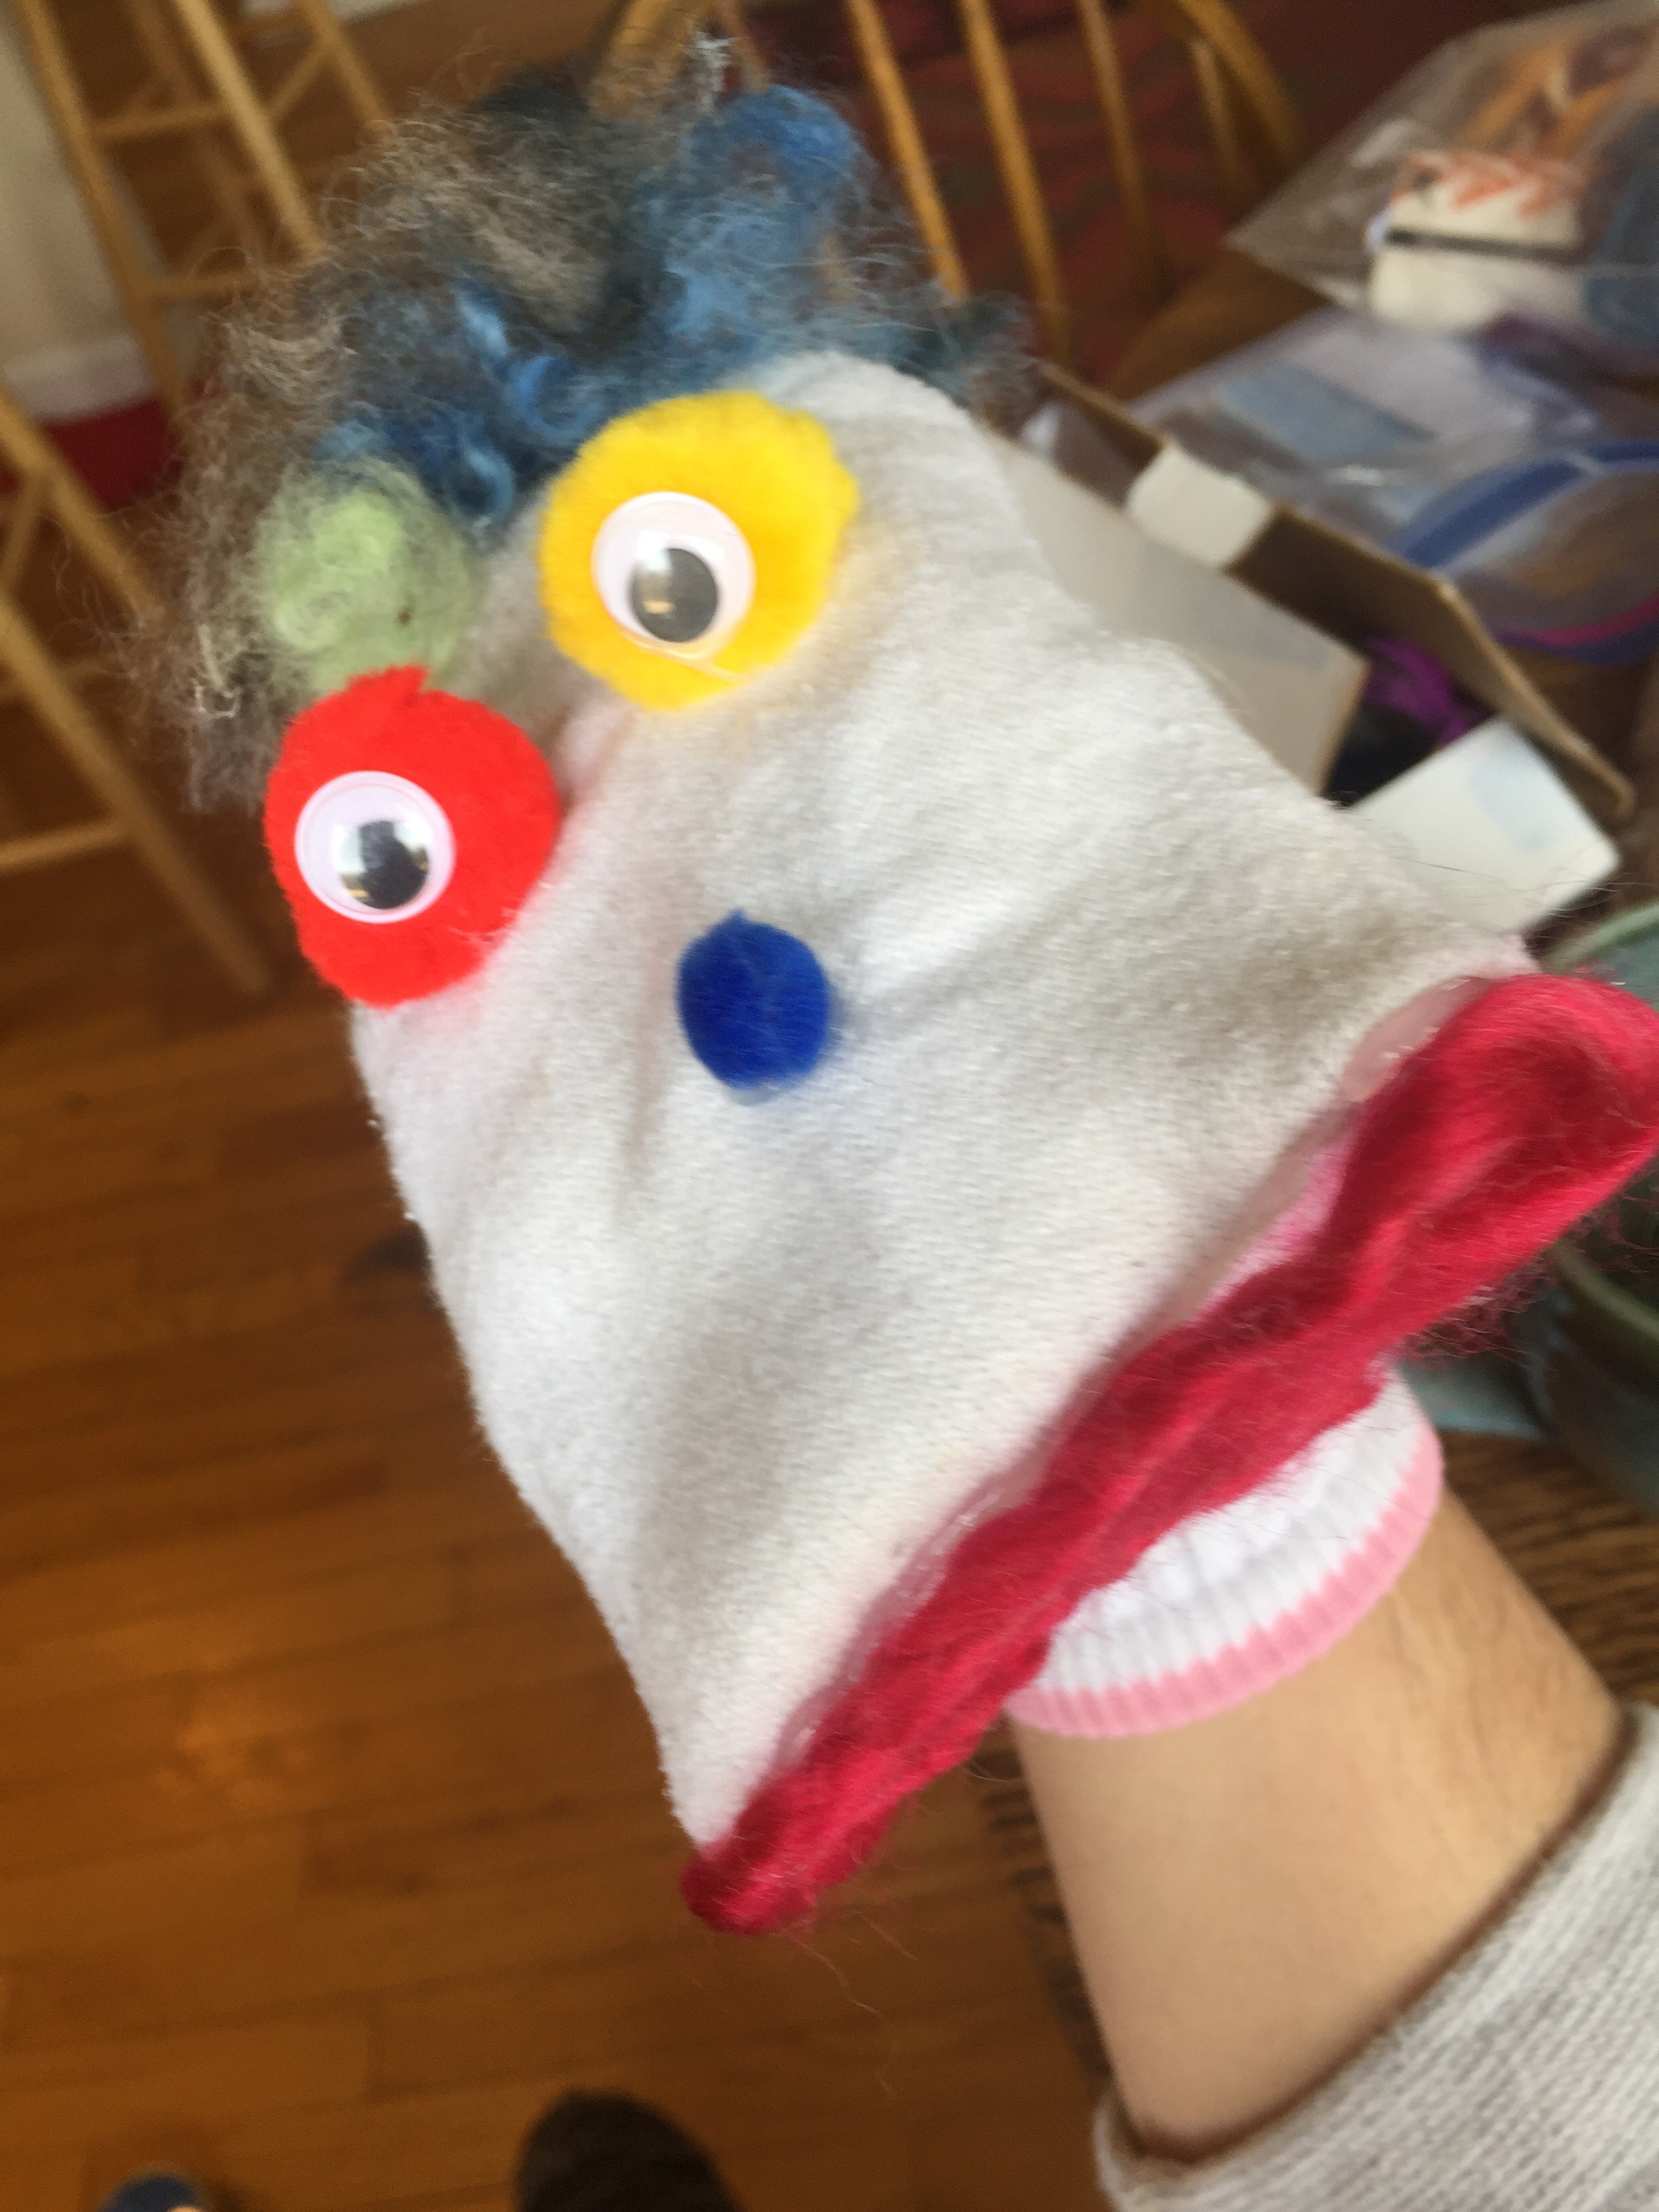
#5: Notice the personality that is already evident! Amazing, what eyes do. 👀 Start adding whatever you want to your puppet, being careful not to overglue. You don’t want the sock to stick to itself. On mine I knew mossy hair was necessary, and feathers.
And more hair… and a nose…
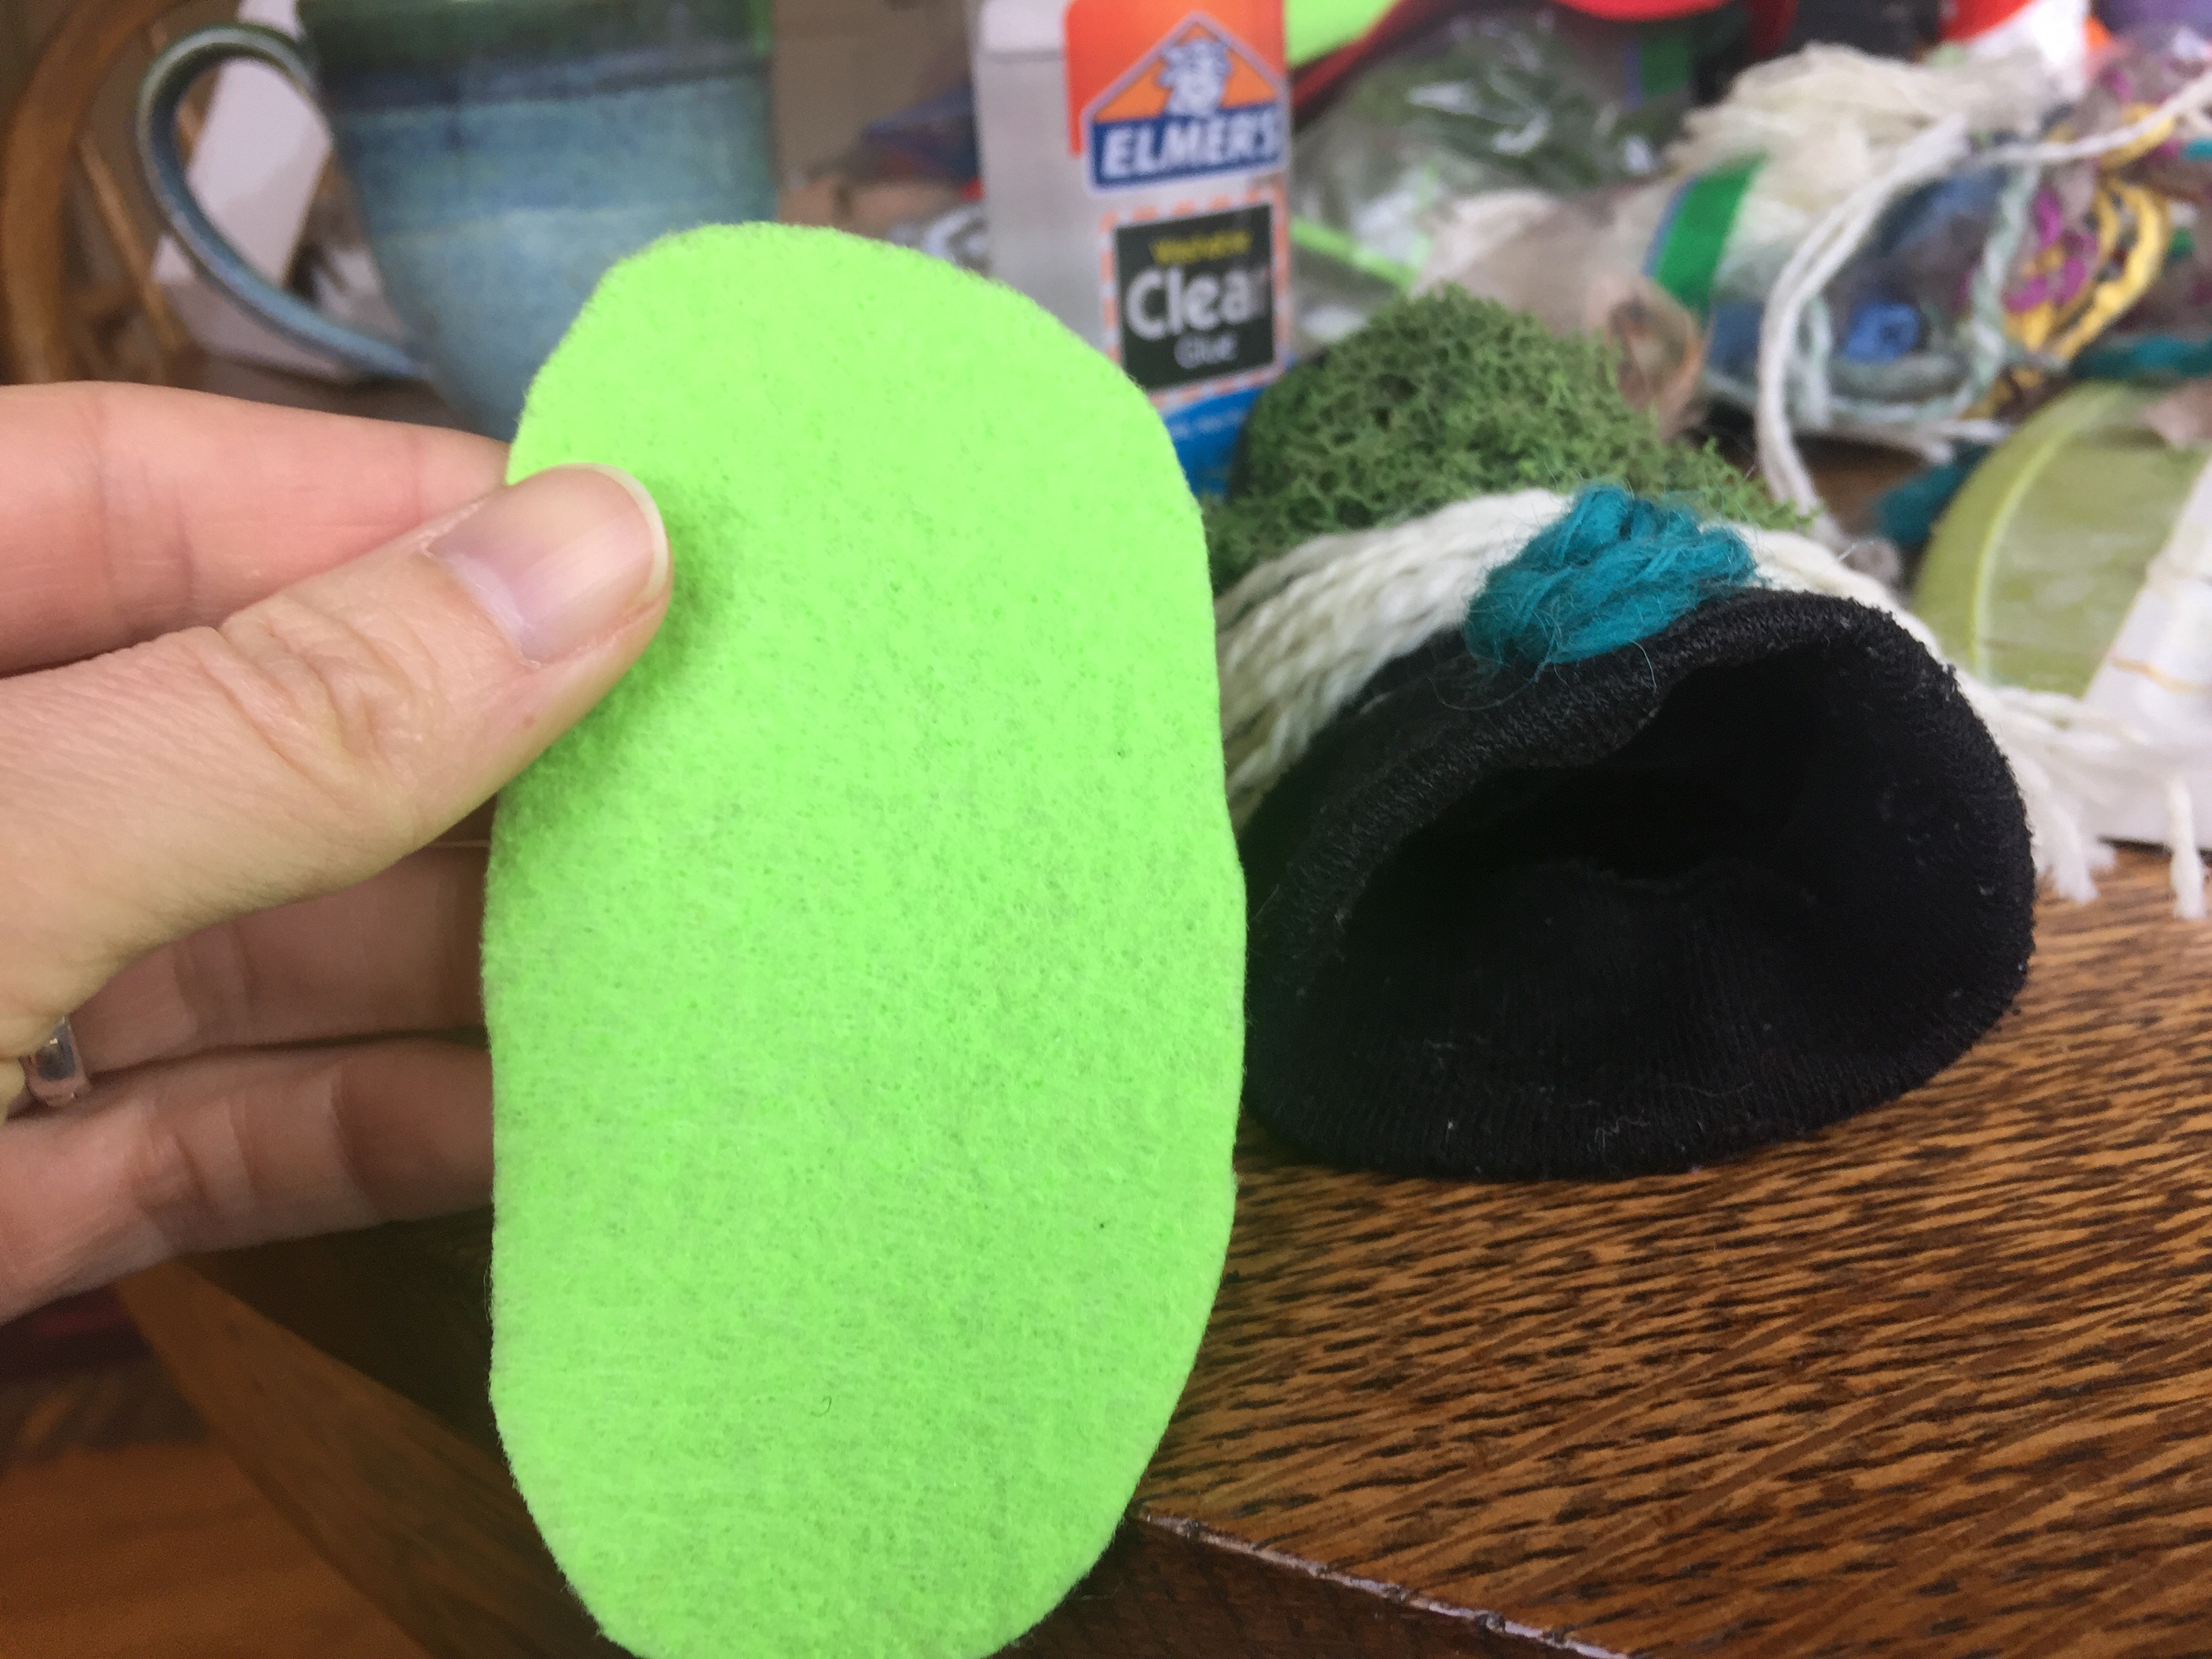
#6: after the adornments dried for a few minutes, I started on the mouth. I propped open the space designated for the mouth and eye-balled the size.
And cut out a felt oval…
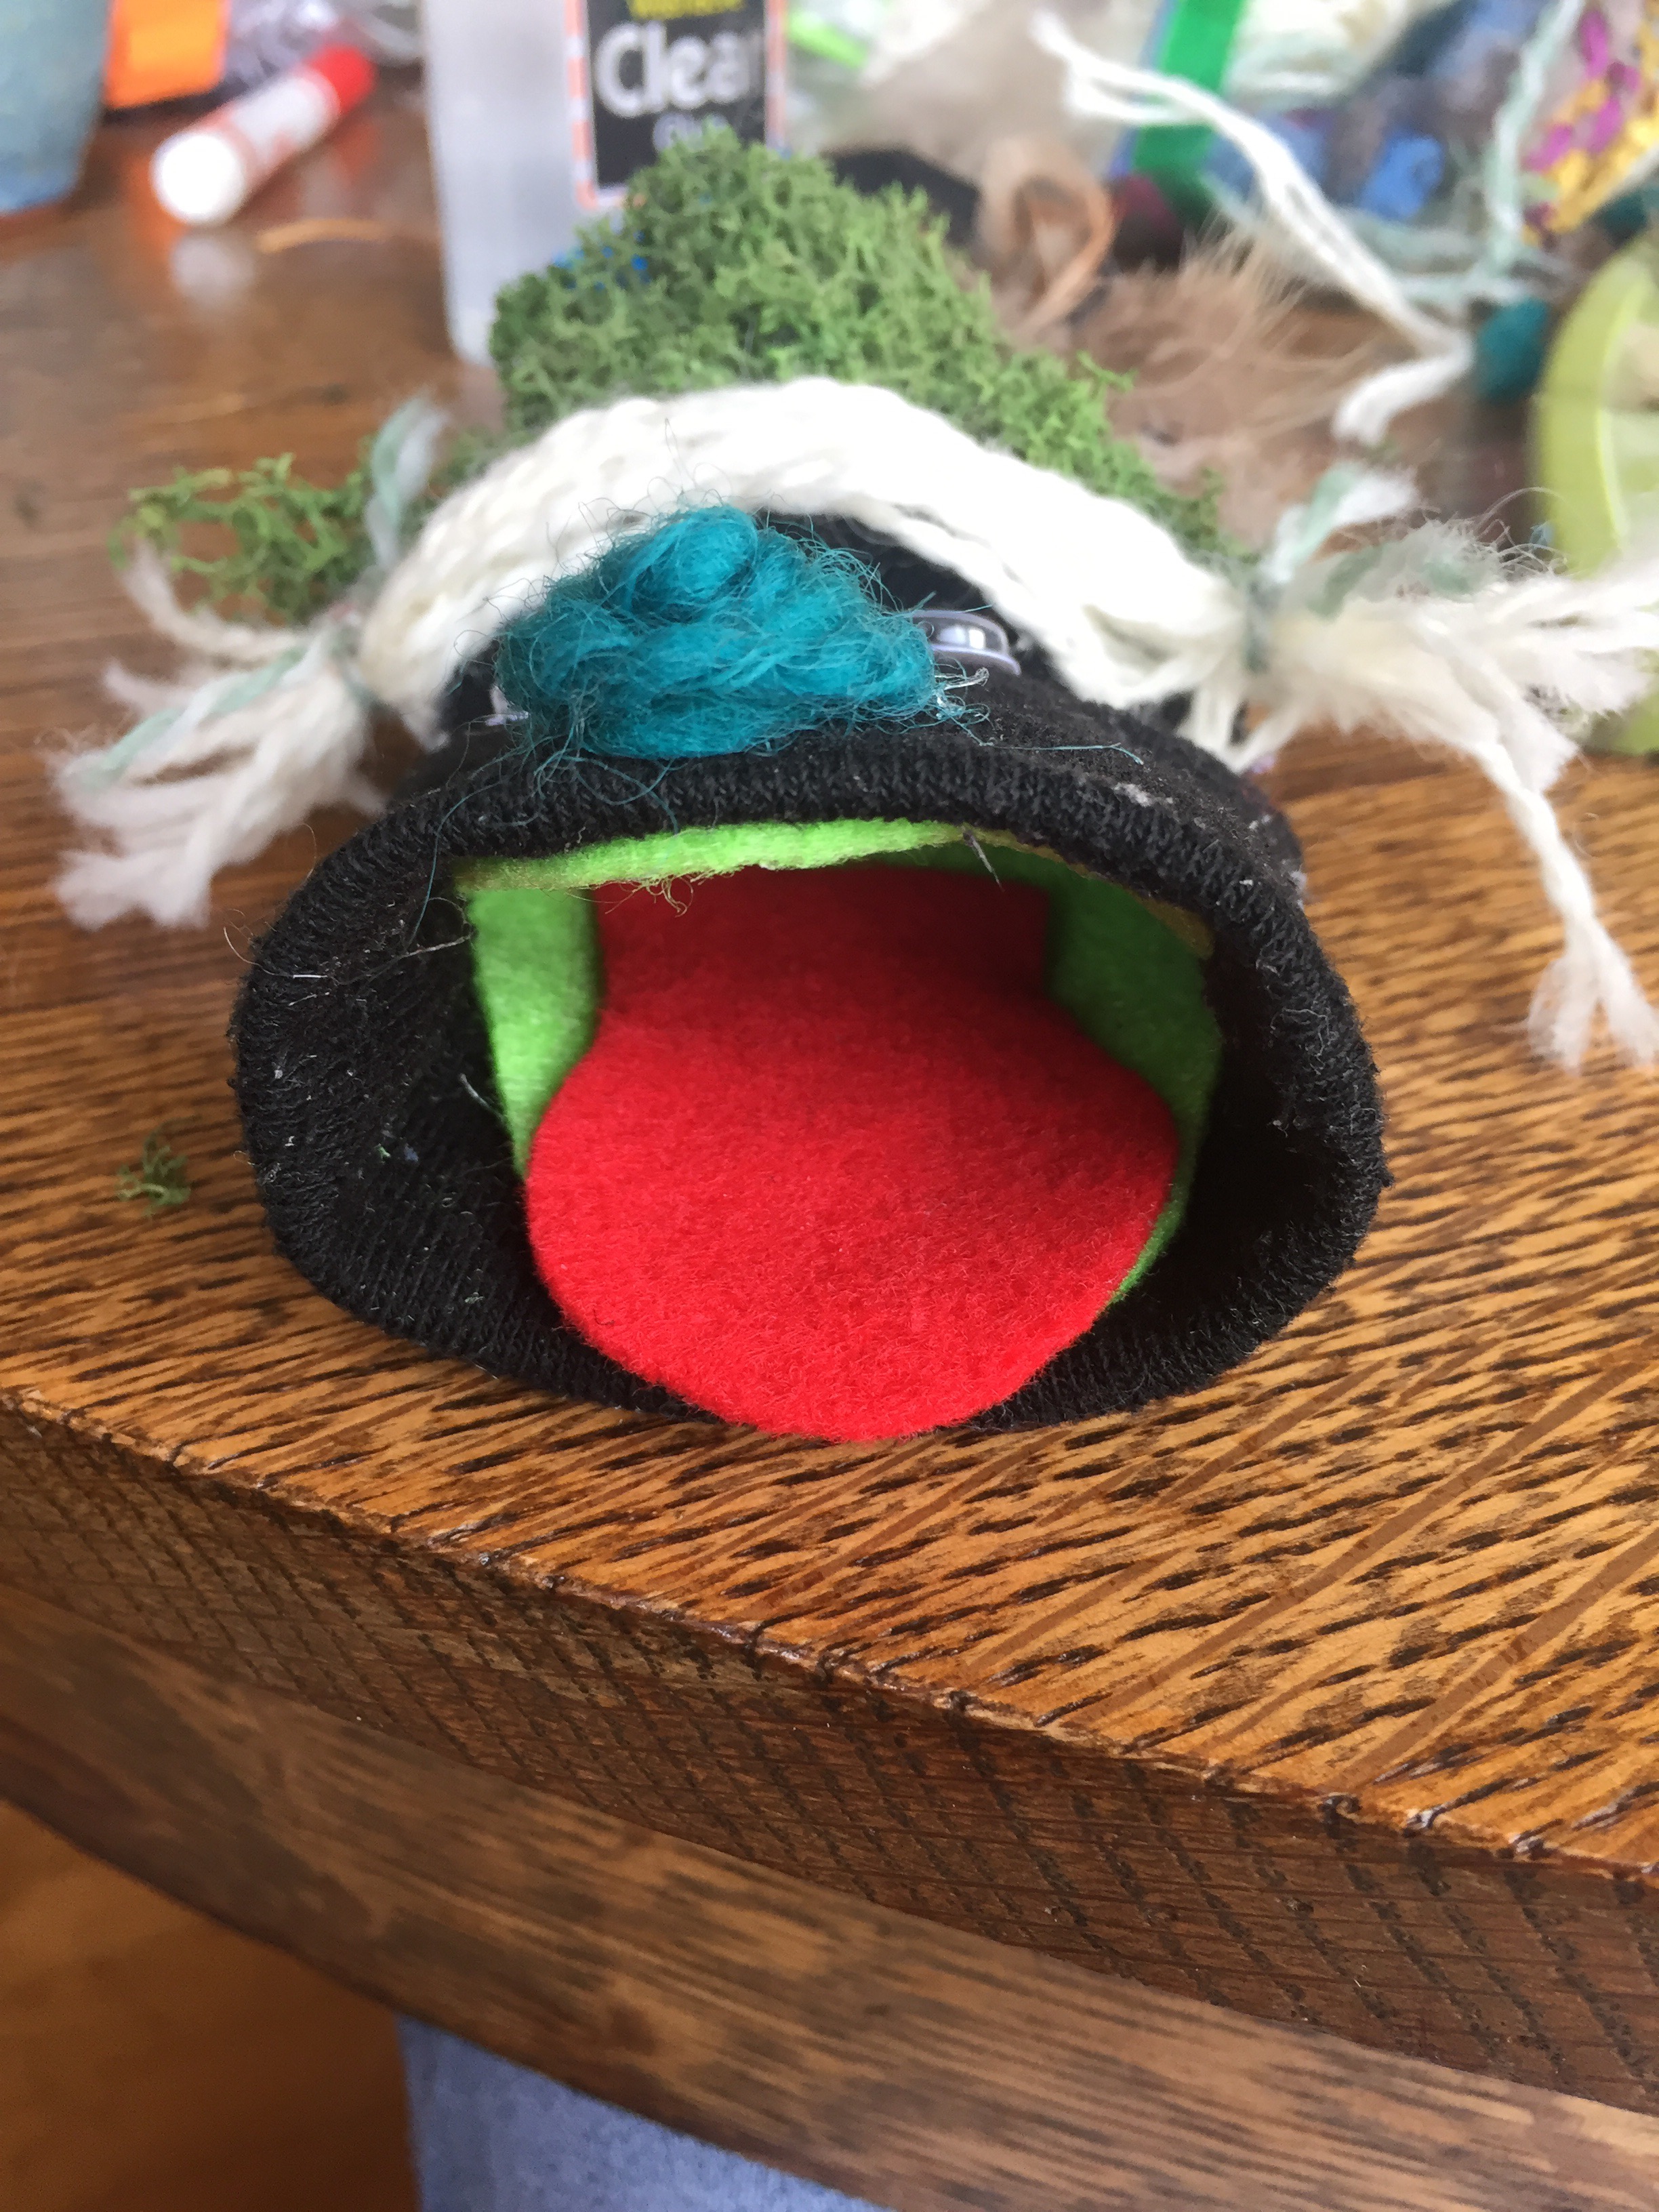
I tucked it into the sock mouth to ensure a good fit, then took it out, put glue around the edges of the felt, and tucked it back in there.
Then I added a felt tongue which was simply a smaller oval with one side cut off.
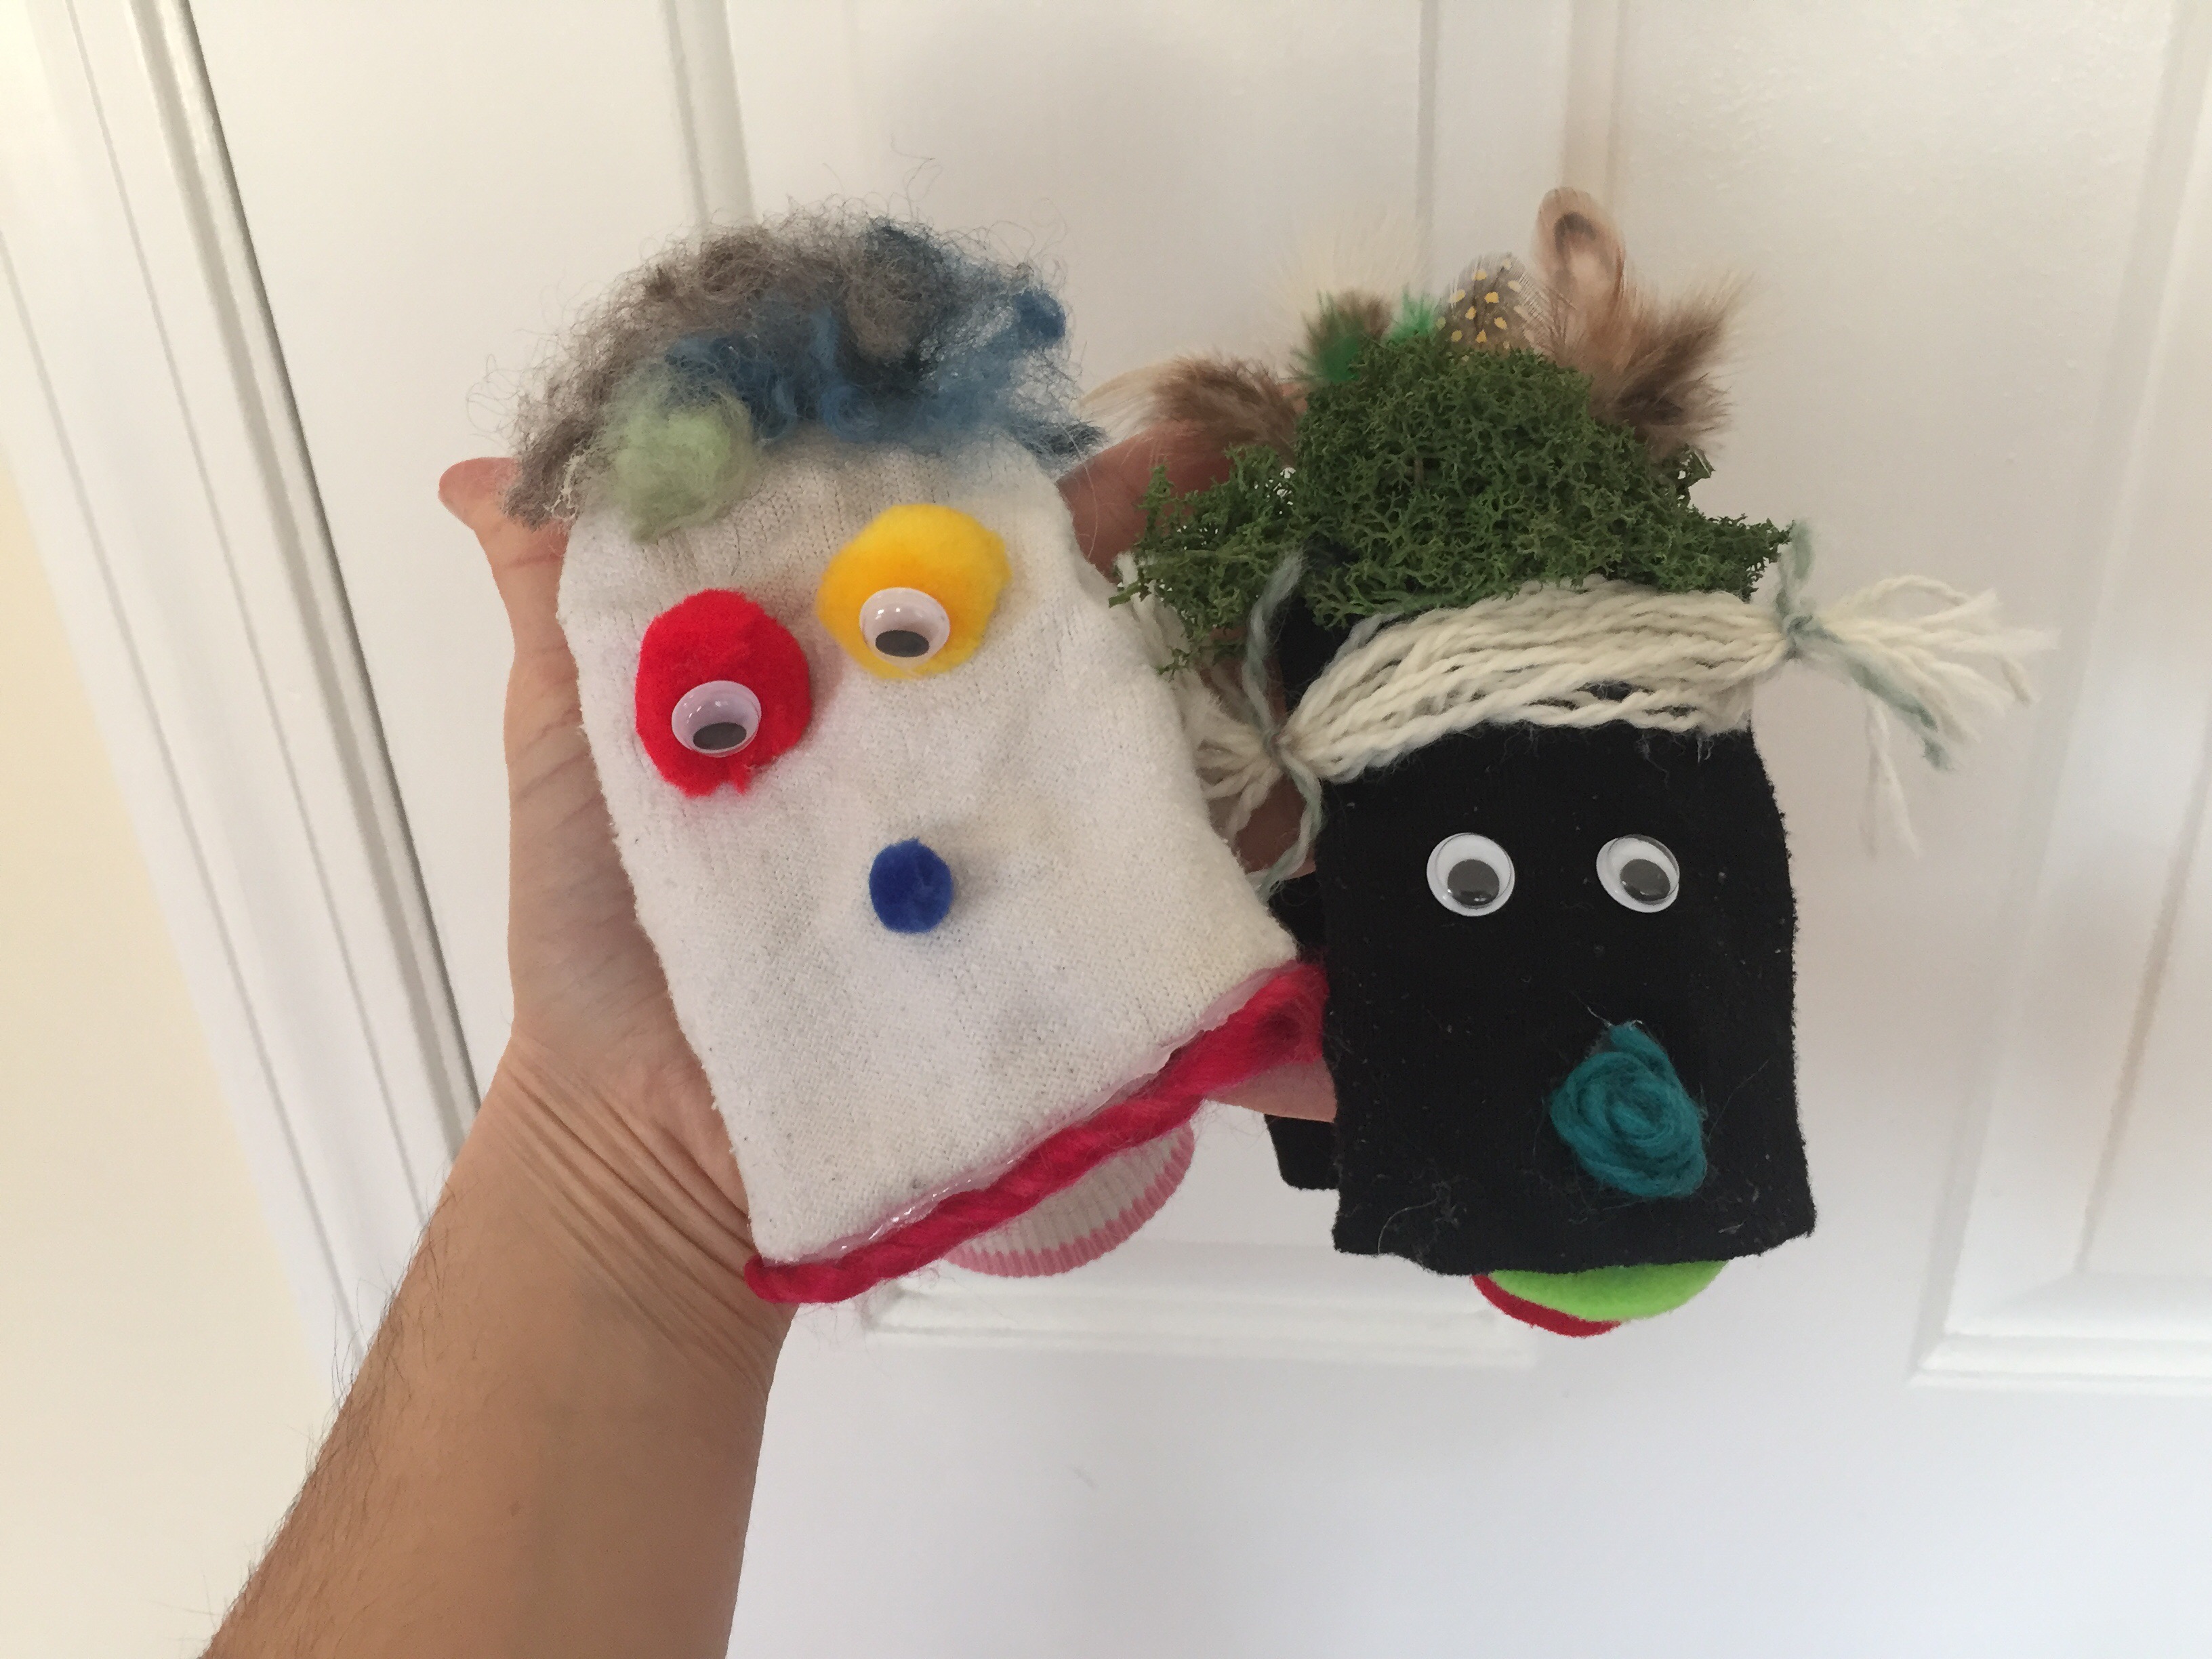
#7: And Voila! You can introduce yourself to your new friend!
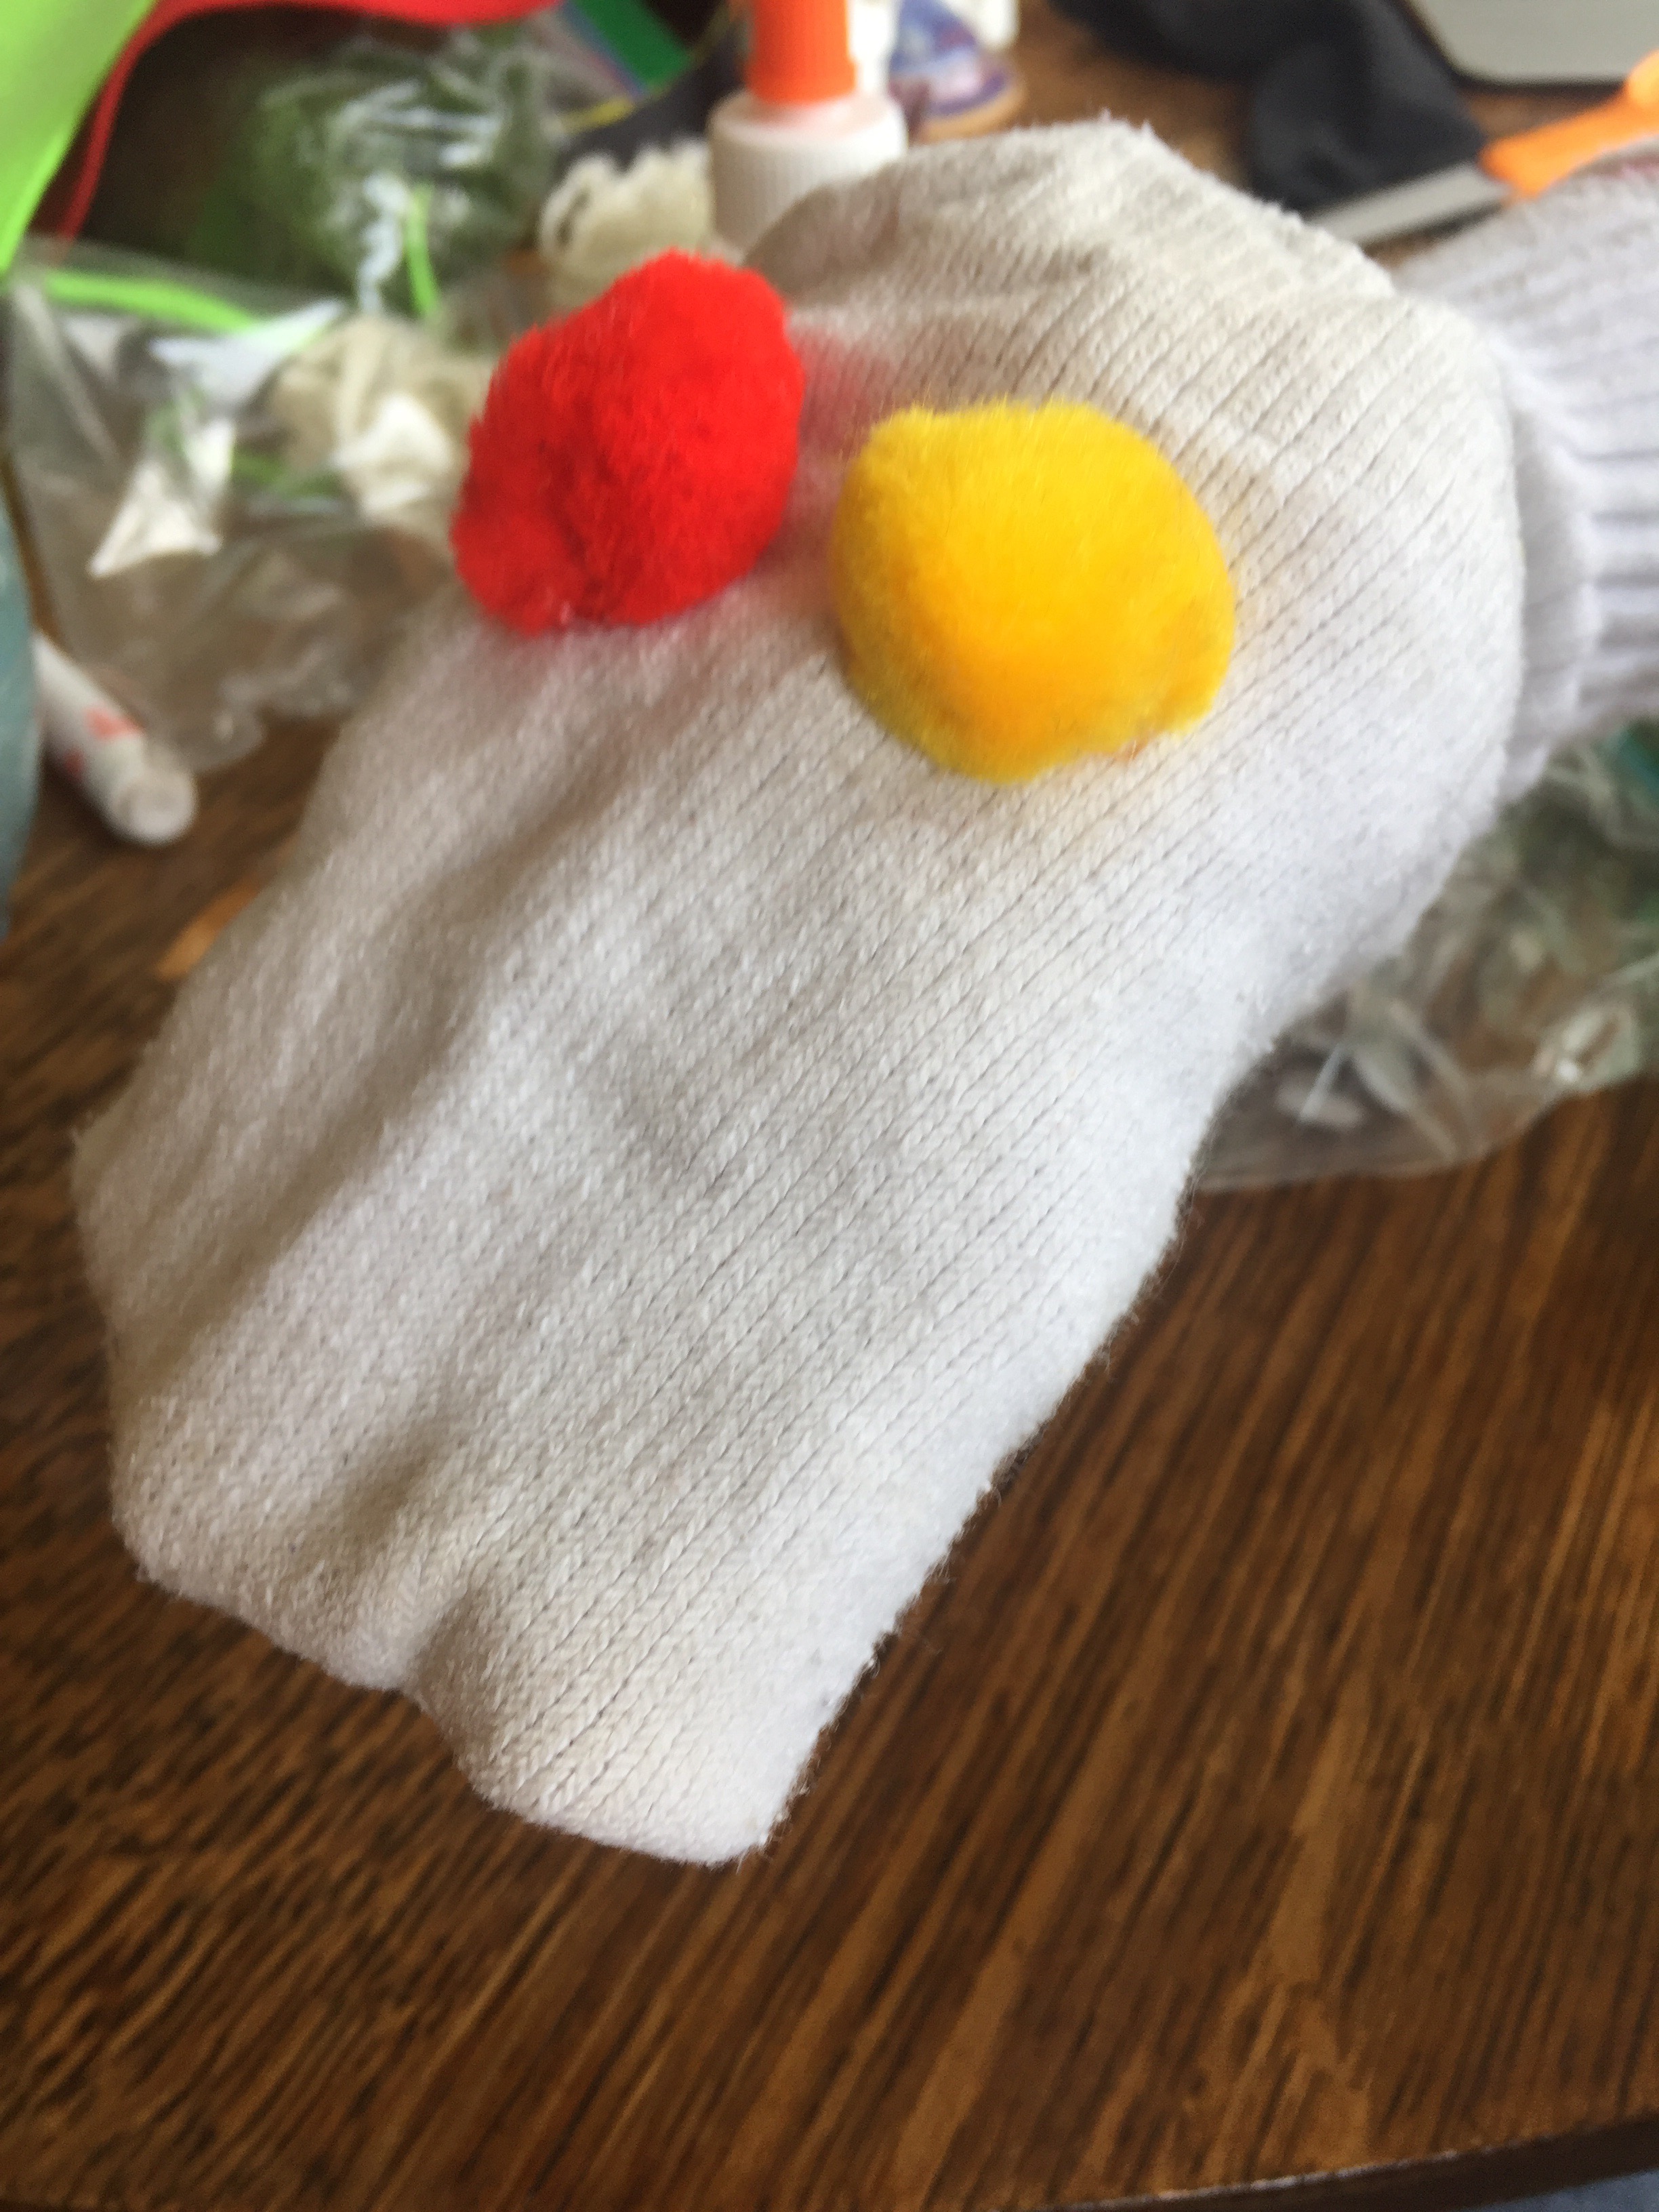
Here’s another one I made with a tube sock.
Ugh, do I need to use bleach?
Nah…
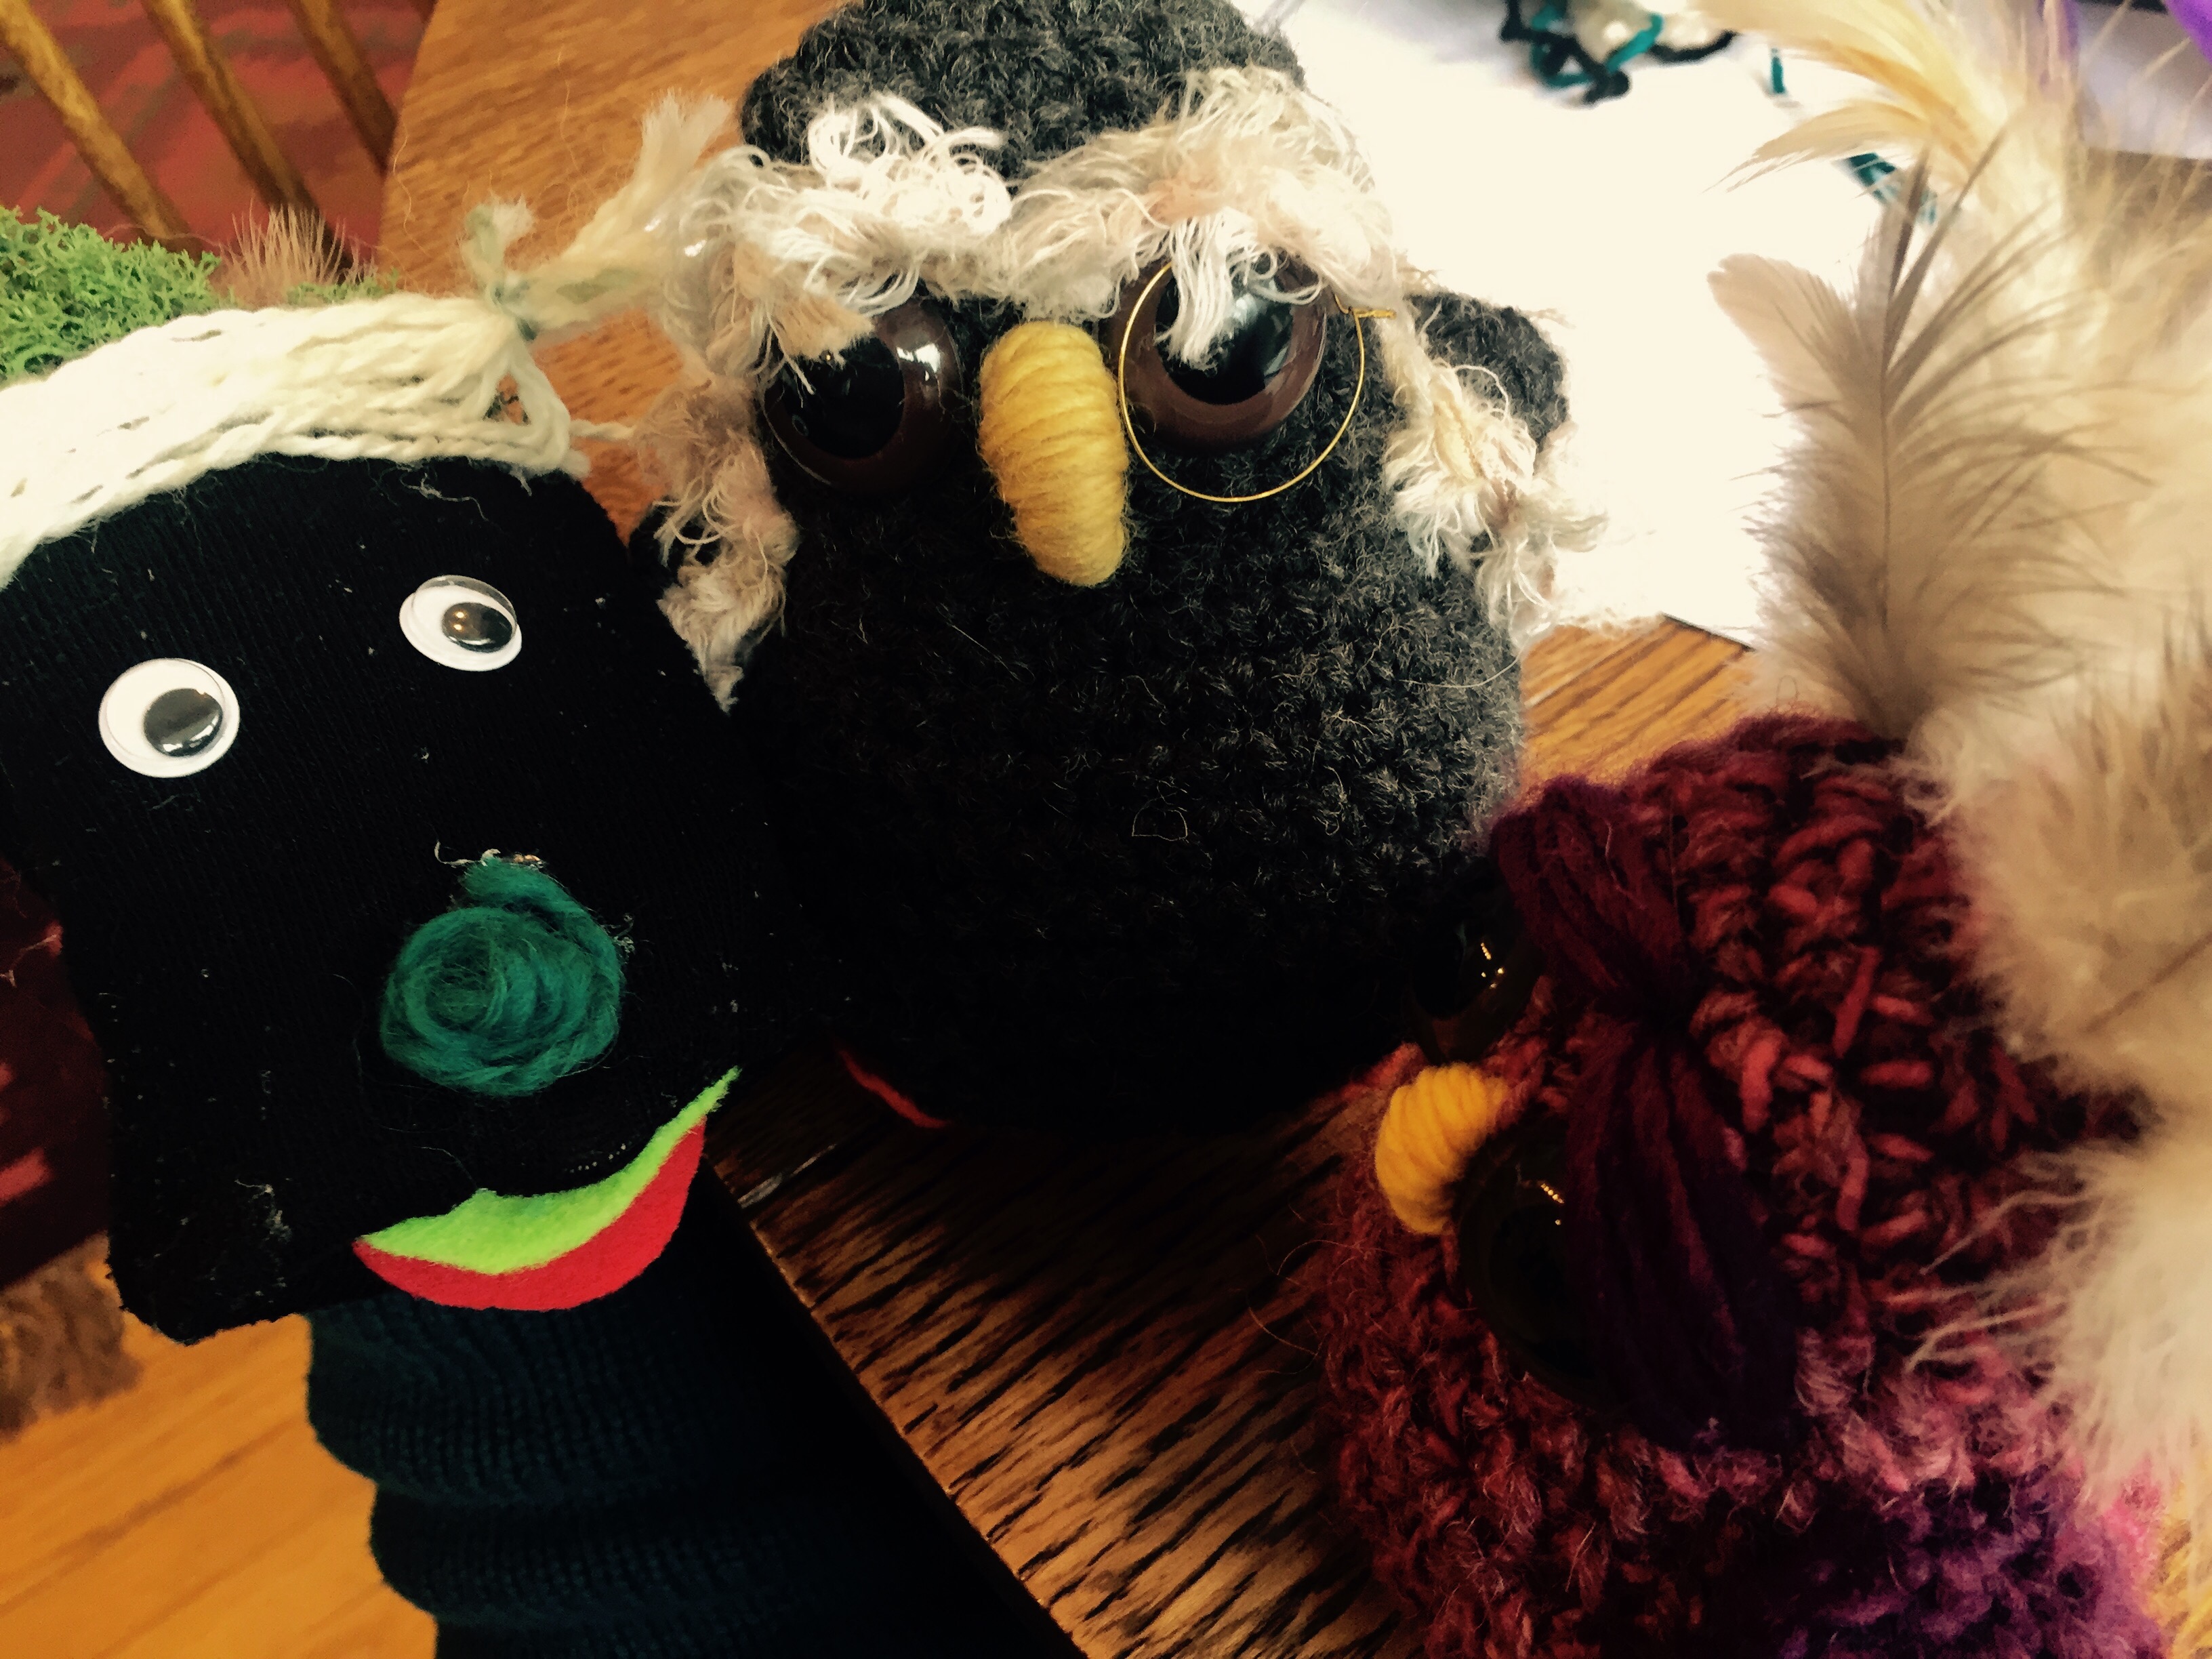
Shiny red yarn for a lovely lip expression. This took a little patience as the yarn needed ample time to dry in order to withstand this character’s rather loud voice.
I can’t share pics of other people’s kids, but I can tell you, we had so much fun that day! These characters come out of nowhere and invite story telling, play acting, and frivolity! Here’s some other perks:
👉 They are inexpensive to make.
👉 They require only as much detail as you feel like giving them. A sock with a mouth on its own is fun. Each thing you add gives it more flavor.
👉 Patience is needed, and flexibility in expectations ~ both good things to practice! Sometimes we gotta wait for glue to dry. Sometimes we don’t know how to make top hats.
My life is organized by school years. I’ve not really had much time in my life when that was not the case. I completed my own schooling when I was twenty-five. Then I worked in schools for six or seven years (I already can’t remember that detail), and then I worked for years with kids in my practice who were in school. Now my own children’s school schedules shape our family’s life. The calendar year means very little to me except for a quiet chance for me to reboot and rethink where I place my energies. The school year, on the other hand, shapes most aspects of our lives.
I spent a lot of time in my kids’ school this year. I volunteered in their classrooms teaching the kids all different kinds of things to do with wool, yarn and other fibery crafts. I also taught the same things in a more official capacity in two other classes. I loved it and I plan to share more here about some of the lessons that I taught. One thing I did in both my kids’ classes was leave a loom set up, the simple kind, for kids to work on as they pleased, with the idea that at the end of the year (or whenever it was finished), I’d turn it into something to decorate their teachers’ rooms with. Yesterday, I finished both of these woven pieces. My son’s 3rd grade classroom filled their loom. Almost every time I went in, someone was working on it.
Here’s their finished piece:
My daughter’s 1st grade class didn’t do many rows on theirs, but I assured their teacher I could make wall-art with it, not to worry. That class also did epically cool stuff with wool they dyed with Kool Aid, wool they felted and wool they experimented with.
Here’s their wool decor:
And, here’s their finished woven wall hanging:
I used antique wooden needles and a sanded dowel to serve as the structure from which the weaving hung. I also had a needle felted little nest hanging around that I opted to attach to the piece. I made that in their class as a demonstration one day and wanted to include it to represent that part of the work they did.
As I worked on turning the woven pieces into wall-art yesterday, I thought about all that has transpired since September, for my children, for me and my husband, for our family as a whole. It’s so much life squeezed into all of these academic months. I reflected on how much my kids learned with their fabulous teachers and with their peers this year, how much more they are doing on their own compared to September, and how much some of our growing pains have been, well, painful. I thought about how lucky I am to have been able to hang out in their classes so many times this year and be given the chance to learn how to teach better, listen better and be more flexible. And, I thought about how much I want to keep doing this. Handcrafting and fiber art are extremely effective mediums for teaching kids about art, history, creativity and themselves. I hope I do this for a long time.
Fueled by that hope, I cleaned off my work desk, and daydreamed about summer break.
I am so very lucky to have standing dates on Fridays when I teach kids how to do things with wool and with yarn. These Fridays are now known as “Fiber Fridays”, and have become a part of my life I am extremely grateful for and proud of. I think about it a lot, why I want to do this stuff with kids. First of all, I have two kids of my own and I relish any chance I get to participate in things in their classrooms. I get to meet their friends, know their teachers and just be part of their school world for a small time, which is amazing. I never leave without internally bowing to teachers, para-professionals, one-on-one specialists, reading specialists, special educators. They make the world go round, in my book. Their love and dedication to the field, and the skills they have, just blows me away.
Okay, so yes, I love being in my kids’ classes. I also love going into other classes and meeting even more kids and answering questions and getting excited about new stuff. It’s just fun and a beautiful complement to my work as a psychologist. I’m not being a psychologist in any formal sense of the word when I am in with children on Fiber Fridays. However, I am sharing something that I truly believe is deeply healing to the human spirit, and is a restorative practice. Handwork/fiber craft tie humans together in a most fundamentally ancient and organic way, and exposing kids to as many ways as I know how to work with fiber has become a prized part of my career.
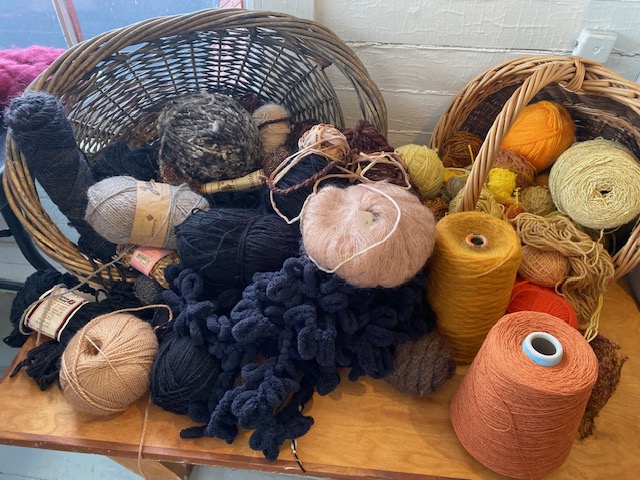
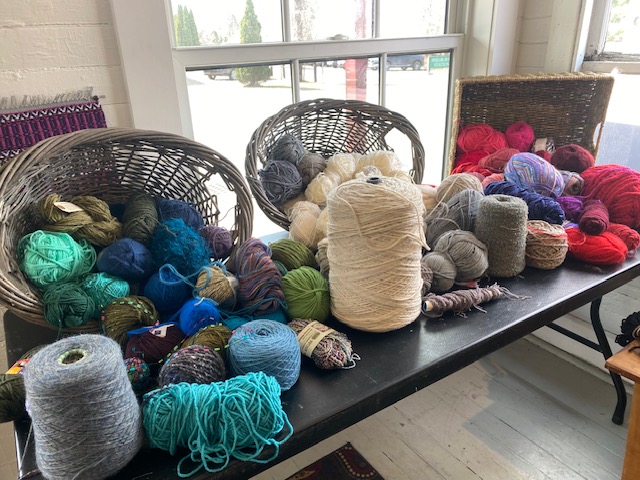
In one of my first grade classes (the one my daughter is in), we’ve been exploring wool. We started with real free flowing exploration. I brought in big wool batts, smaller mounds of wool in a variety of colors, some fabric, some yarn, and a needle felting tool for just me to use, just in case some quick stick-togetherness was needed. I showed the class first different ways we can play with wool. I pulled it apart, I twisted it, I formed it into shapes and wrapped them in fabric and tied yarn around it. I encouraged them to just play and sculpt and imagine, and I let them know that there were no specific things they had to make at the end. Each table got its own basket of a big assortment of wool and then, it was off to the races! I was actually amazed, and I learned so much that day of free wool play. Children made babies, cradles, nests, birds, balls, clouds, old ladies, and animals. They played and laughed and shared. For some reason I was really worried that they’d be confused or adrift without a specific goal in mind, but I was wrong! They were happy to just go for it! I was lucky to have plenty of help from the teachers and a parent volunteer with cutting fabric, wrapping, needle felting and tying. It was peaceful and joyful. I do believe working with wool is magical.
Two weeks later in the same class, I referred back to our previous experience, and said, “this time, we are going to experiment with wool mixed with soap and water!”. Our project was to make felted balls. Before we began, I first showed them balls I made at home. I also showed them my “oops” items… a disc that was supposed to be a ball… a nest that was supposed to be a ball… a weird creasy ball that was supposed to be smooth. You know, it’s kind of hard, at least for me, to get a wad of wool to felt into a perfectly smooth felted ball with just warm, soapy water and your hands. I don’t know how Martha Stewart does it!
And we talked about having one idea in your head when you go to make something and how sometimes it doesn’t turn out like that. I told the kids that we are learning, experimenting, having fun and seeing what comes out of our efforts.
On the floor I had set up a drop cloth with towels covering it. On that were six plastic mixing bowls, two with soapy water and four with clear water that had to keep being replaced as kids dipped their creations into them to rinse the soap.
Water + Wool + Soap + Being Okay with Oops = Felting
Balls were made. Some were smooth. Some were crinkly and seamy. We got a mushroom, some discs and some wild looking blobby alien life form planets, or maybe coral? I saw a bunch of children totally okay with experimenting and just seeing what happened and I think that right there is a major piece of wisdom gleaned from mindful handwork.
Freedom to experiment and see what happens, within one’s own heart and spirit, is such a beautiful thing, and it’s something that I think we all should tend to as often as we can. I am often guilty of hanging on so tightly to what my plan is that I forget to see what’s actually happening right in front of me. I forget to loosen my belly and breathe and just let things be as they are. It’s so easy to forget that.
You know what else blows kids’ minds about wool and felting? With some simple ingredients and some agitation, soft and fluffy wool is transformed into felt and it is impossible to return it to its original form. I can’t explain why something so obvious is so mystical and amazing to kids, but it is, and I need to meditate on the symbol.
Stay tuned. I’ll be sharing more projects and ideas and insights from this cool gig I have.
Before I share how today’s rock felting project went in my daughter’s kindergarten class, I must first publicly bow to teachers. A deep, humble, grateful bow. You are amazing. My daughter’s teacher knows her students so well, created a wonderful set-up for the kids to move through as they waited for their turn to felt, and she celebrated their accomplishments and efforts. She is wonderful.
Today went beautifully. I arrived early and went through some of my books as well as found some books in the school’s library that were fitting for the class, for show-and-tell and for a bit of inspiration. While I sat there, something clicked for me. I felt like I was doing exactly what I wanted to do in that moment. There was no energy consuming worry. No shoulds bothering my psyche, and no pressures whispering in my ear. I’m trying to create a bridge for myself between my training as a psychologist, my passion for working with fiber and my strong desire to be with my kids. I’m not going into the classroom with my psychologist hat on in the traditional sense. Not at all. Where psychology and fiber marry for me is in the process of doing, the benefits of making, and the bounty that comes from transforming such an organic substance into something else.
When my time in class began, we all sat in a circle and I let the children feel wool. They could pull it apart, smush it together, twist it and ball it up. They got to see how it pulls apart so easily and is fluffy and light. Then I passed around the felt from a felted rock that I made a while ago. It was cut in half, so they could see how stuck together the fibers were. They pulled on it, twisted it and tried to rip it but couldn’t! I told them that they were going to transform the same kind of loose wool they were just playing with into the felt that they could see on the example rocks I brought. I said that they were going to do some magic. That felt pretty exciting.
Then I shut up. It was go-time because for sure, my voice going on and on about too many details was NOT where it was at!
We ended up setting up the process in the following way: I was at a table that could seat up to six kids. I had the rocks, the wool, little nylon footies, a bowl of very warm, soapy water and paper towels. I laid out a base layer of white roving in front of each child as well as myself. Then I showed them how I lined up the second layer of wool on top of the base layer. I had a variety of colors to choose from. Children were able to pick the colors they wanted and for the most part, did not put on too much, although sometimes it was hard to resist. I definitely found that two layers of wool was plenty for the small size rocks they had.
Then they flipped it all over, laid their rocks on their wool and began to wrap their rocks. It did take adult help to hold the wrapped rock securely while putting in into the nylon footie. I got the footies here. Then, they dipped their rocks in the warm, soapy water and I showed them how to rub them all around. After that, they moved to another table with a parent volunteer who had another bowl of warm, soapy water. They continued the process for a few rounds. She had the brilliant idea of singing songs as they rubbed their rocks. I hadn’t thought of that, but now I will! It really kept the kids going and engaged in what they were doing. After about 8 to 10 minutes, I brought over a bowl of cool water for the kids to dunk their rocks in and we helped them to peel the nylon off their rocks. The nylon had become a bit stuck to the wool, but with adult help it was okay. I think if it were a smaller group, I’d have stopped them sooner, removed the nylon and just let them rub directly onto the wool, but these were quick moving groups and I couldn’t get to it all. The second group finished their rocks at the original table with the volunteer and I moved to the other table to get the third group going. There was a bit of movement, for sure, but with the adults working together, I’d say it went very smoothly.
I have to say, seeing each rock actually come out felted was awesome. I was even a little surprised. I think a part of me was waiting for it not to work and for someone to experience massive disappointment, but that did not happen! Some rocks were completely covered while some had some bear spots. It really seemed like if there was too much wool around the rock, it was more likely that it would slip around during the felting process. Some were smooth, some were chunky, and some had little woolen “tails”. What I loved was that they did not know about the “perfect” felted rock. Each rock got to just be its own unique, funny, snuggly thing that each child could be proud of.
I think most of the kids were quite pleased with themselves and their little woolen creations! I am so happy for them.