One of the classes I teach at the Shelburne Craft School is called Weaving Your Story. The chance to meld my love of weaving with my passions for healing, growth and creativity has been a true boon in my life. The program is fully grant funded by grantors and an anonymous donor making it cost free for participants. The Vermont Arts Council, being a grantor and a great supporter of the program, recently interviewed me to talk about Weaving Your Story and I wanted to share the article with you here. It captures so much of what the class is about and how I feel about it!
In case you are wondering how weaving and creative expression can be healing, I think the conversation gets at it well. Enjoy!
I think it was around fifteen years ago now that I re-found my love of making things. That energy had been in some kind of limbo state, emerging at times through writing, experiments, and gardening. For these last fifteen years, though, I’ve been in a steady state of learning about all sorts of fiber craft and art. A main passion has emerged, and that has to do with weaving.
The interlacement of all things is an idea, or a reality, that just grabs me. It’s simple and obvious. But it’s also profound and true. I recently wrote this in an instagram post:
One of the things I love about weaving is that is invites our minds to work with our bodies. We can be with humble tools and materials and through the simple act of interlacements, something beautiful can emerge.
To interlace materials is to simply join them in an over and under rhythm. Suddenly, elements are joined when they were otherwise separate. Weaving for me has been a way to be with myself and my thoughts. I follow the directions of the materials and let myself flow with the process, rather than try to control the process from start to finish.
This has been true of my experiences with grief. The more I tried to control grief, the more I suffered. As I have learned to move with grief and let the waves of it interlace with all of the other truths about me and my life, the more I’ve been able to grow with it.
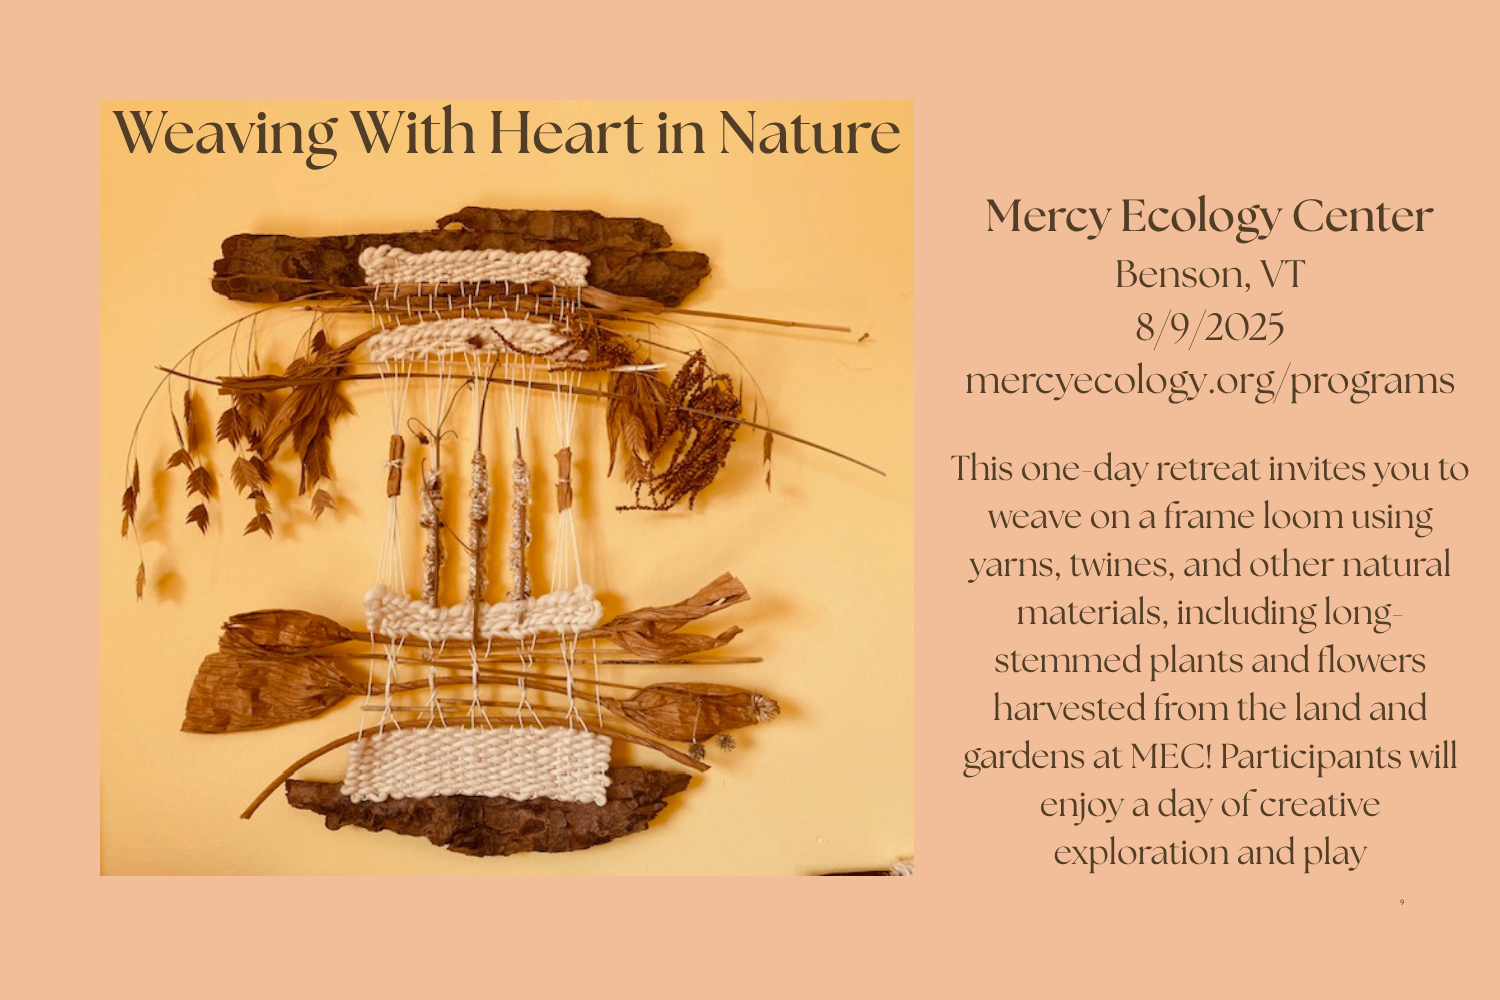
If you told me fifteen years ago that I’d be invited to lead a weaving workshop at such a wonderful place as Mercy Ecospirituality Center, I’d have looked behind me, assuming you were talking to someone else. If you are within a reasonable drive to Benson, VT, and feel like spending a day playing with interlacements, please come! I promise, you will end up with something that you didn’t expect, and that it will mean something to you.
Because I’m getting ready to teach my first online class that involves a lot of videos. And, as I’ve been editing them, I’ve realized, wow, I really do say “ummmm” a whole lot. It’s such a good place holder for my mouth when I need to catch up with my thoughts, but not ideal to listen to! I’m very grateful for iMovie editing features!
I’m also extremely grateful for…
~ The chance to bring Weaving Your Story to more people~ this is a class I built, drawing together my passions from years of work and study, both as a therapist and as a weaver. I feel so strongly about what weaving offers to people, aesthetically, emotionally, in community.
~ The Shelburne Craft School, and especially its director, Heather Moore, who right out of the gate expressed interest in the way I use weaving in my work with people, and wondered if we might build a class around it. And that’s just what we did! Through that process, I’ve learned about writing grants and partnering with other organizations, while expanding my own skill set as I’ve offered this work to a larger group. I’ve also gotten to teach a dear friend and colleague, Ali Waltien, how to offer Weaving Your Story in her work. How amazing!
~ An anonymous donor who has made the class available to even more people.
~ Weaving Your Story participants who take the leap into weaving… well… their stories! This takes courage, patience, trust, and flexibility, and with every single group, I learn and grow.
~ My daughter who has been helping me learn how to make and edit videos, export, upload and put into the airwaves the online version of the class.
That all reads like an acceptance speech! Seriously though, I’d be remiss to talk about the Weaving Your Story classes without expressing all the gratitude I feel for those who have given so much to me, so there we are.
Now, back to editing my videos! If I can reduce my “ummmmms” by 75% or more, I think it’ll be okay.
Weave me a rope that will pull me through these impossible times.
I’m delighted to share that an article I was invited to work on with the director of the Shelburne Craft School, Heather Moore, has been published in the IMAG #18 periodical from InSEA publications. It’s called, “Who Cares How it Comes Out? Pinhole Camera as Teacher and Muse”. You can find it here! It was a marvelous process, working on such an important-to-me project. The more I think about creativity, the more I think it is an essential and critical part of being human and that it ought never be treated as an afterthought. We’ve, as a species, been articulating our ideas and inspirations for millennia. To be able to think and write about how the creative process fosters community, empathy, enthusiasm, and engagement was a real pleasure. I hope you like it!
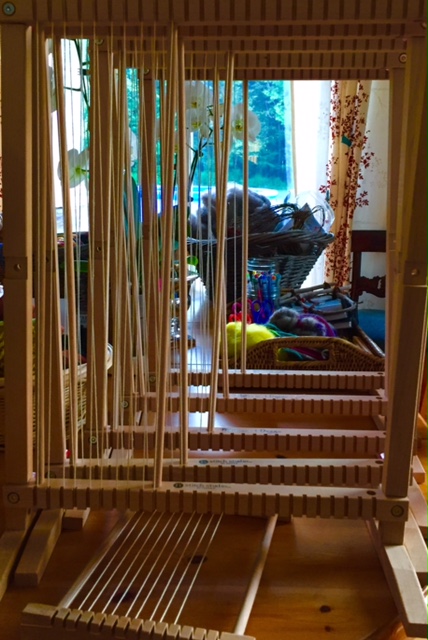
I haven’t been able to weave lately because of a back/neck injury I sustained one month ago tomorrow. As I’ve worked to get back in touch with my body and what it’s communicating to me (if only I’d listen!), I’ve been thinking a lot my looms and which one will be my entryway back into weaving.
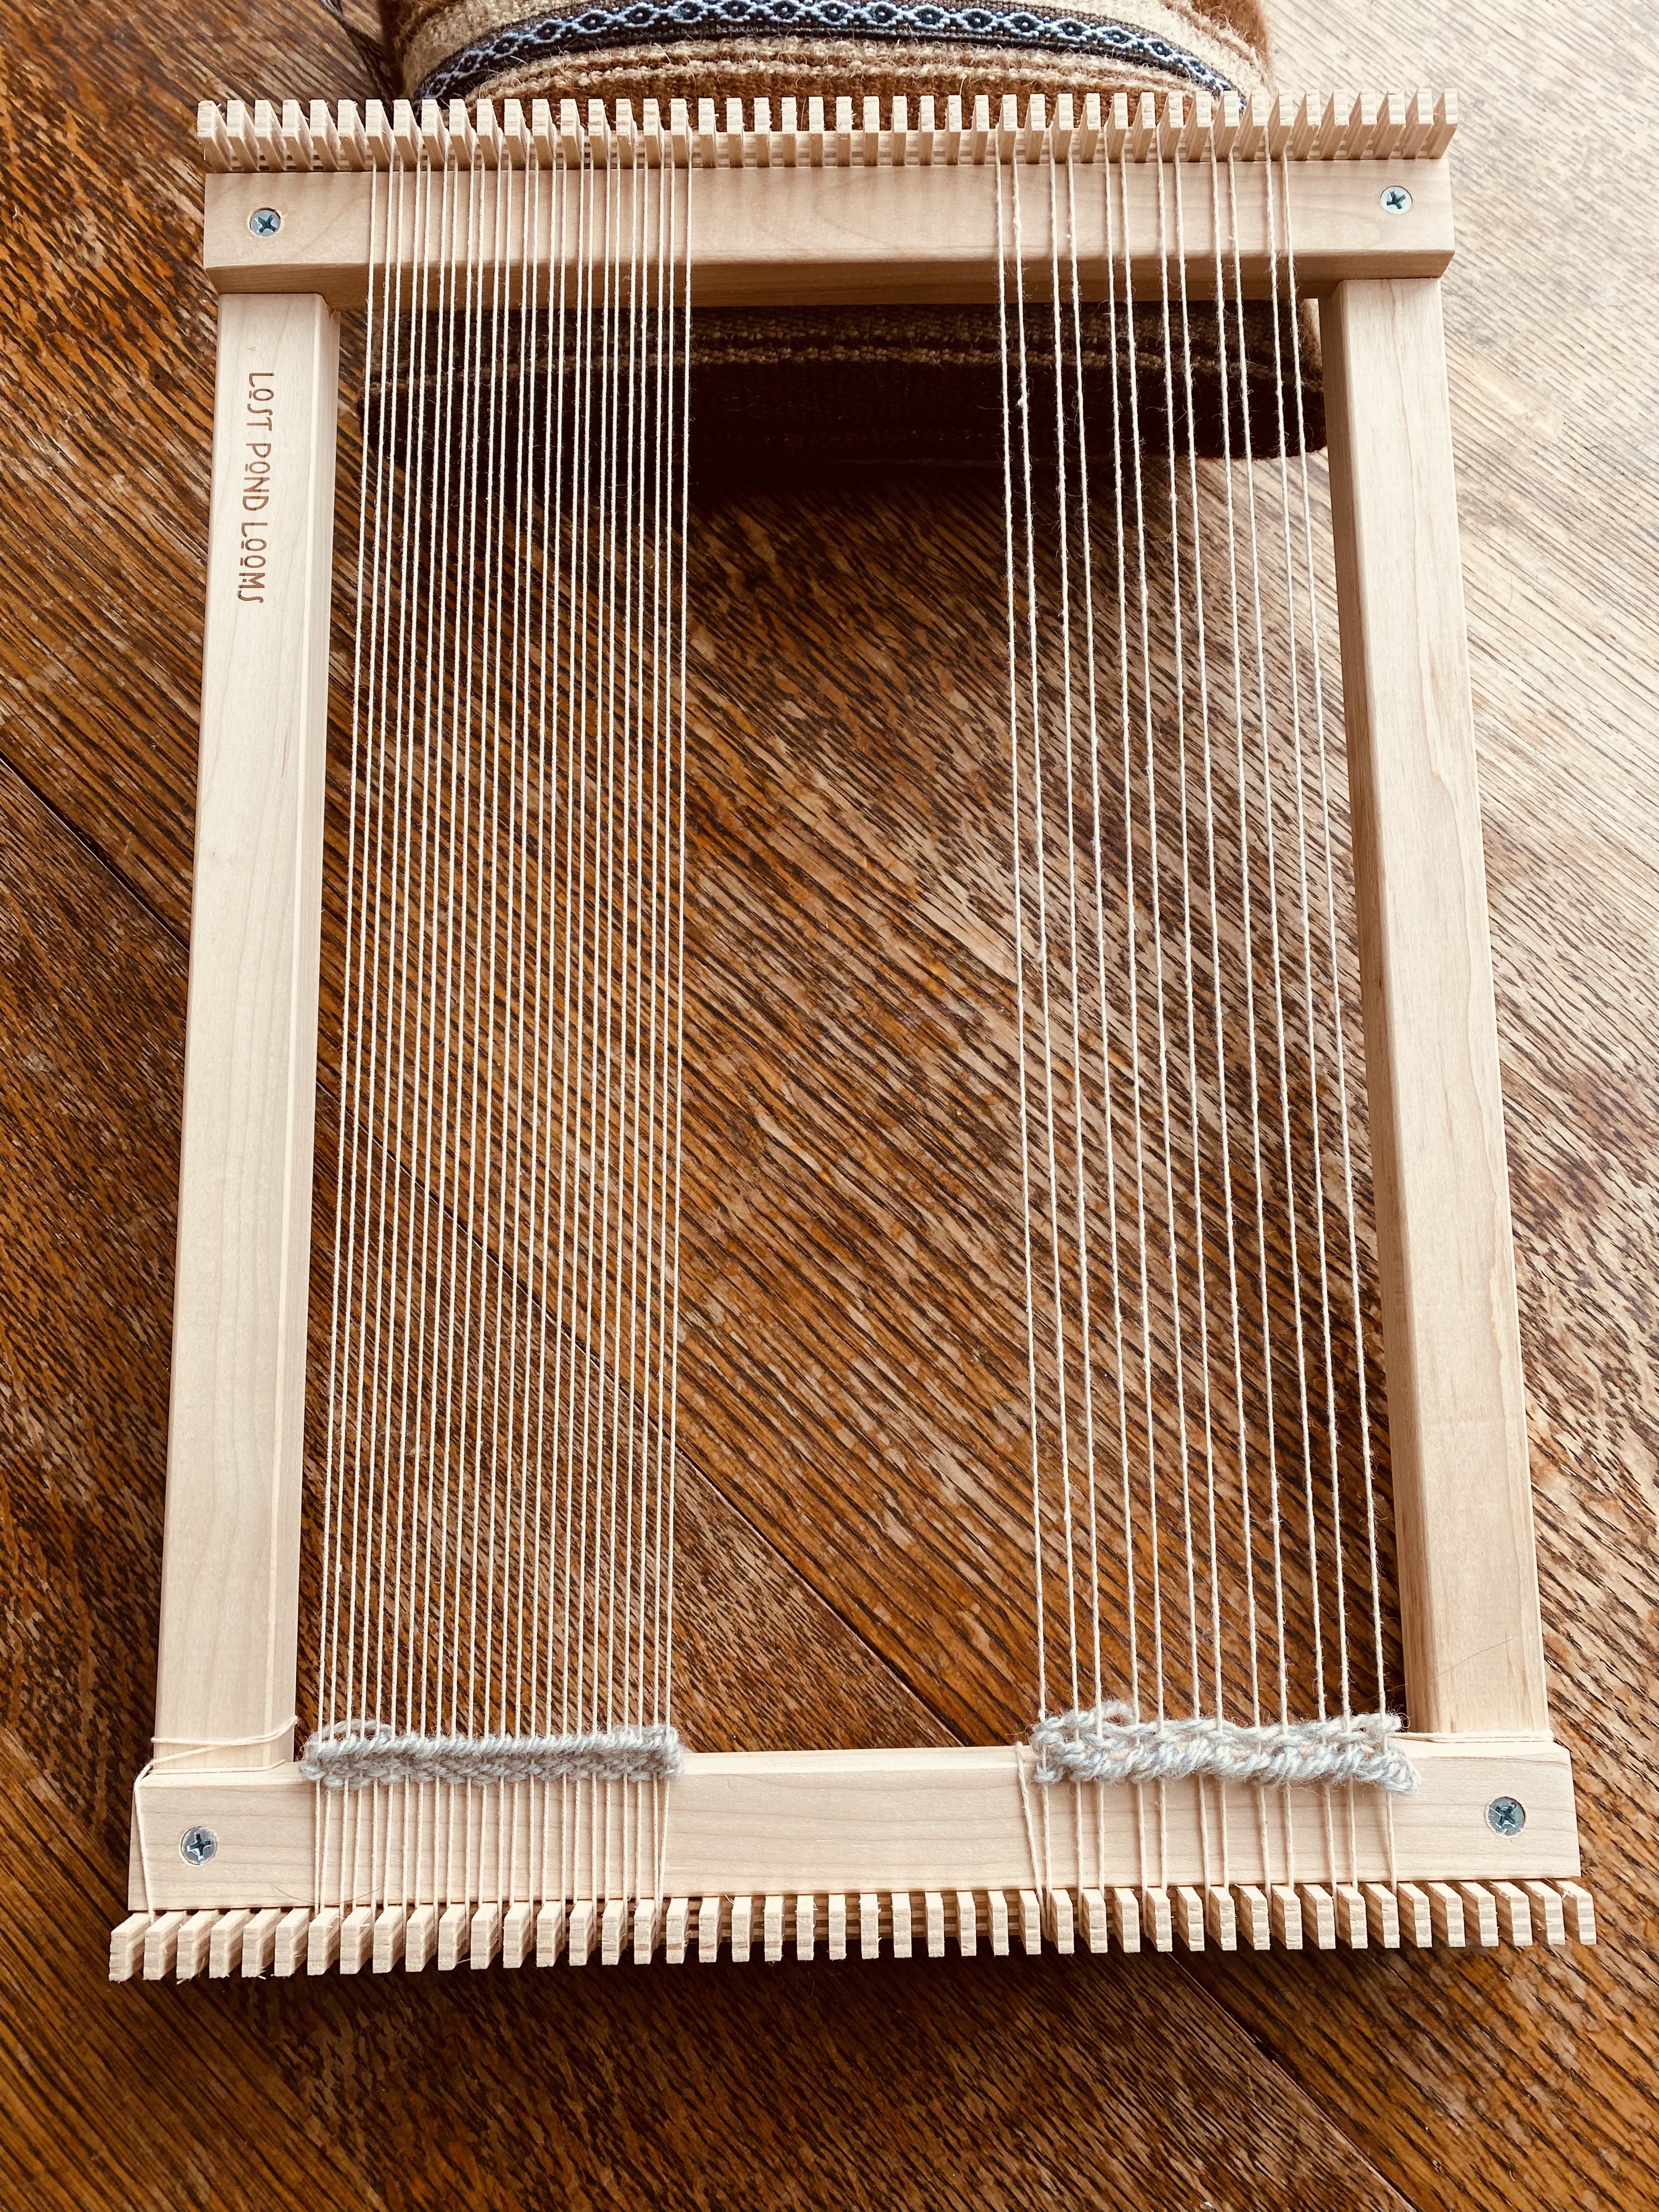
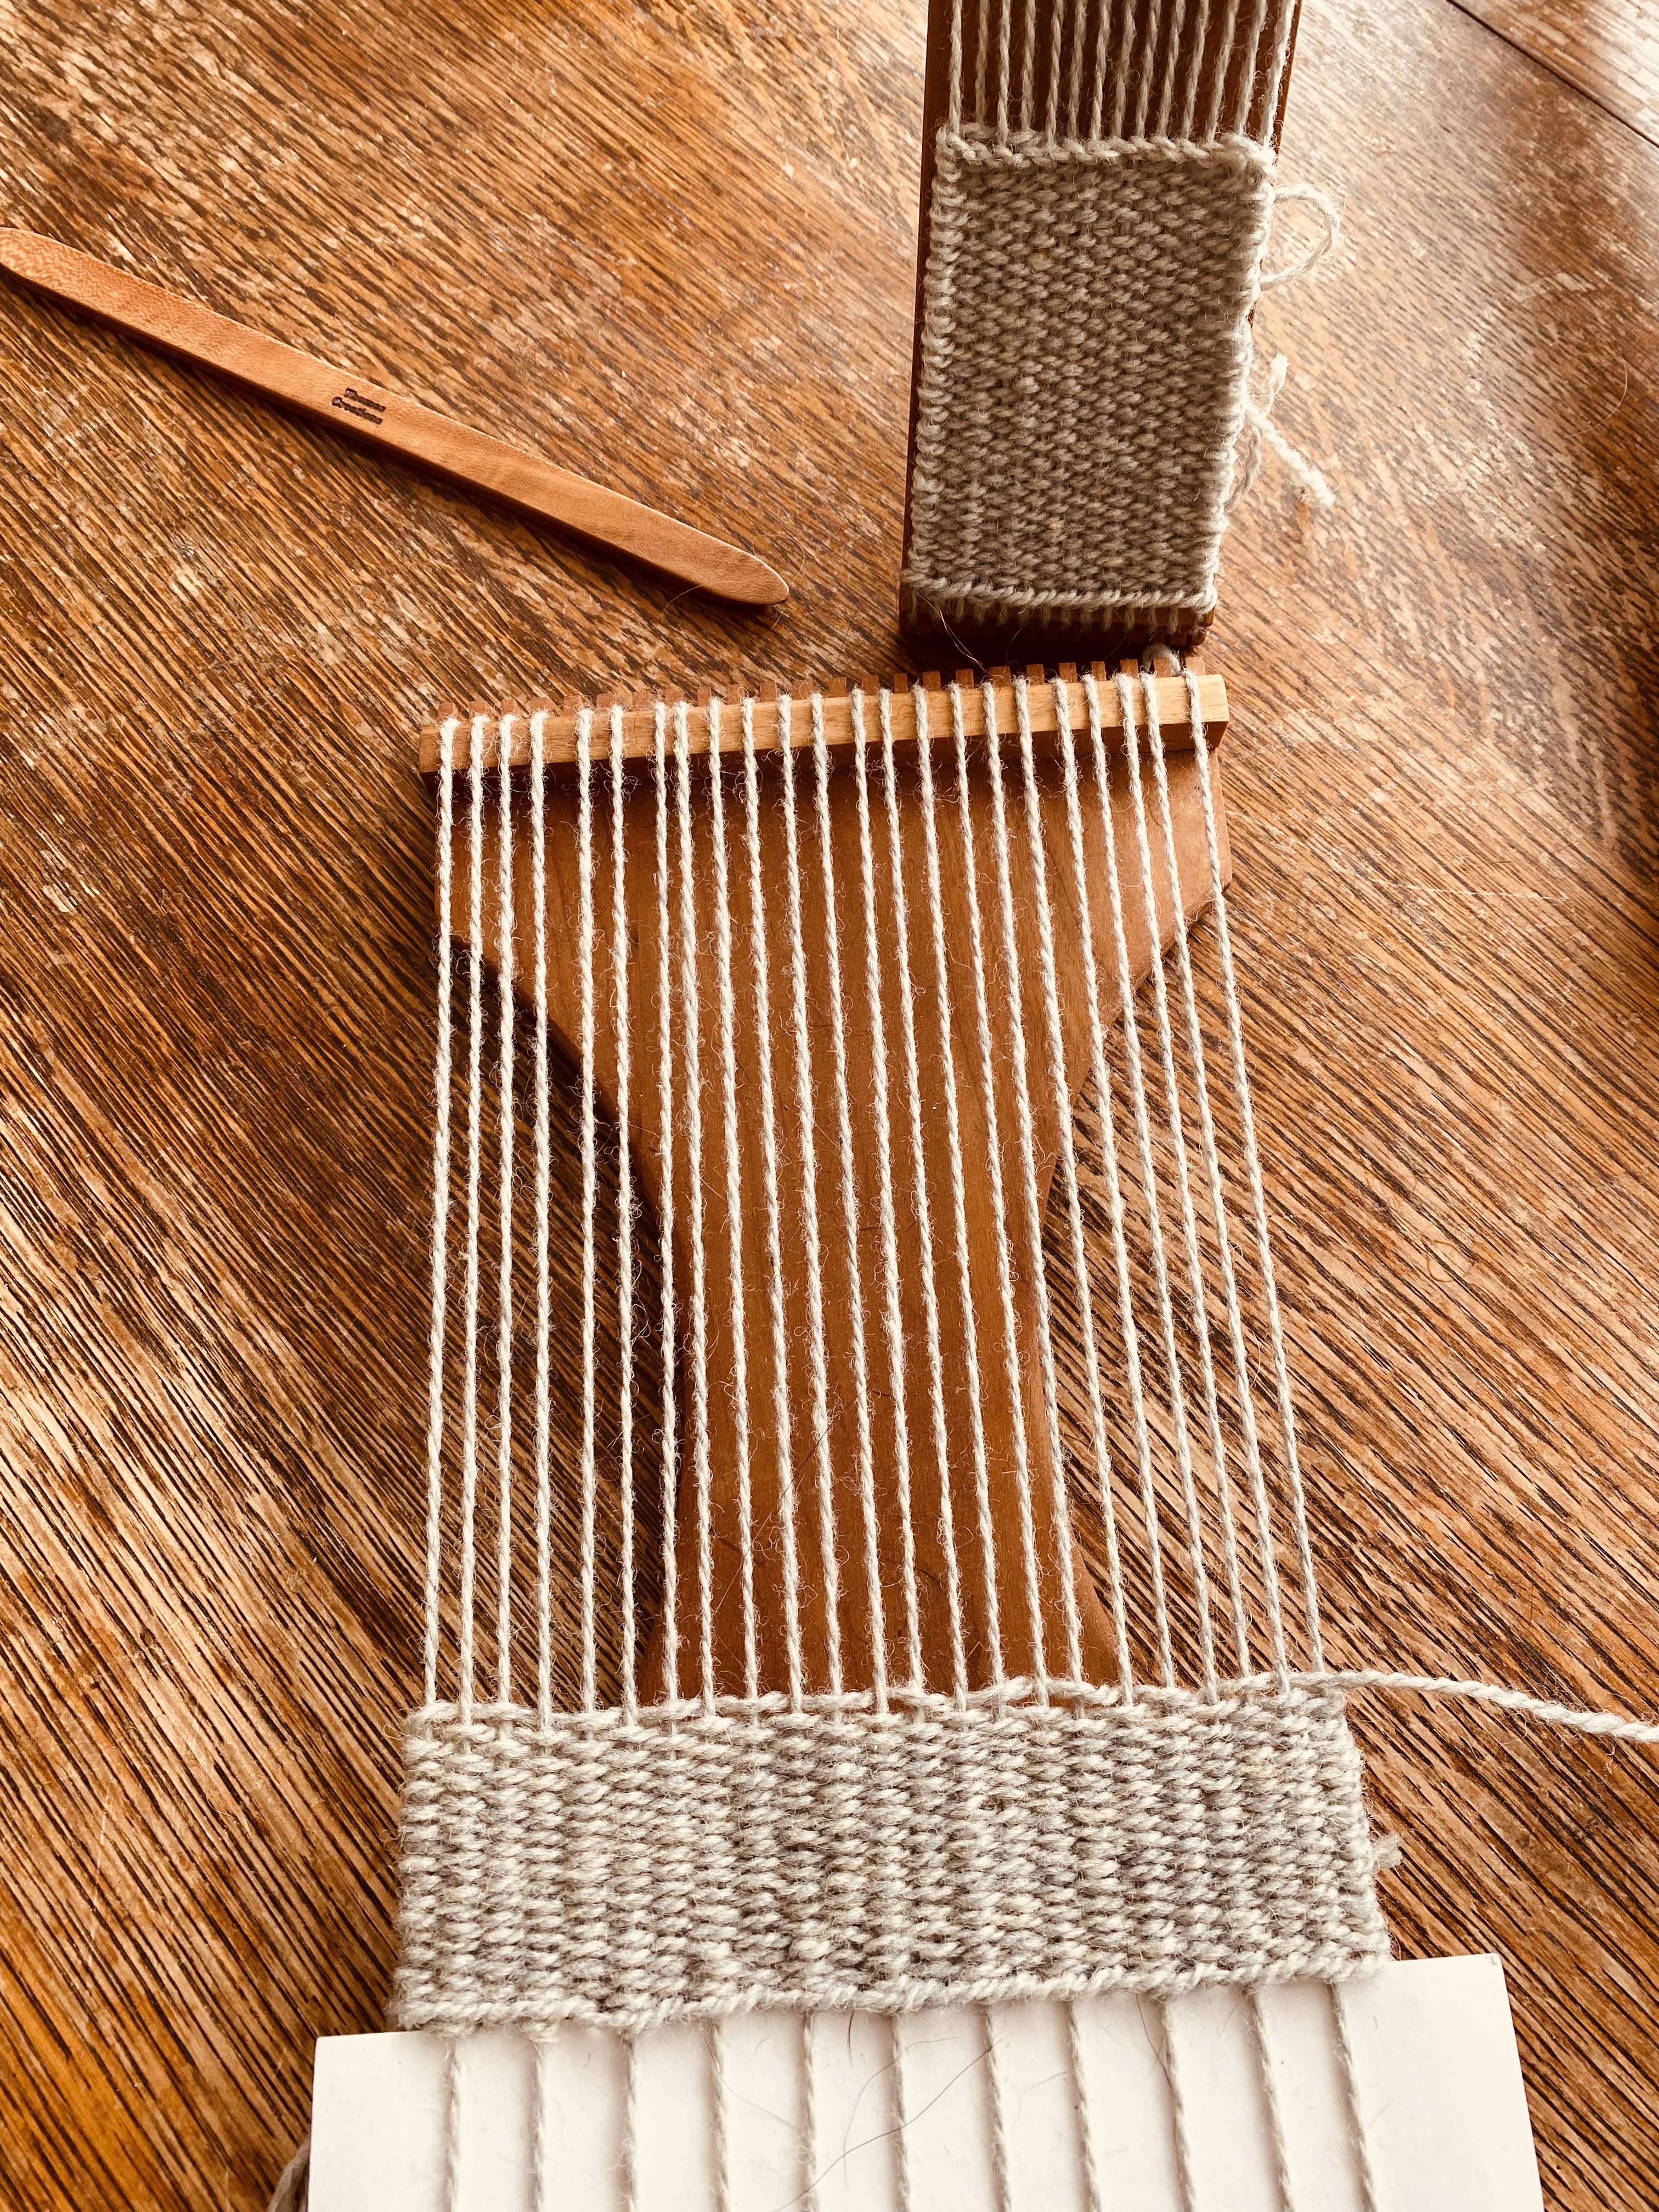
I think for the sake of my back, I’ll start weaving again on this wonderful one from Lost Pond Looms. I am planning on using this loom in both my Introduction to Tapestry Weaving Classes and Wild Weaving classes, as we phase out the ones we have been using. I like this loom because it is super strong and allows for different warp spacing. I also love that we are buying it directly from the person who makes them, and he’s from the next state over in NY.
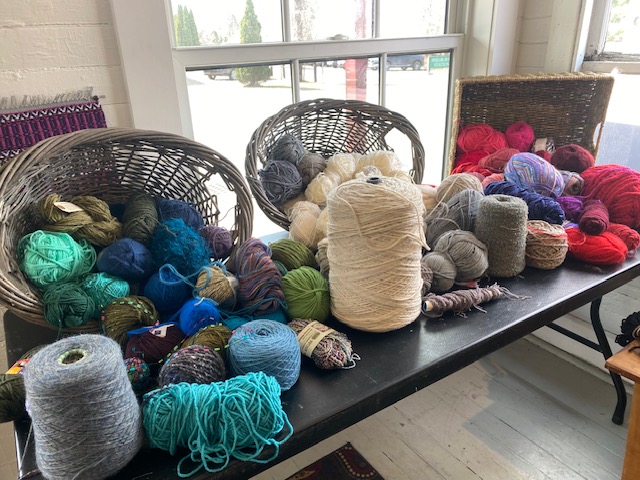
So, taking it slow, and learning ever more to listen to the language of my body and woven form itself. And in the meantime, I’m circling my weaving tools, thinking about what they will hold soon, and looking forward to picking up my yarn again.
Something very exciting is happening here in Shelburne, VT, of the fibery, weavy, yarny brand. On this rainy Memorial Day Monday, I’d love to share the news with you.
A couple of months ago, I received an email from the director of the Shelburne Craft School, a wonderful woman named Claire, letting me know that they were bringing weaving back to their programming. Oh my… she had me right there. It was an incredibly welcome email to receive for reasons big and small. In it, Claire explained some of what she was hoping to accomplish and asked if I would I like to talk. Truth be known, I would have jogged my pandemic-fatigued self to her right then and there, but I tempered that urge and like any mature grown up, set a date to meet in my studio nearby on a later date.
When we met, it was difficult for me to contain my enthusiasm. I listened to what Claire’s vision was and marveled at the fact that soon, Weaving and Fiber Art would be offerings at the Shelburne Craft School again. The school had a strong weaving program decades ago. I’m unclear as to why it was stopped. I’ve only heard whisperings about “the day the looms left”, or something like that. At any rate, as we spoke, I realized quickly that while I want to be a part of this most assuredly, I don’t have the weaving expertise to spearhead the vision coming to life. But, I thought of my weaving teacher, Lausanne Allen, who has more expertise in her pinky nail than I’ll ever hope to achieve in my lifetime. I let Claire know I’d be in touch with Lausanne we’d see what unfolds.
Well… receiving Lausanne’s response to my inquiry as to whether she could imagine taking on developing a weaving program at the craft school was probably the closest I’ve come to that feeling you get when you hurriedly open a letter from a someone you’ve missed terribly, or the results of some test… I sped read it and laughed out loud and read it again more slowly… not only was she interested, but she was thrilled out it, too! I’d forgotten this, but Lausanne reminded me that she learned how to weave at the Shelburne Craft School in the 80s and right out of the gate, she had so many ideas and questions and wonderings…
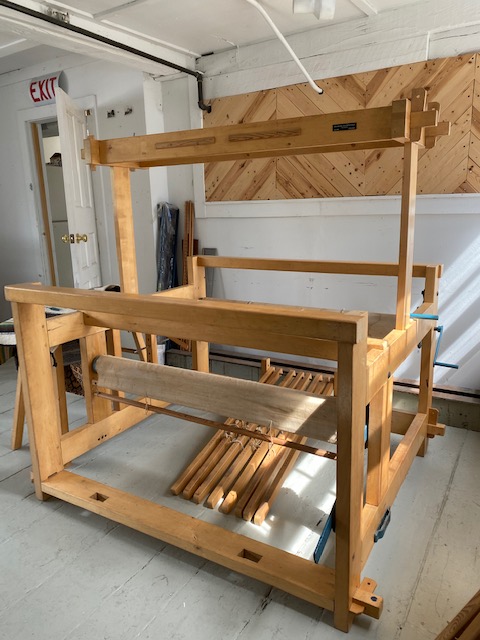
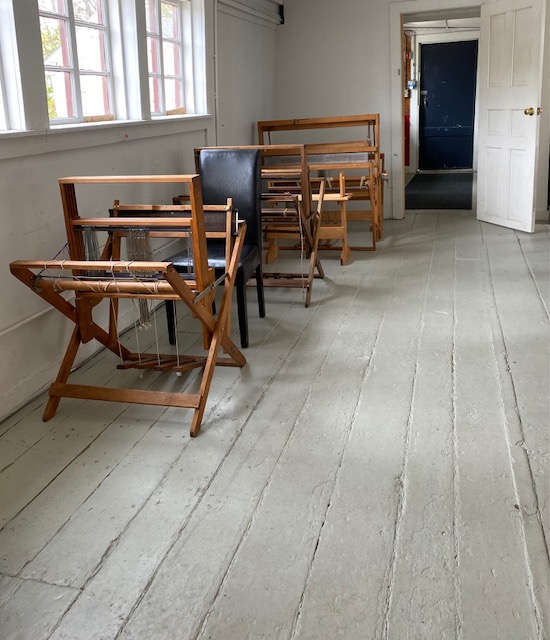
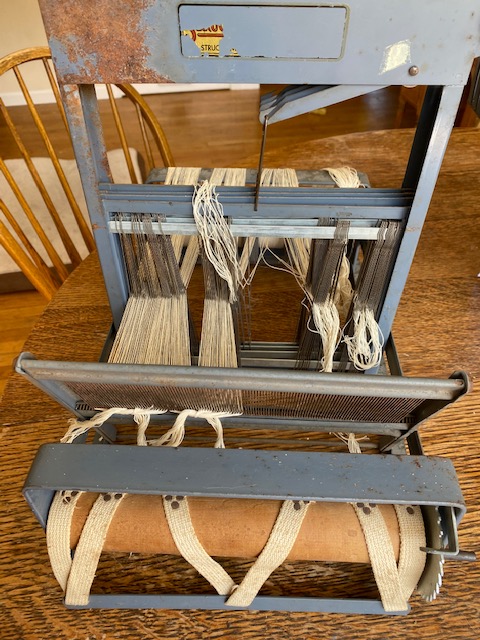
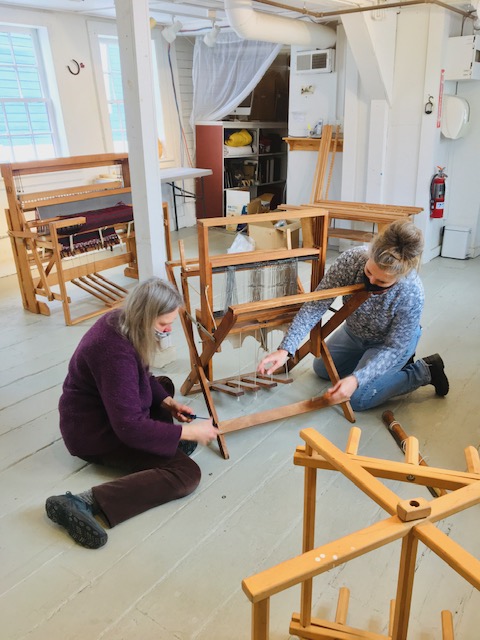
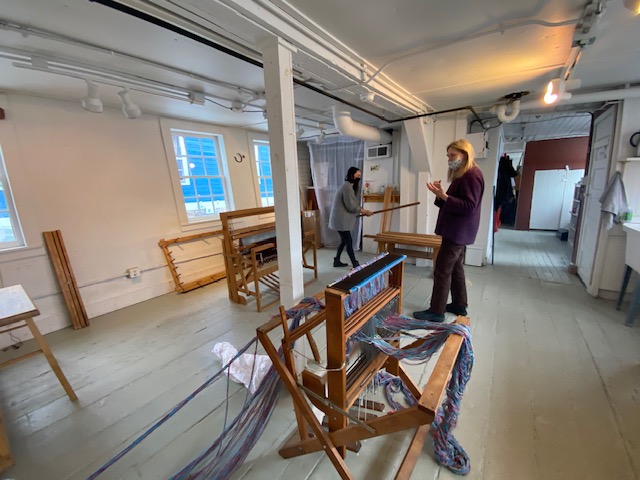
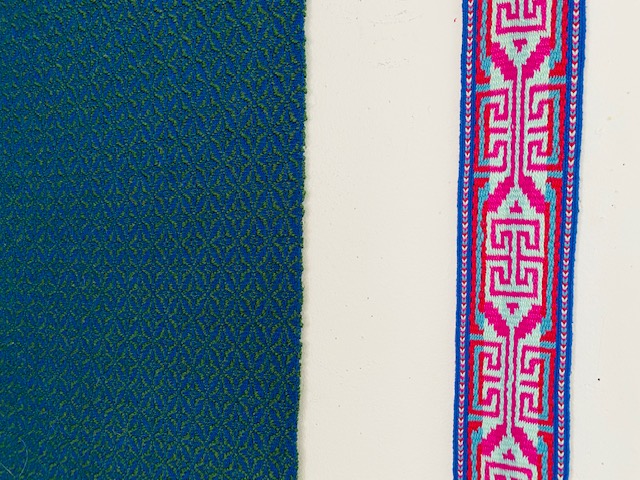
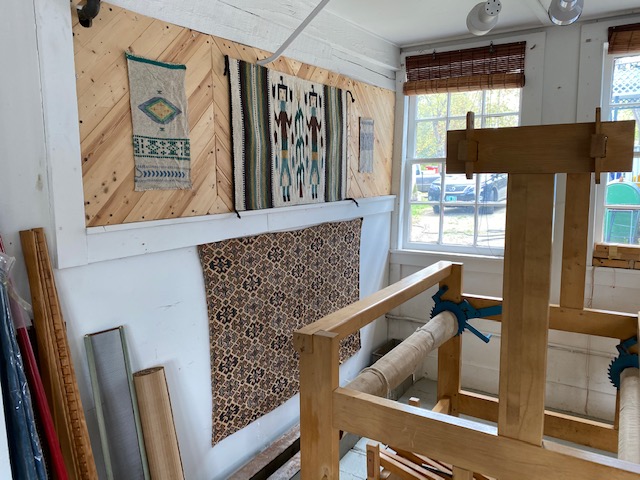
A lot has happened since Lausanne and Claire met. Spaces have been cleared, looms that the school still had from the fateful time the weaving program shut down have been resurrected and Lausanne and I have brought in a couple of our own. The walls have been adorned with Lausanne’s incredible work and other weavings we’ve collected over the years. There’s been cleaning, oiling, de-rusting and untangling. Lausanne has done many hours of research and learning and acquiring of needed items for the school. And me? I get to be Lausanne’s… I don’t know what to call myself… helper? Assistant? Grateful-To-Be-There-Apprentice? I can tell you this: I feel pinch-myself lucky to be a part of this new development in my town, and am thrilled that Claire has the vision she does to bring back such an important part of not just our town’s history, but in my view, an integral part of the story of human making.
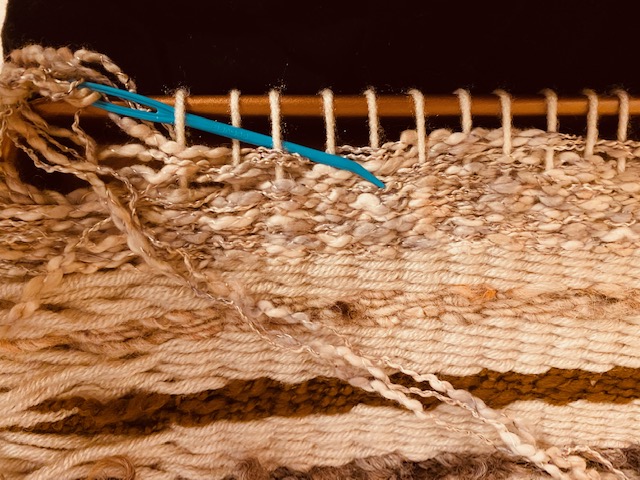
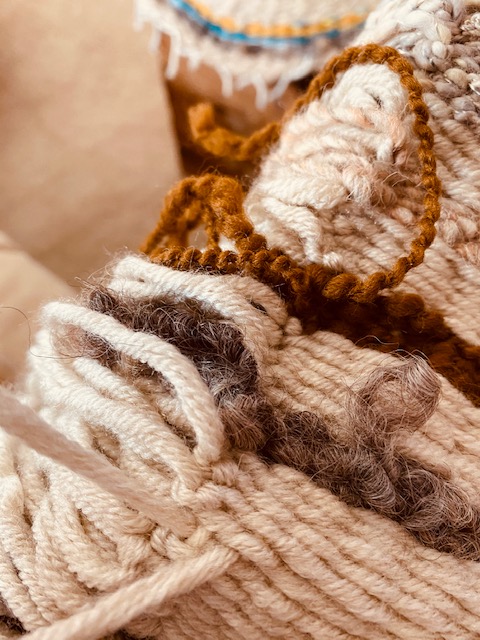
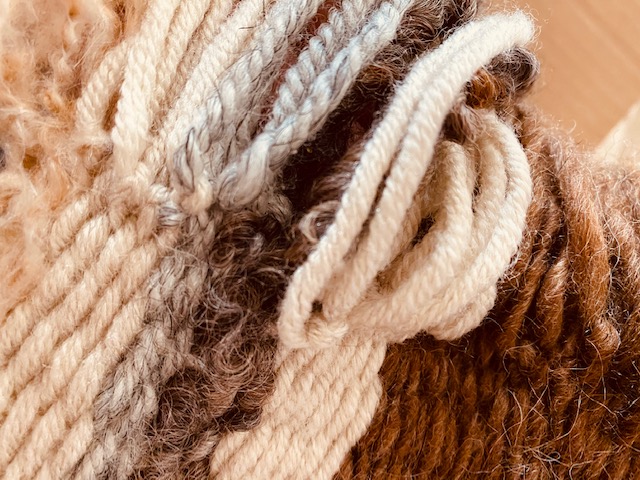
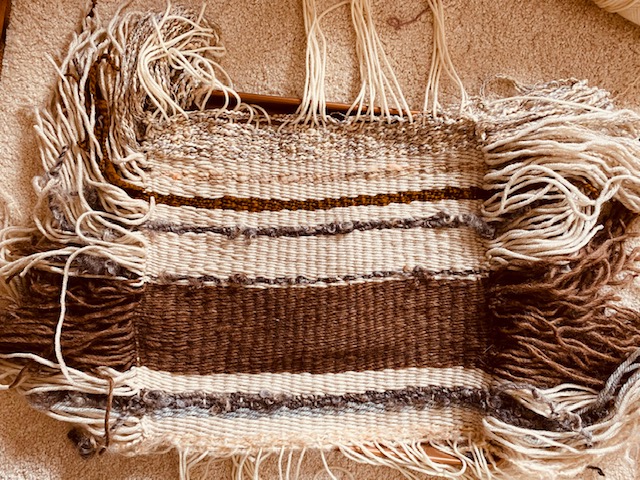
These are some images of the development of the space. Over the next month or so, I’ll introduce each of the looms and share the project that will go on them. We need to get some of them moving after their long hiatus from their purpose.
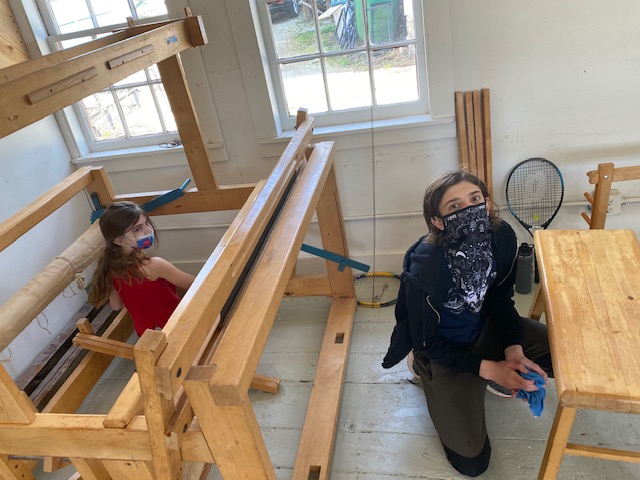
Thanks to my kids for helping to clean!
Heddle measuring!
If you are reading this with a particular interest in weaving and wonder when might things be lifting off ground at the school, I will be regularly updating you here. And of course, check out the Shelburne Craft School’s website to see all of their offerings. It’s a wonderful place to be, and soon the sounds of beaters beating, shuttles flying, bobbins spinning, and voices whispering to cloth will be filling the air and saturating the old wood of the historic building.
Greetings, fellow crafters. In my Fiber Saturday class yesterday, I demo’d how to make a circular loom out of cardboard. Here, I am offering more detailed instructions and a project idea. Many of the kids I have gotten to craft with LOVE circular weaving. In a way, it’s easier than weaving on a rectangular loom because you just go around and around, rather than back and forth (coming back the other way on a loom can be super perplexing to some. What do you do with that end warp thread!) Getting into the flow is easy and you end up with something beautiful at the end.
Quick Disclaimer: I’ve woven many things on circular looms at this point. I’ve often had the experience where I wanted my circular weaving to lay flat, but it curls up instead, or I’ve wanted the piece to be a bowl, but it’s lays more flat than I wished. So much affects the way this project turns out. The yarn or fabric variability really changes things, how tightly the yarn is pulled as it is taken around the loom certainly affects how taut it becomes… Things I always stress with this project are: have fun, the goal is not to adhere to a rigid idea of what you want but rather to play with colors and textures and see what you get! No matter what, it will be beautiful. For elementary kids, the book Beautiful Oops, by Barney Saltzberg, is a great companion to this project. I also love the book Ish, by Peter H. Reynolds.
To make a bowl on these looms, you do want to pull a little firmly on the yarn, especially as you reach the edges of the loom.
One more thing! This is a great project for kids, but elementary age kids will likely need adult or older kid help with the construction of the loom and the step-up.
Materials:
cardboard- the flaps of cardboard boxes are plenty strong enough
yarn for warp
yarn, fabric, ribbon, string, jute… whatever you want… for the weaving
marker
strong scissors
tape
round things that can be used for tracing a good circle- must fit on the cardboard
tapestry needle (or a sewing needle with the very large eye, or, you can even use a paperclip- just find the smallest one you have and tie the end of the yarn to end of it)
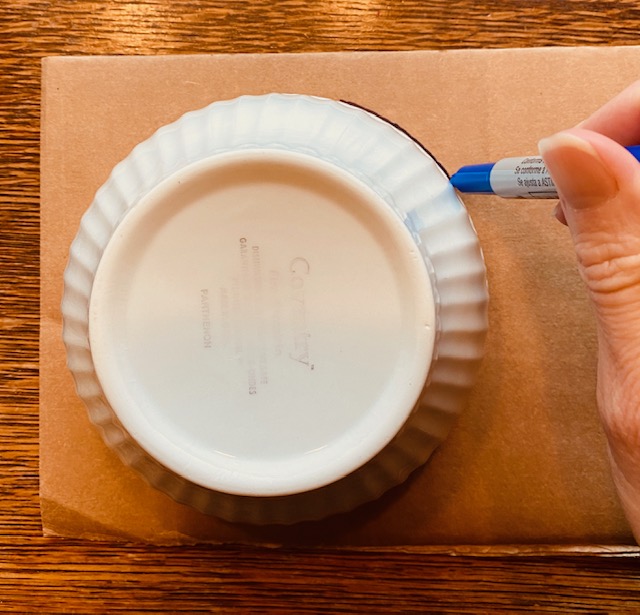
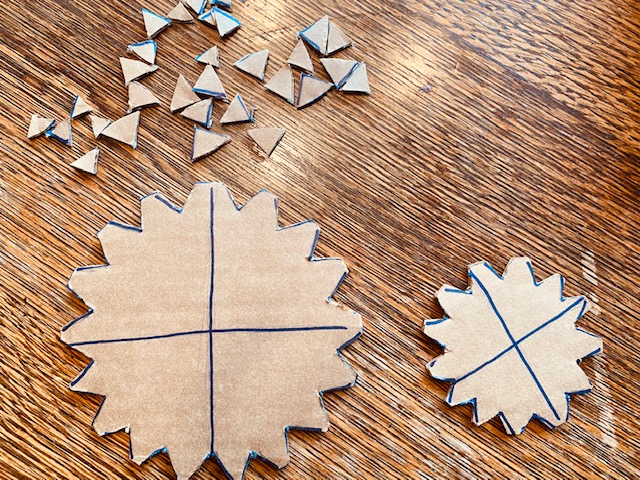
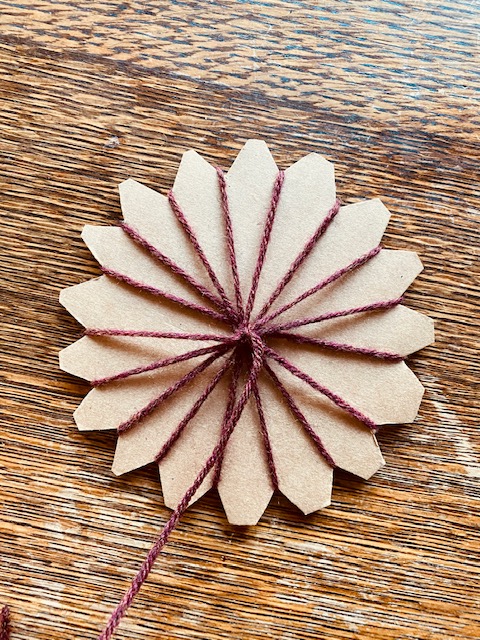
Step 1: Trace your circle. This will be the approximate size of your circular loom.
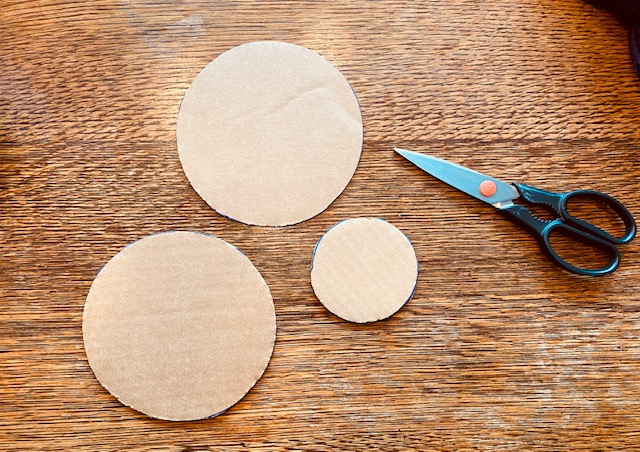
Step 2: Cut out the circles as neatly as you can.
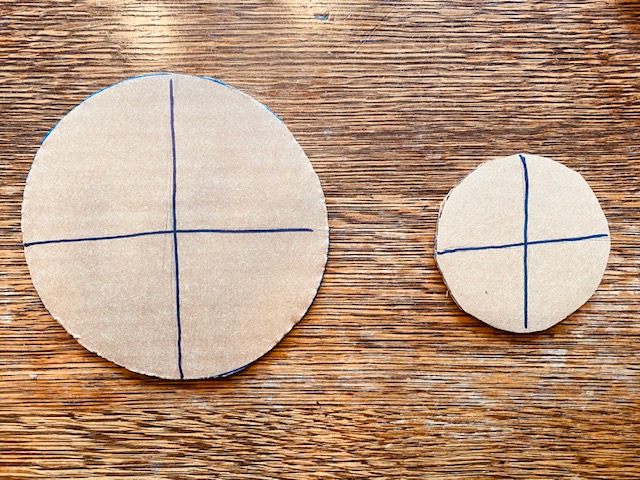
Step 3: Some folks who are really good at being precise might balk at my lack of straight or perfectly measured grid-work here. I get that. BUT, the point is to demonstrate that this does not have to be incredibly perfect. In fact, I think it’s a relief to many to not have to stress about that. You generally want to split your circle into four kinda even sections.
Step 4: Around the edge of each section, you will start to make triangles. These will be cut out and serve as notches for your warp thread to hold on to (the warp is what you weave around). You want the same number of triangles in each section EXCEPT ONE! You can see that in each of my looms below, I added one that straddles a segment line. This is because you need an odd number of notches so that you have an odd number of warp threads. Otherwise, each time you go around the loom, you’ll have the yarn always going under the same warp thread and over the same warp thread. You don’t want that.
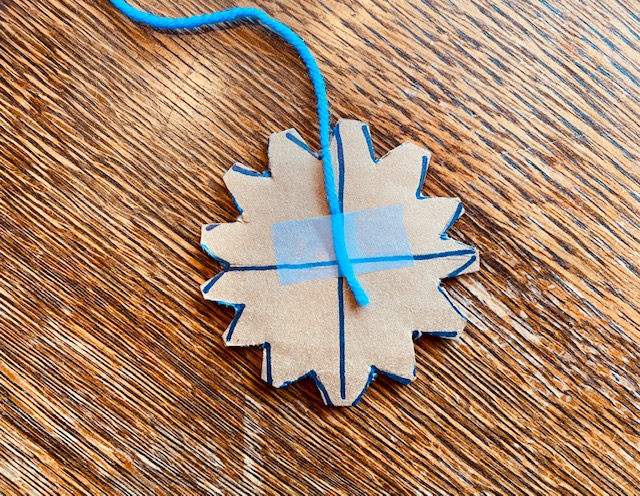
Step 5: tape one side of a piece of yarn to the back of your loom.
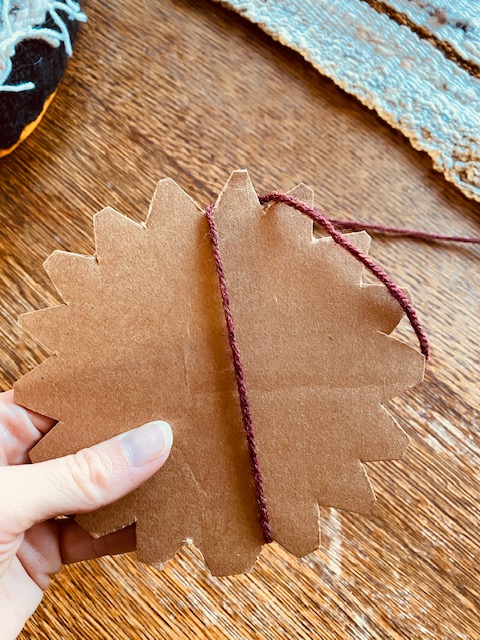
Step 6 (warping the loom):
turn the loom over so you are looking at the front (the front for me is the side with no marker.
pull the yarn over, crossing the loom to the other side. you have an odd number of notches in your loom… so when you pull your yarn across, it won’t land right in the center, right? So you want an even number of notches on one side and an odd on the other, of the yarn just pulled across, having one more notch on one side.
hold yarn snuggly and wrap it around the notch, moving from right to left and then turn the loom so it is “up” again, with the notch you just wrapped on the upside
bring yarn down, crossing in the middle, going to the left of the notch with the yarn in it.
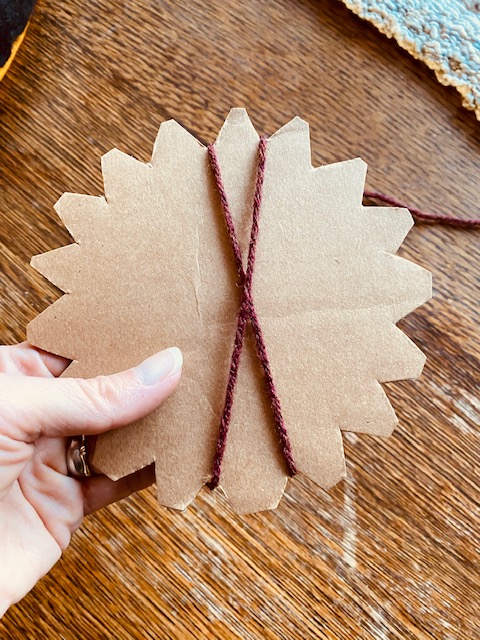
wrap the yarn around that next notch, again, moving from right to left
repeat this step until you’ve brought the yarn around every notch
cut the yarn from the yarn ball, leaving several inches to work with and use that yarn end to tie around the center of the warp threads, making it neat and organized in the middle.
Warping the loom:
Tying the center of the warp:
Step 8: Then start weaving! I generally weave from right to left, but it doesn’t matter which way you go as long as that is the only way you go as you weave. No doubling back! The same weaving principles apply with circular looms as do with other looms. Bring the yarn over one warp thread, under the next, over the next, under the next, and so on… The first few rounds might not look right, but as you go around, it will become more and more organized and clear whether you are to go over or under.
Step 9: Optional- You can add new colors and textures whenever you want. I usually just tie on the the thread and begin weaving. When the loose ends come up against the weaving as the new yarn starts getting woven with, I gently tuck them under the already woven part. DON’T SNIP THEM! You want them longer so you can sew them in once you are finished and the piece is off the loom.
As I make my way towards the upper part of the loom, I like to use a tapestry needle to weave. It keeps one from pulling on the warp too much and allows for weaving right up to the top.
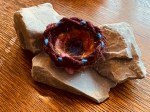
Step 10: Once you feel you cannot weave anymore, it’s time to take your piece off the loom! Gently pull off the tape, and the warp that is wrapped around the notches. You will notice how it is naturally shaped- will it be a bowl, or a coaster/placemat/wallhanging? Does it curl up or lay flat? Assess and gently shape it as you wish.
Step 11: Time to sew in those loose ends with the tapestry needle. I usually sew them into the bottom/underside of the piece. Just gently bring the loose end down through the column of weaving right below and it and carefully snip the remaining bit. It will be completely hidden in your piece.
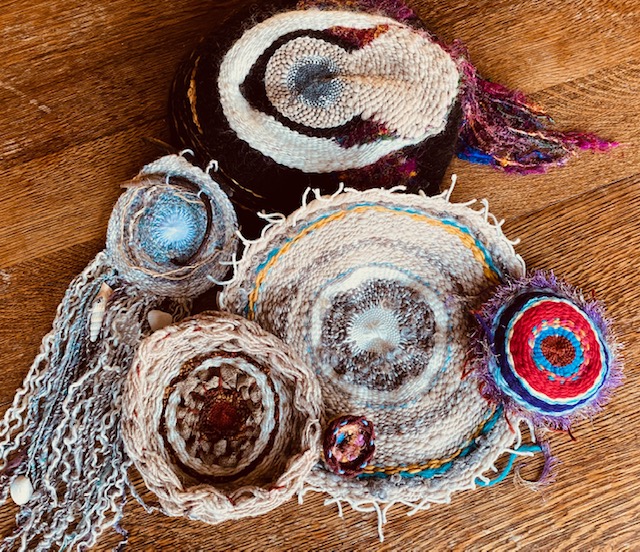
Step 12: Admire your handiwork! I love my little bowl! I can imagine making several of these and having nesting bowls all over. Or sewing them together in a way to make something that looks like coral, or finding a little stuffed bunny or chick and making this a little nest…
Have fun with this. I’ve done circular weaving with kids as young as 6. And I intend on weaving this way for as long as my fingers let me. It is so relaxing and so satisfying, and you likely have all you need already in your home.
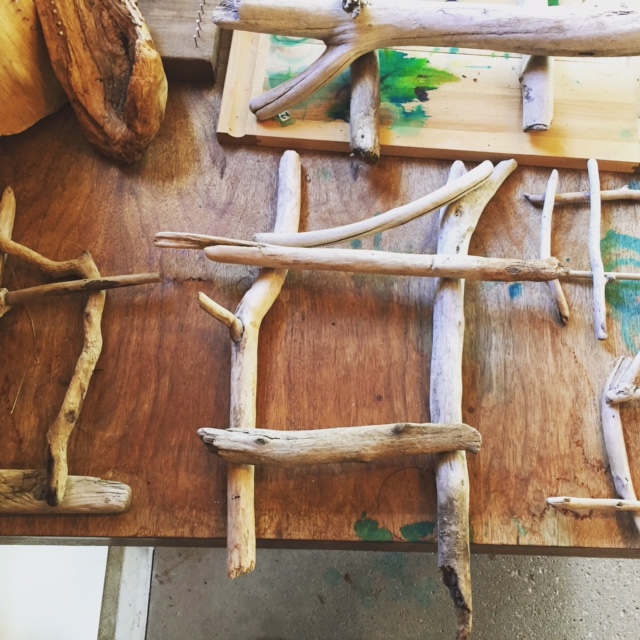
Hello All~ I sure do hope you are doing okay, wherever you are. I have so much I’d like to say and share about what this COVID-19 pandemic is teaching me. I may have to do that in another post. But here and now, I will share with you a project I made up for wonderful kids I get to spend time with, even though we are all doing some wicked epic social distancing. I have spent large bits of the last seven years teaching fiber art in my kids’ classes (and in some others, too!) and I can tell you, the kids inspire in me so much longing to keep making, keep creating and keep sharing. Now that our Fiber Friday classes are happening on Saturdays via Zoom, I’m trying to figure out lots of yarn-y things to teach using materials we might have kicking around at home. The thing with weaving is, you can make a loom out of so many things! “Homework” for this week is to look around the house and yard to see if we might find weird, unexpected, unique or random “looms” that could be woven on. These could be sticks, frames, chairs, trees… whatever! I hope I see some good ideas next week!
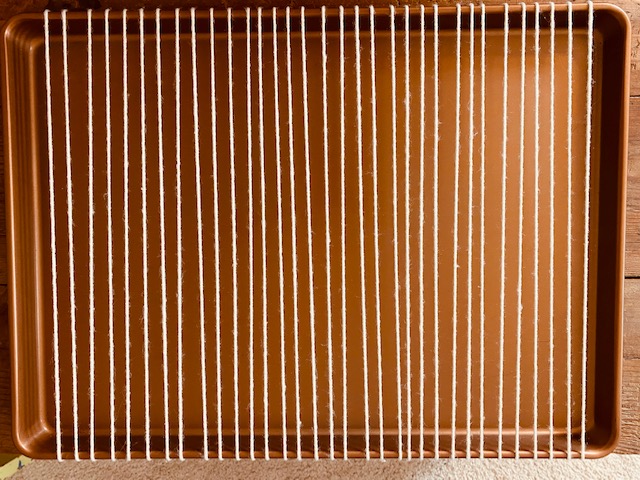
This project is aptly called the Cookie Sheet Weaving Project. As you can see, I’ve used a cookie sheet, yarn, and tape to make this loom. I’ll give step-by-step instructions and maybe you can give it a go!
Materials:
cookie sheet, any size
yarn
scissors
tape
Optional Materials
fabric
large eyed tapestry needle
lots of variety of yarn- this is a great project for using up small bits of yarn stash
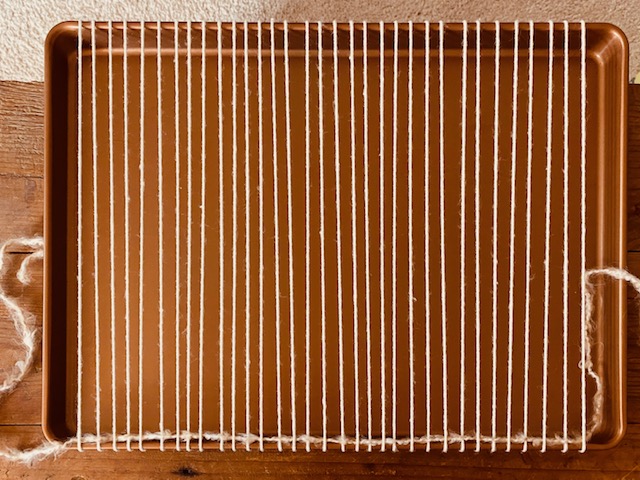
This is what your loom will look like once it is set up. I’ve chosen to warp my tray the long way, making my weaving piece wide. You can do it the other way, too. You can also choose to warp only a portion of the tray.
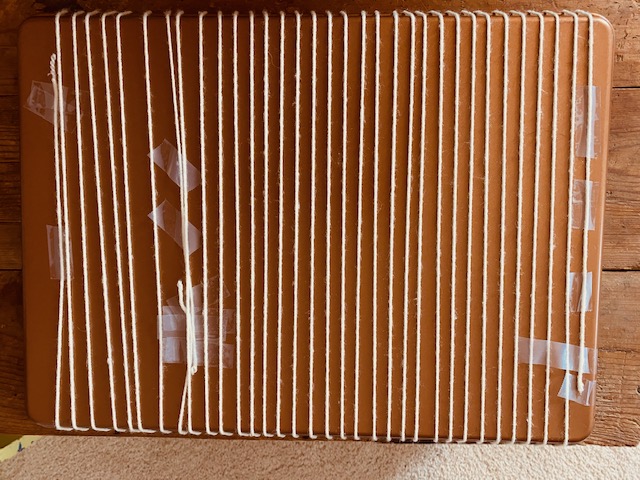
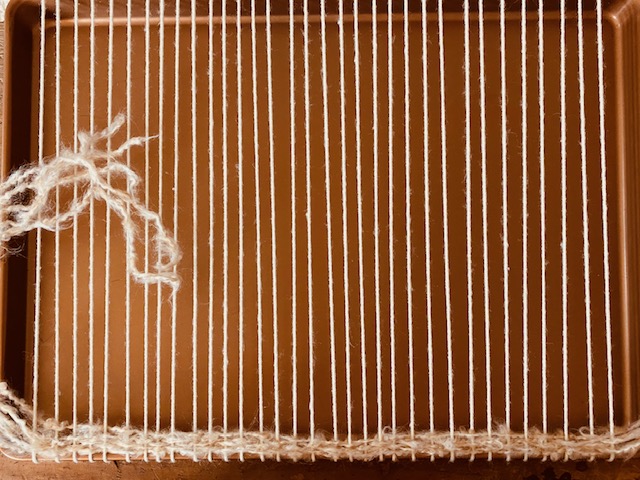
To secure the warp, tape the end of skein of yarn to one side of the bottom of the tray, and then start wrapping the yarn around the tray, with about a 1/4 inch to a 1/3 inch between each wrapped thread. You can see, the underside of the loom isn’t gorgeous, with tape everywhere, securing the warp. Don’t worry about that. It’s most important that your warp is securely fastened onto the tray. Since my tape wasn’t turbo sticky, I used a lot of it.
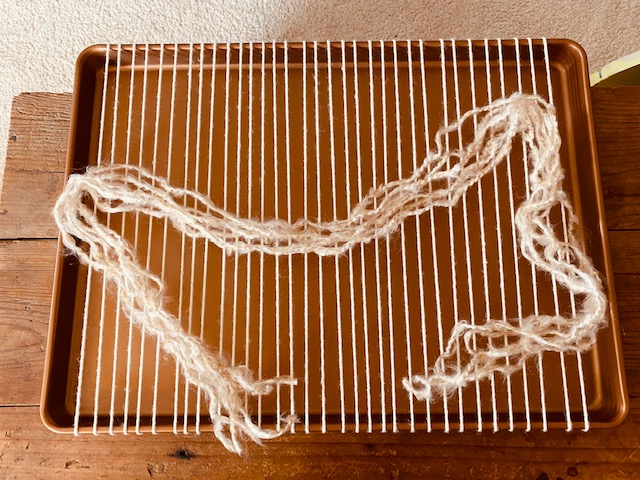
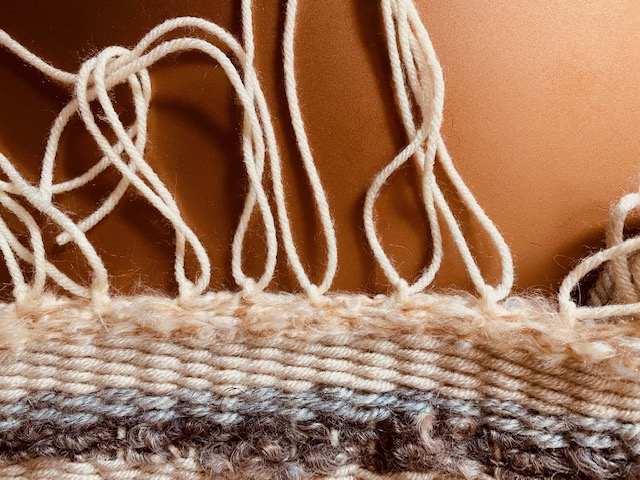
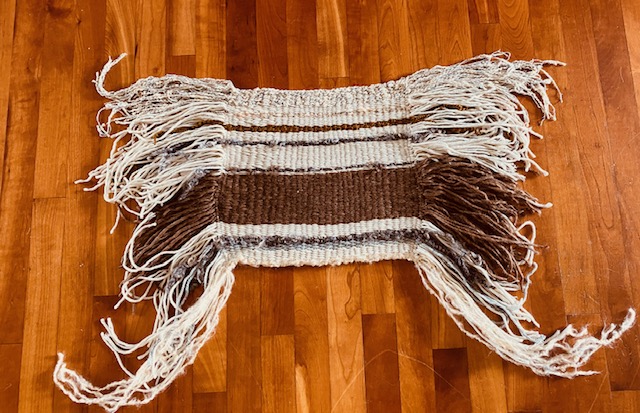
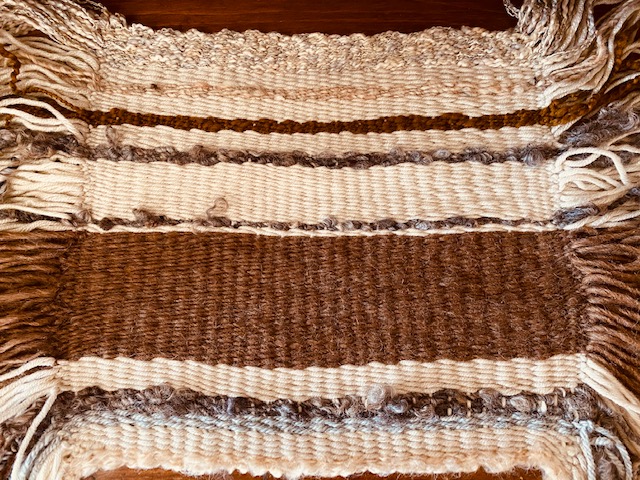
I opted for making a very fringy piece. Rather than moving back and forth and back and forth with the yarn, leaving no fringe on the edge, I chose to cut lengths of yarn that were several inches longer than the width of the cookie sheet. I wove each thread individually and then made sure that the remaining yarn was about equal on each side. If you don’t want fringe, just keep weaving back and forth with a long length of yarn, being sure not to pull too hard on the warp threads as you come back the other way.
Row 1: I started by taking one end of a cut length of yarn and going under the first warp thread, over the next, under the next, and so on.
Row 2: With the next cut length of yarn, I went over the first warp thread, under the next, over the next, under the next and so on. In this way of weaving, I noticed that I liked weaving from right to left, over and over again. This is different than when you weave with a very long length, moving back and forth from right to left, and then left to right as you head back again.
Because I have a LOT of small balls of yarn, I chose colors and textures that go well together and I cut a bunch of lengths at a time so I could just get into the flow of weaving. This is a very portable project, so I had it all over the house depending on what I was doing.
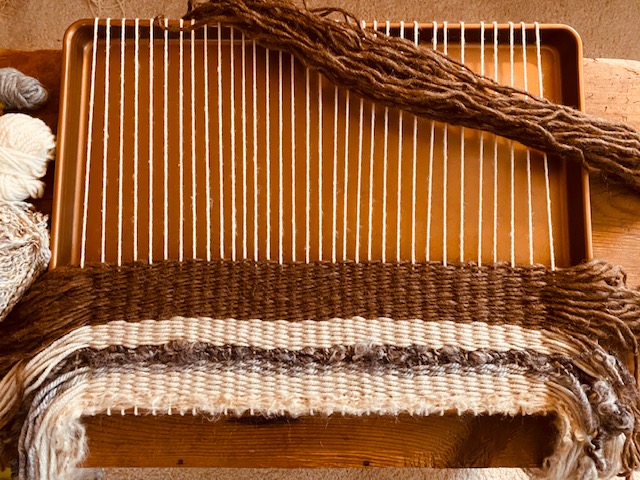
And I wove, and wove… and wove… Once you get to the top, you’ll notice that there’s not much room for your fingers to move the yarn around the warp threads.
If you have a tapestry needle, this is a good time to get it. Threading it with the yarn you are weaving with (the weft), you can really get up to the edge of the tray.
Before I thought about taking the project off the loom, I tied off the fringe on each side. You just take one weft thread, and the next one, and tie it in a double knot. Make sure that the two edges you tie are on opposite sides of the warp thread. This will ensure that the warp is secure and your piece won’t become loose and/or unravel.
When your fringe is all tied up, flip the tray over and remove the pieces of tape that are securing the edges of the warp. Then, cut across the middle of the warp threads, freeing the piece from the tray.
You have a choice to make here. For both choices you should tie off the warp threads in the same way you did the fringe, tying one thread next to its neighbor. If you have an extra one at the end, just include it with the two next to it.
Then, the choice… Do you leave the warp as fringe, too? Or do you sew it into your weaving? There is no right answer except for doing what you think is best for your piece. If I had used a thicker, more interesting or robust yarn for my warp, I think I would have left it as fringe, but the yarn I chose is kind of tame compared to my fringy side, so I opted to sew it in.
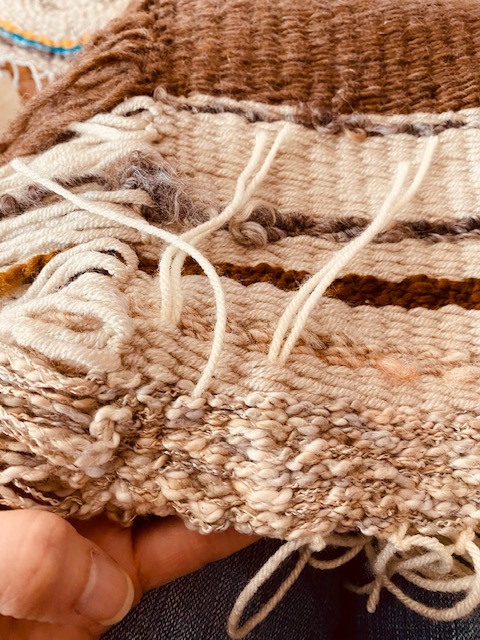
Here’s the warp threads tied off.
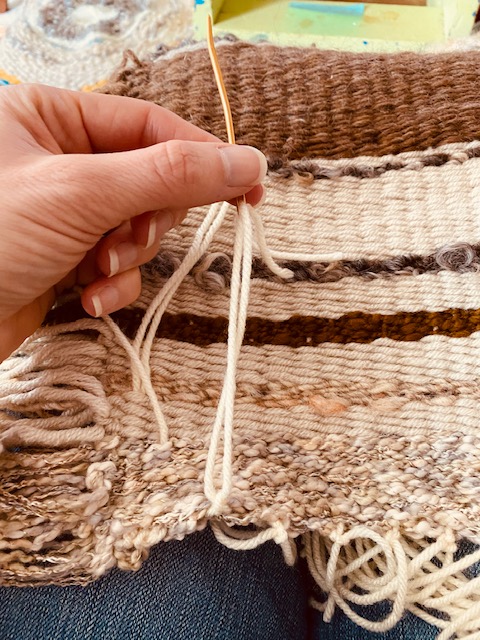
I chose to sew the two tied threads at a time, because they are already tied together as one.
Using your tapestry needle, bring the warp threads back through the weaving, drawing the needle through the column of the woven piece that is right under it. Don’t pull too tight here as you’ll pucker your cloth.
Flip your piece over to make sure the warp threads are really hidden in the column of weaving. Sometimes they peep through too much and you have to do it again.
Once you’ve gone through a couple of inches, you can snip the remainder off.
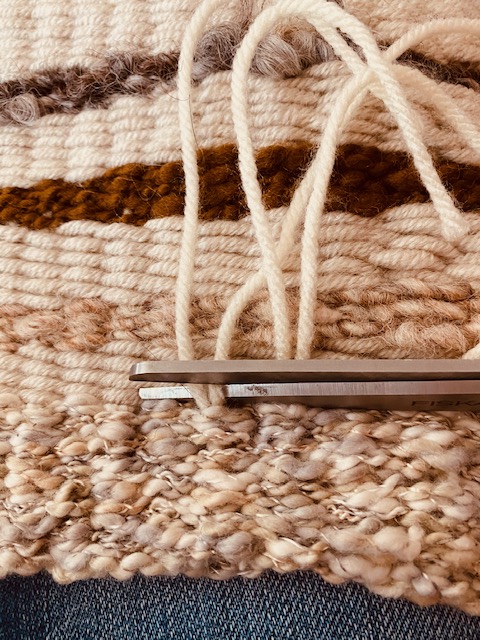
Here you see my piece with the wild fringe and sewn in warp threads. This thing definitely needs a little fringe-cut.
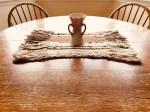
And there we have it! Who knew I needed a new woven table decor piece?!
Stay tuned for some more fiber art ideas. These will always be great for kids to do, but for sure, these are also fun for folks of all ages. It’s the truth that handcrafting is good for us. It quiets the mind, especially once we get into a good flow. It helps ground us when things feel wild or unpredictable. And, it can give us the chance to see that we can make some really beautiful things.
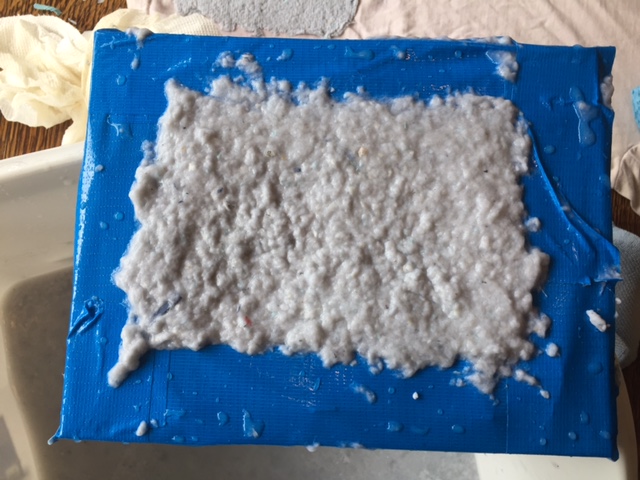
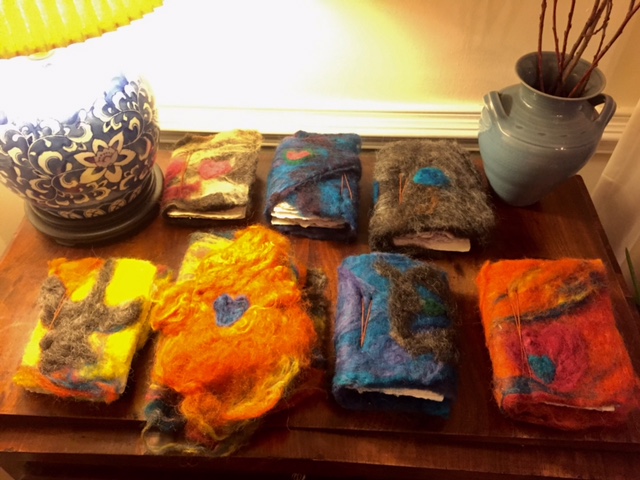
This summer was a time of taking a few risks, including putting my fiber art teaching love out into the universe in a different way. I’ve shared already the camp I offered to do with weaving. You can read about that here. The second camp I offered was all about making a book from scratch. It’s important to me for kids to know and be frequently reminded that they can make stuff, really cool stuff, with found items, recycling and a little ingenuity. Art supplies are expensive, as are art classes, but if you know how to get your hands on materials that are free or inexpensive, you have at your fingertips myriad ways to make art, to be an artists, to add your own beauty to the world. So… I was messing around one day after daydreaming about making a book for collage. My first book was the one pictured below. It’s made with handmade paper, wool that I wet-felted for the cover, a piece of driftwood and cotton thread for stitching together. I’ll show you the camp process, mostly in pictures with a little text, because I think the images speak for themselves. This is the project that inspired the camp.
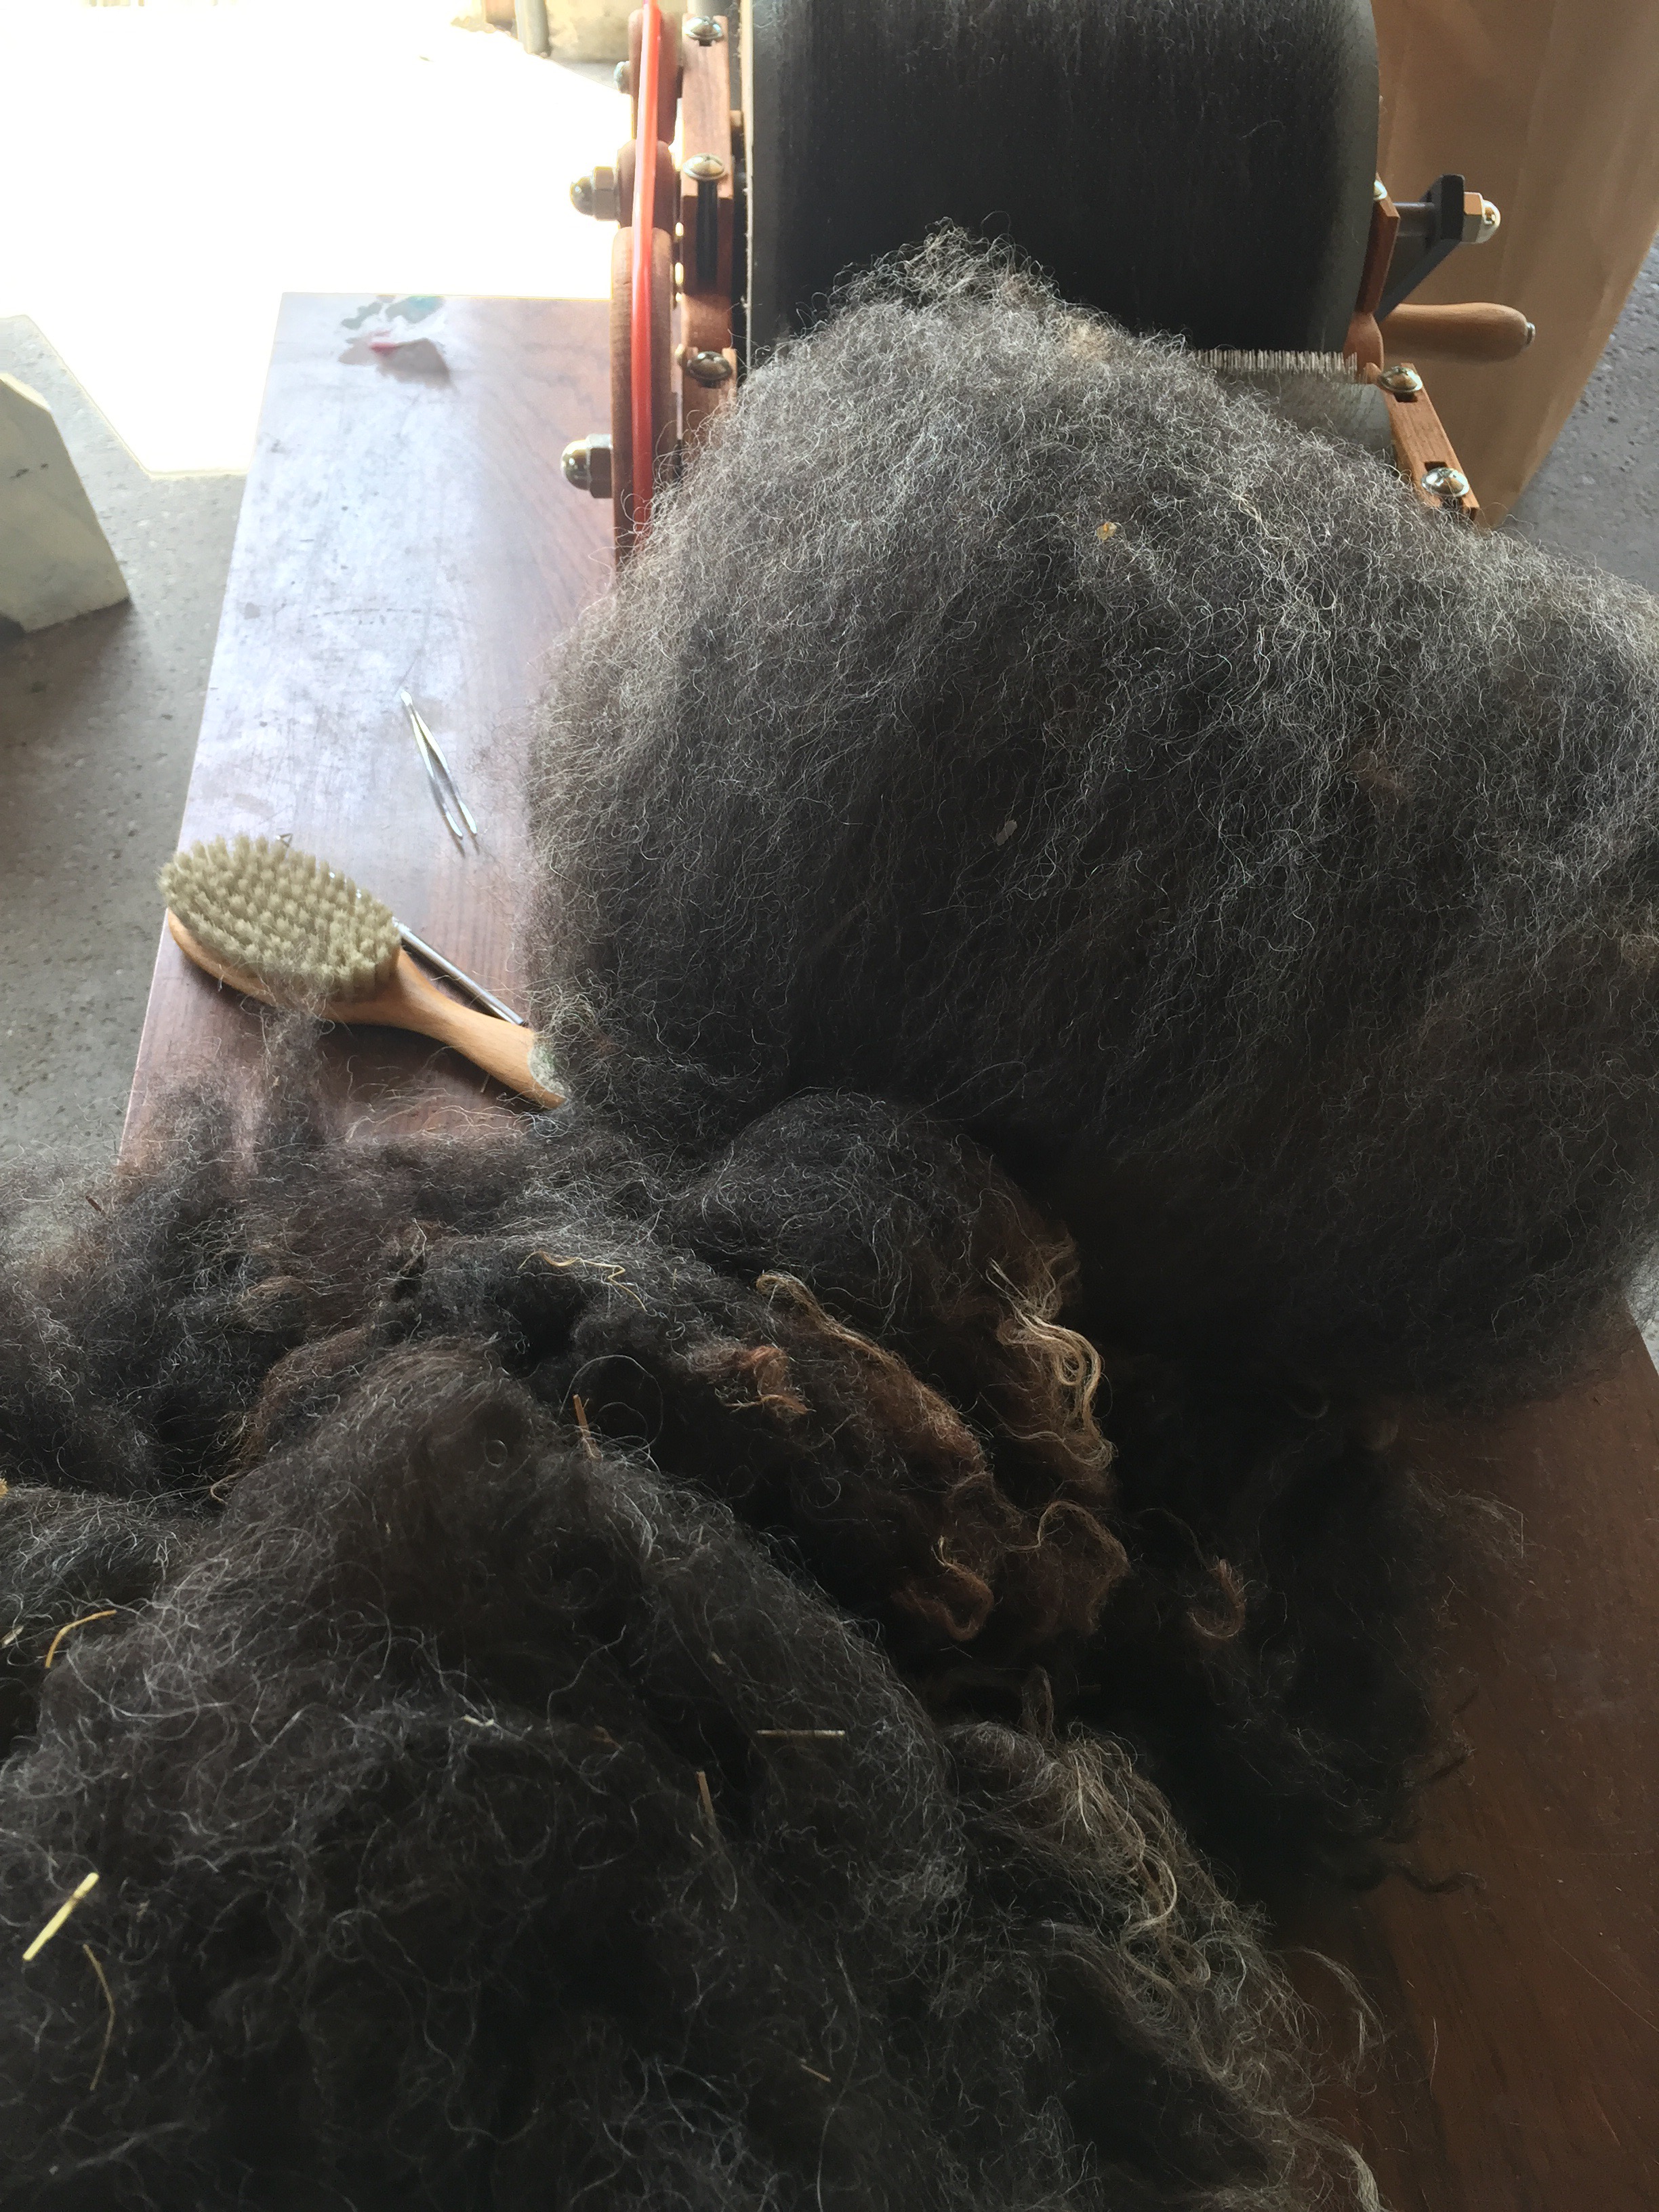
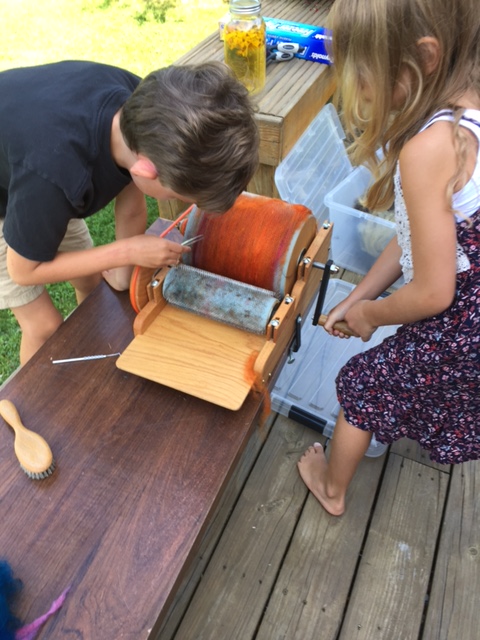
I spent a good deal of time before camp began prepping some materials. Carding Shetland wool…
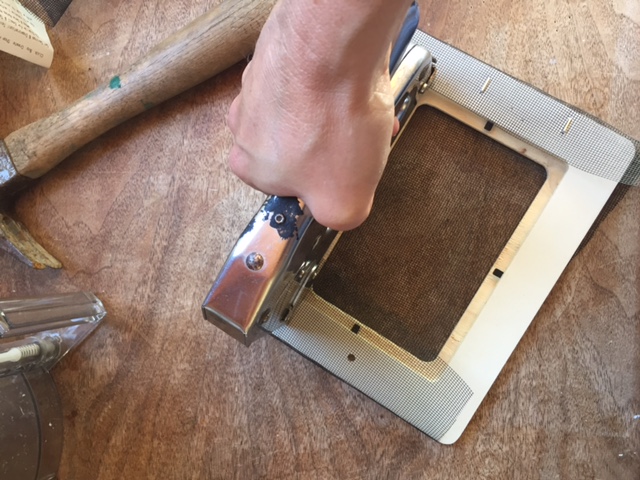
Making frames… a word on that: I found wooden frames at Michael’s craft store for $1 each. These saved the day. I had a number of frames on hand that I found at garage sales but I figured that kids are sometimes interested in making sure everything is even and balanced and fair, so, I decided to ensure that each child had the same size frame.
Also, I’ve been trying to find on line the tip I came across for outlining the frames with duct tape. I want to give credit to the blogger that shared that brilliant idea! Doing this makes for much easier removal of the paper once you flip it onto the drying surface. I will always do this now, and if I come across the blogger’s site, I will for sure share it here.
Here’s me stapling the screen onto the frame. I used my mom’s staple gun, which made me think of her. I feel close to her when I’m crafting or creating. You can read about why this is relevant here.
While things go better with kids when things are fair, they go even better than better when kids know which thing is theirs. It’s lucky I had this flashy duct tape on hand. No guess work needed!
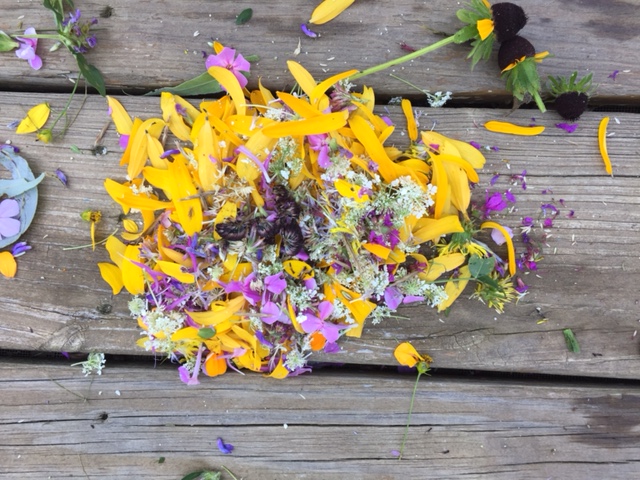
Here’s the thing about paper pulp (made in a cuisinart with recycled paper and water; the paper I put through the shredder first)~ not all kids love touching gooey, smushy, splootchy wet stuff. It’s handy knowing this ahead of time so you can have at your finger tips ideas of what steps kids might enjoy doing in the process, like soaking up the water from the underside of the frame/screen with a sponge, stirring the pulpy concoction, adding flower bits, etc., in the even that full-on hand immersion in paper pulp is out of the question.
Here’s the kids looking for flowery colorful bits to throw in to our pulp.
If those colors aren’t inspiring, I don’t know what is.
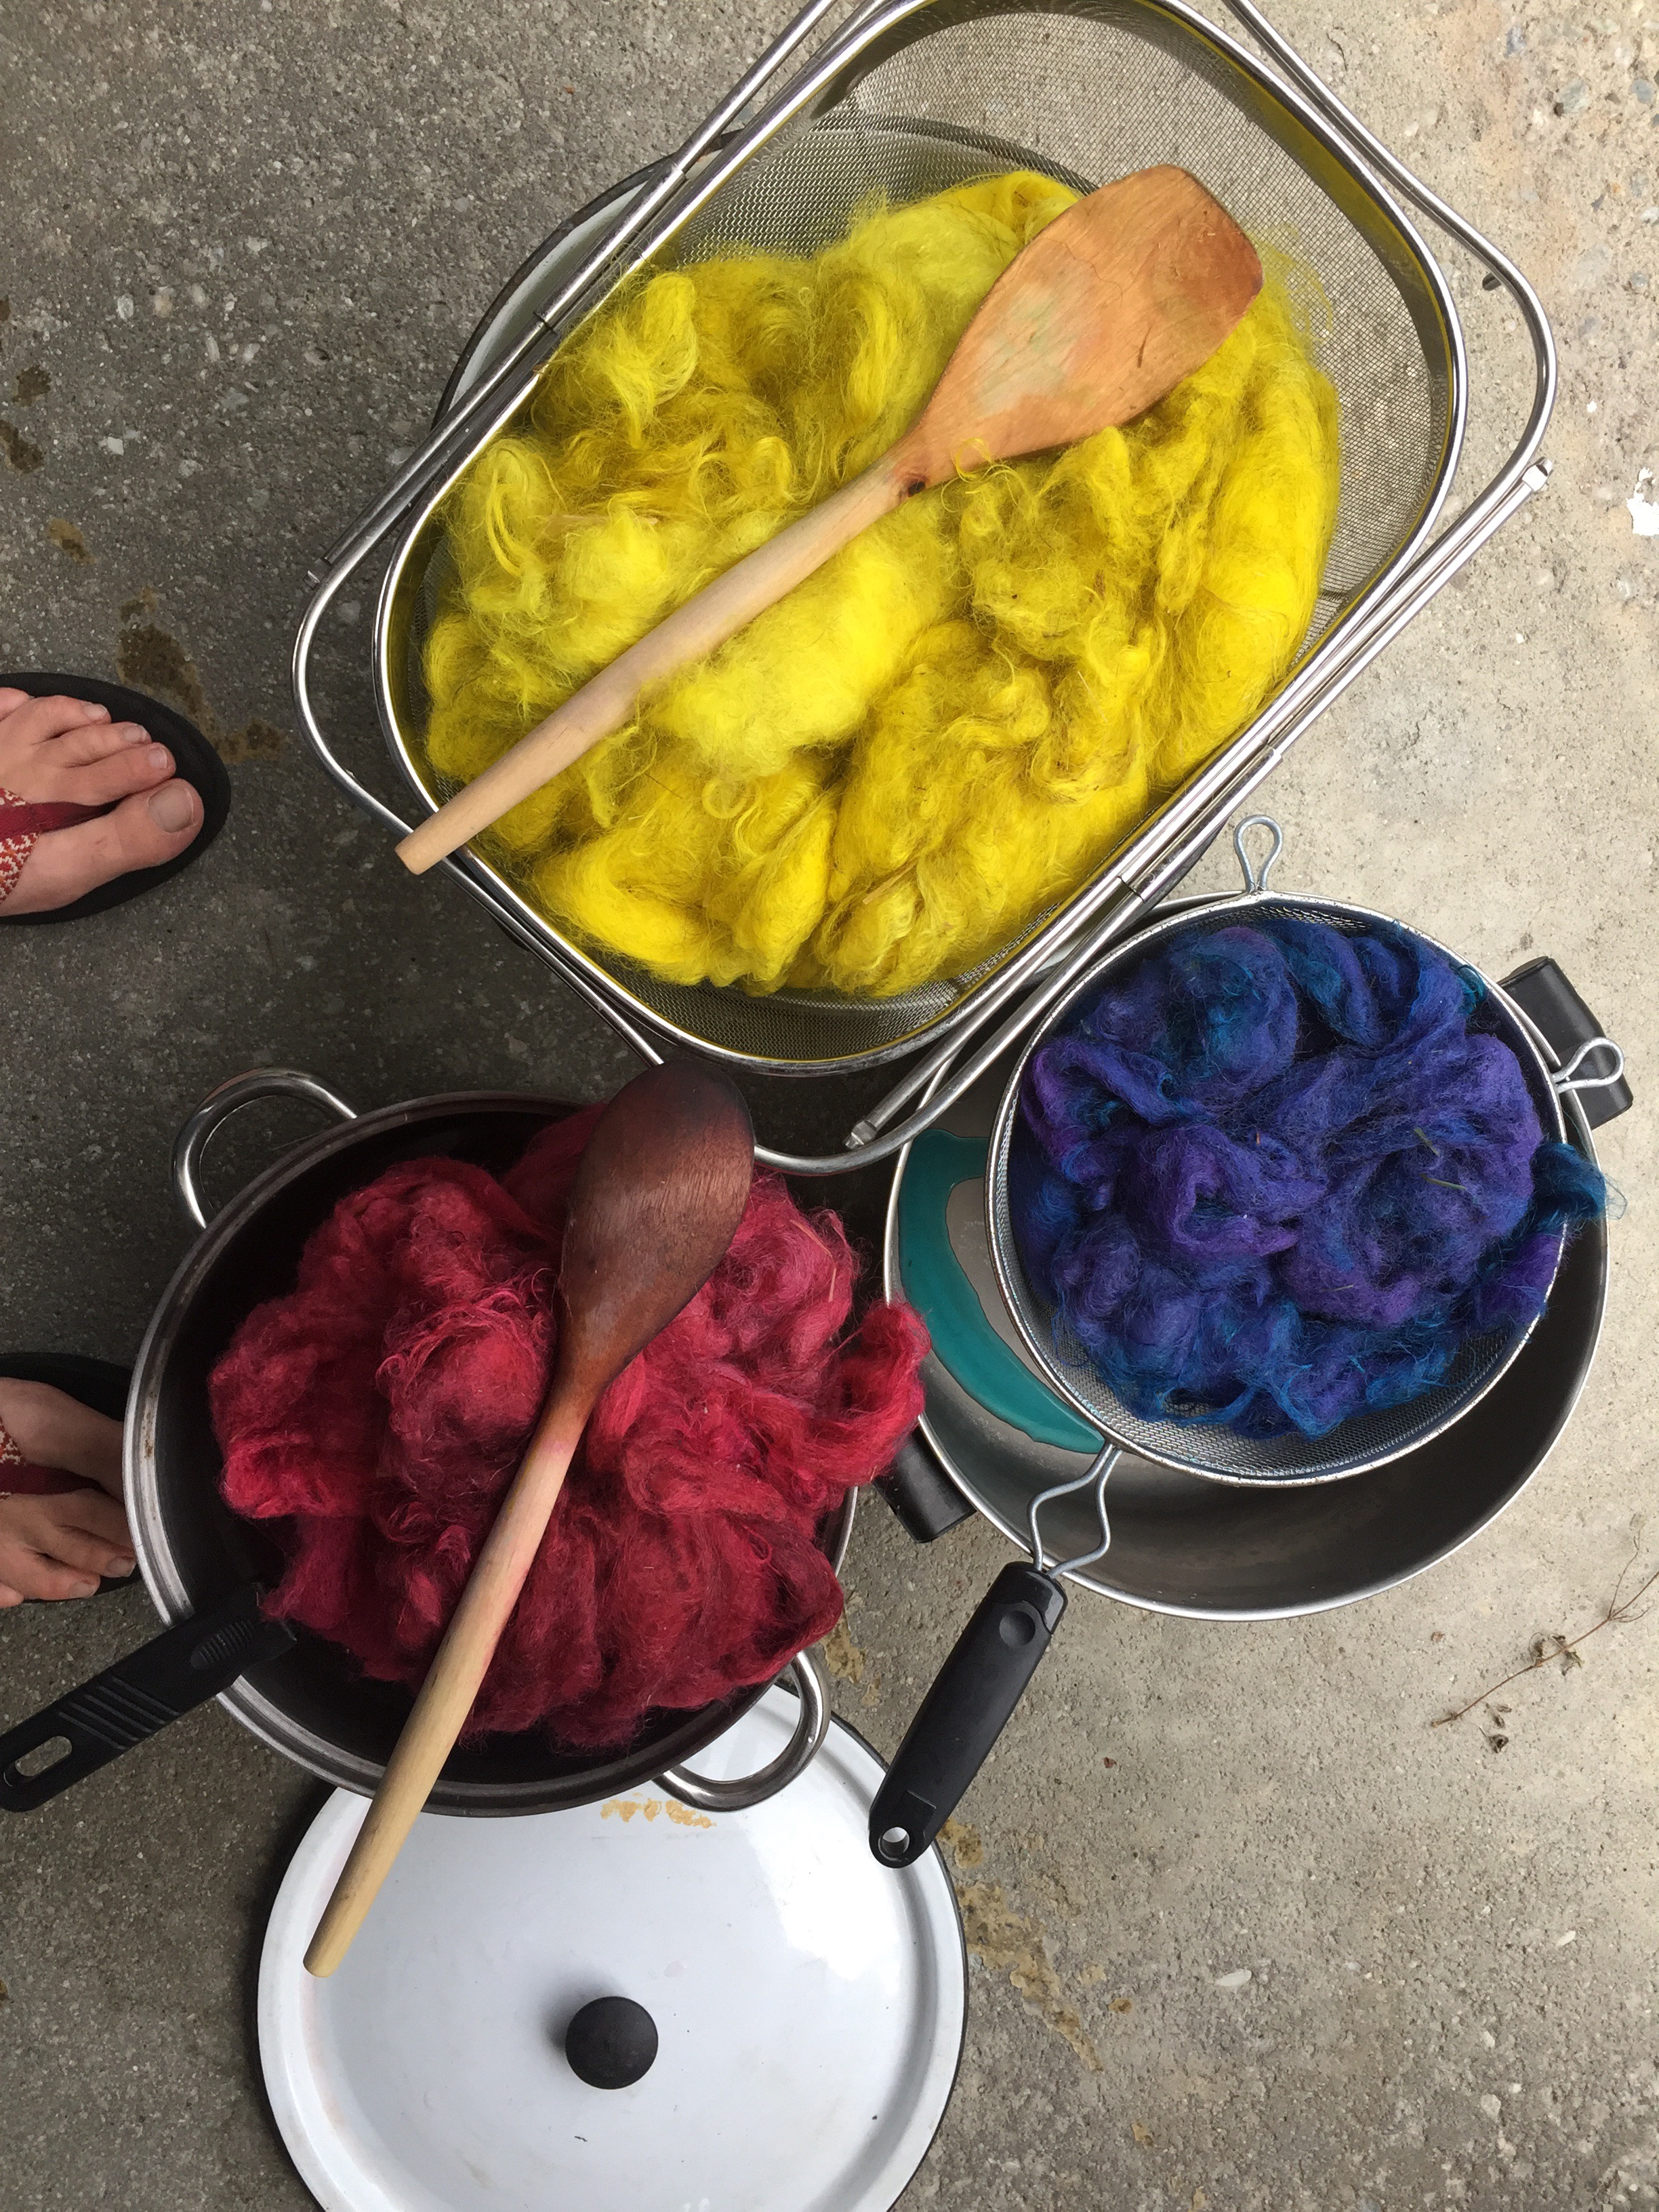
I spent a good amount of time experimenting before camp started…
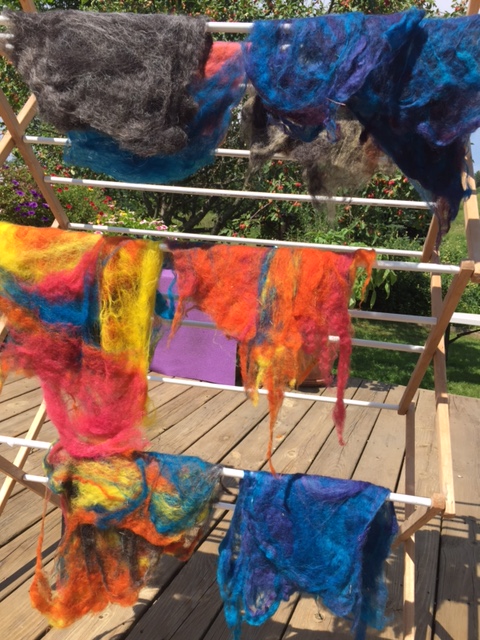
And dyeing wool…
Here’s some kids using a drum carder to prepare wool for felting. This camp included chances to do as many jobs as possible in the time we had. I had the kids pick a lot of the grassy bits out of the wool, fluff it open to prepare for carding, and then card it. There were varying opinions on this. I could sit and pick at wool all day and be fine. I love looking at those tasks as a chance to just chill the heck out and be with my thoughts. Not all kids love that, of course, so some felting was a wee bit chunkier than others, and that’s okay!
For the wet-felting part, I had the kids arrange the layers of wool they were using to make their book over on a plastic table on top of a sheet of freezer paper. Then, we covered the wool in warm, soapy water, and covered it all again with freezer paper. The paper stayed strong while the kids pressed and rubbed their hands over their wool. Once it was showing signs of felting, they could take off the top layer and use their hands to felt directly. Again, some kids love that textural messy feeling and others don’t. Leaving the freezer paper on for a while longer helped those who preferred keeping their hands free from that specific wet-wool feeling.
Then, once dried, the kids arranged their books as they wanted them, and had a chance to needle felt a design on to their covers. The night before the last day of camp, I sewed the books together. Originally, I’d hoped the campers would do that part, but we ran out of time.
I think these books are all so beautiful. Interspersed between their handmade paper, I included sheets of handmade paper from India that is more amenable to writing. I will keep working on my own paper making skills to see if I can get closer to that quality.
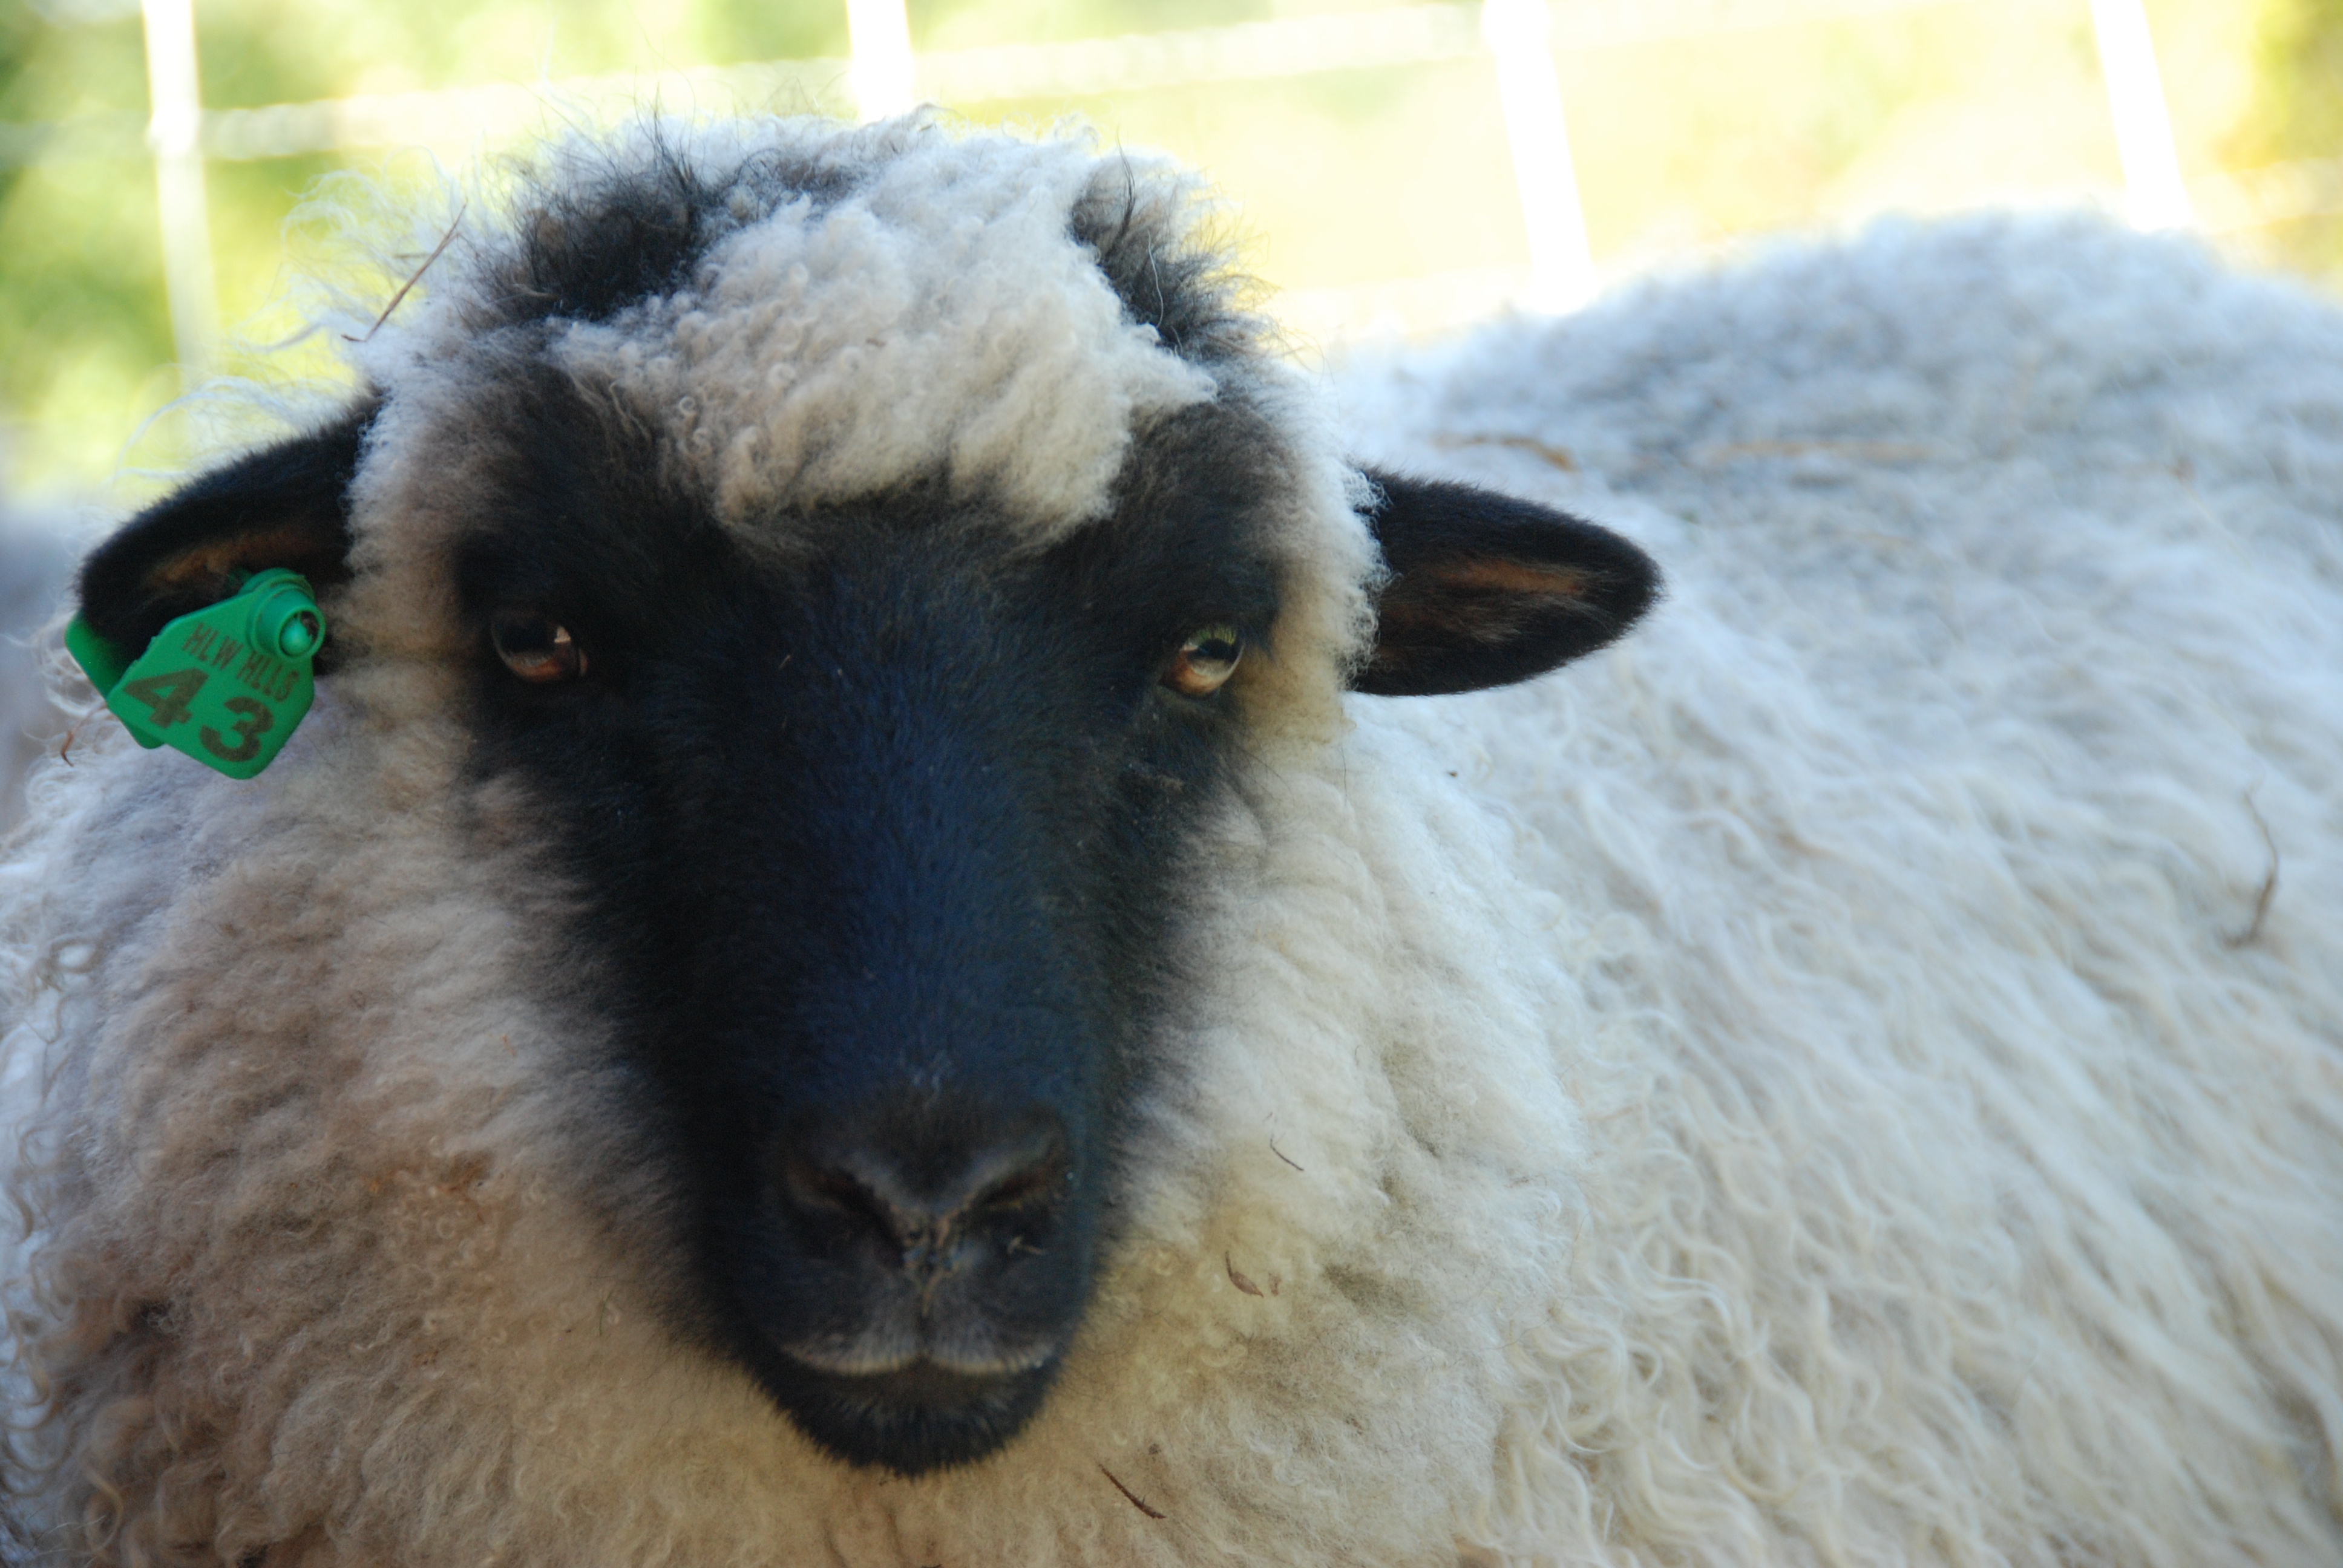
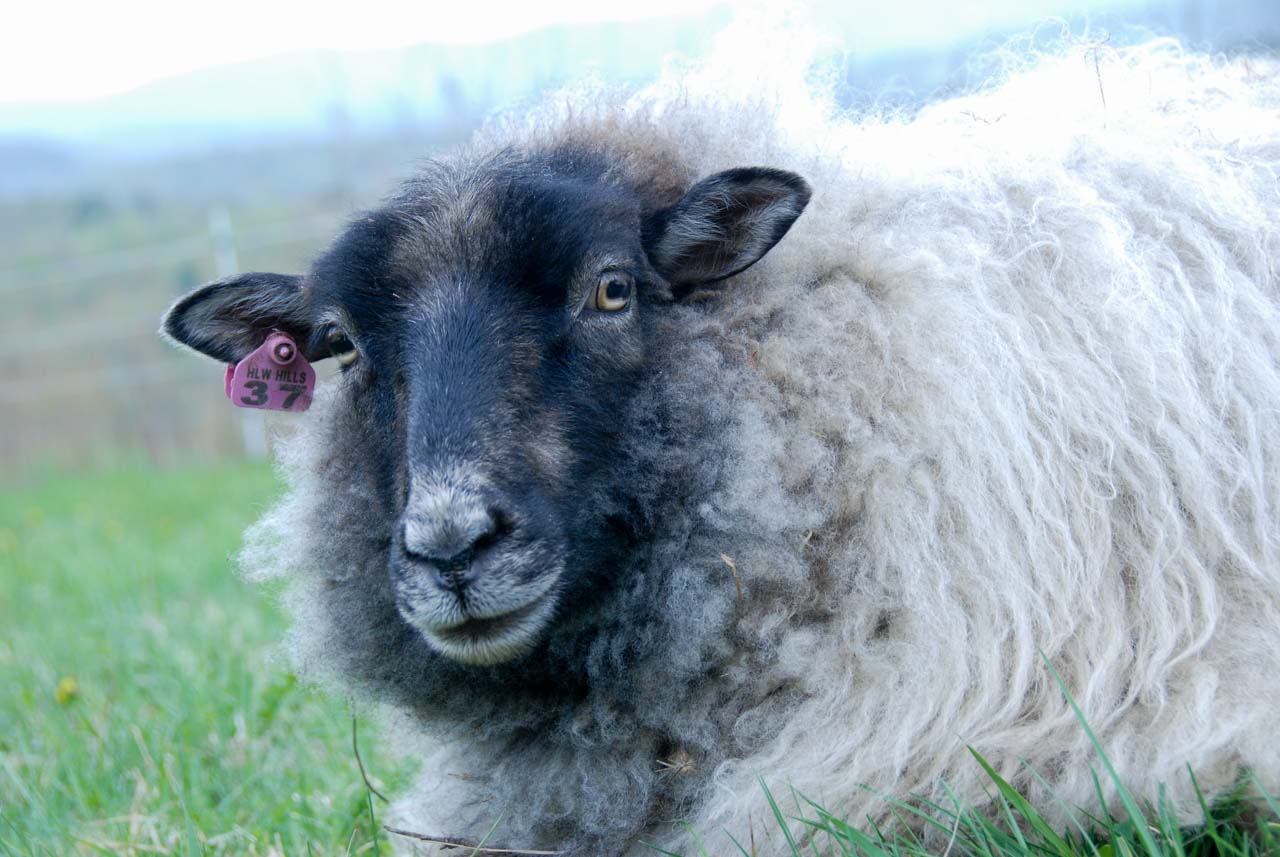
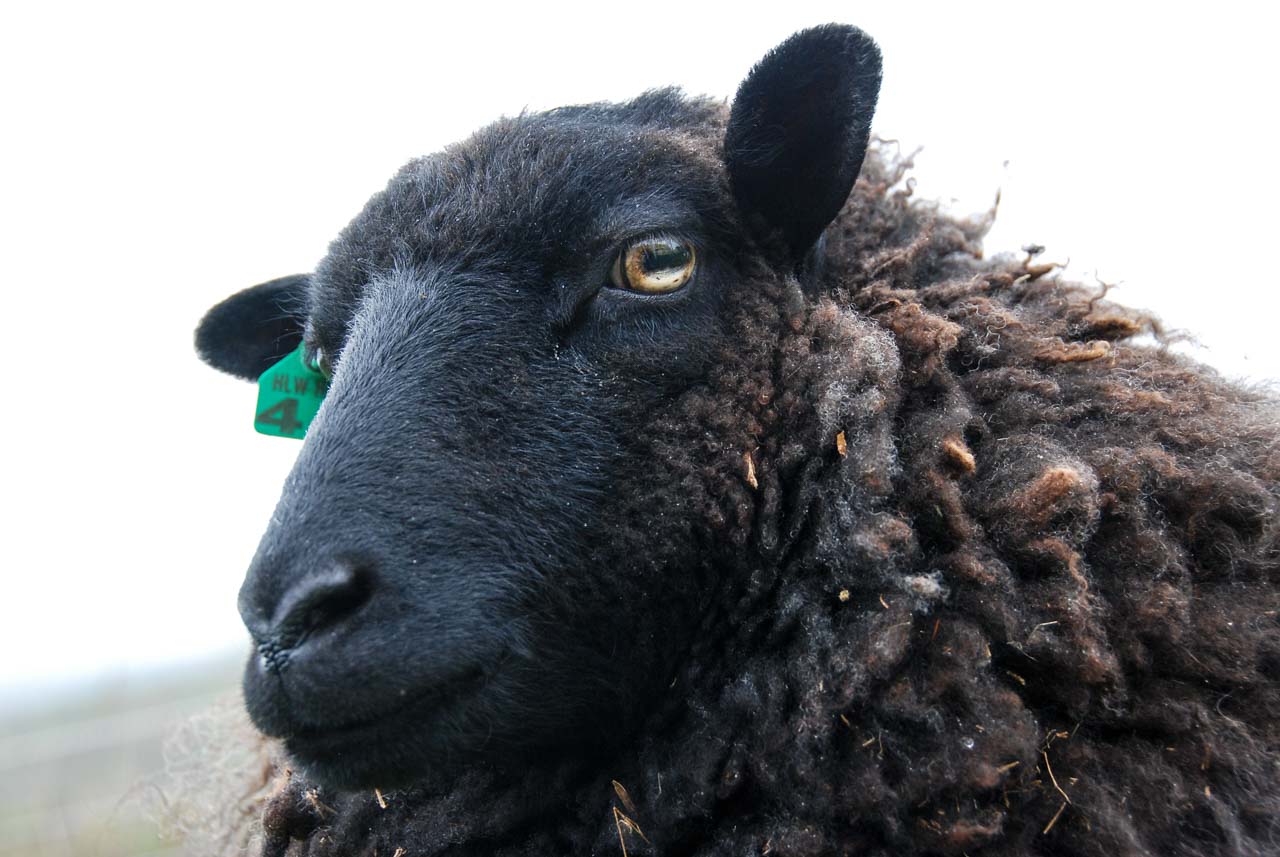
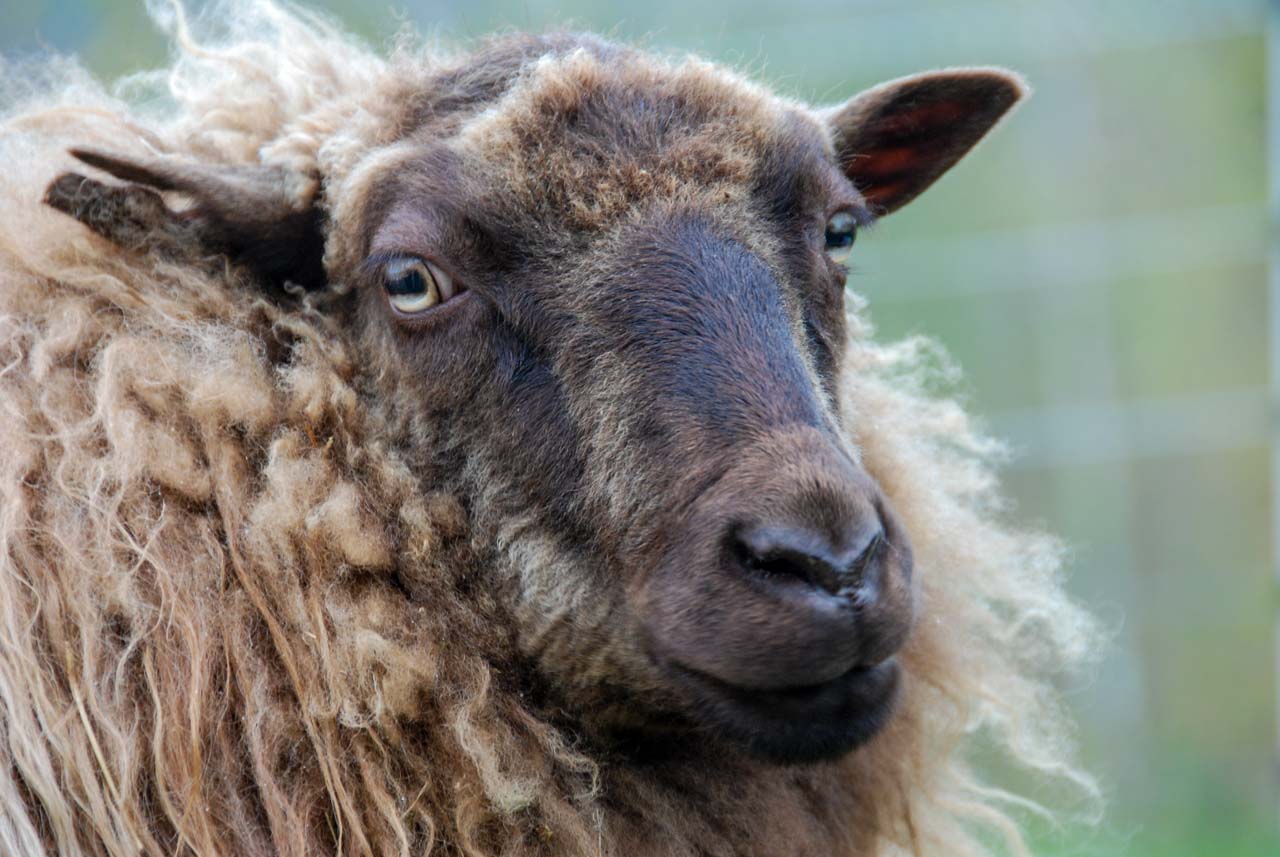
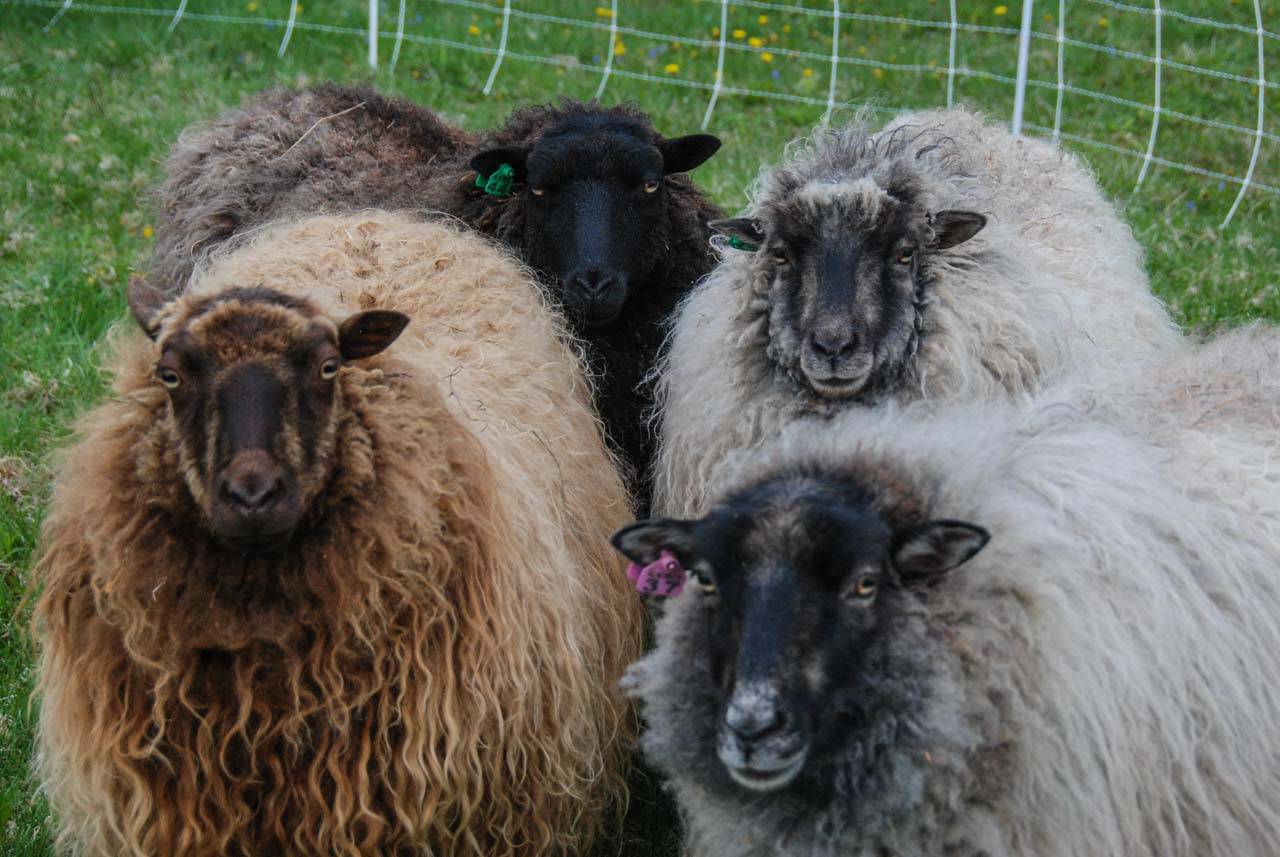
And listen, it’s not right to ignore the behind-the-scenes stars of the show… the sheep! Something I love about being a part of the fiber handcrafting and fiber art community is that I get to meet so many wonderful people. This is the second year that I’ve gotten wool from a wonderful man named Peter Moore, who lovingly cares for his four Shetland sheep. I met Peter because he posted online that he had wool available, and I jumped at the chance. I can say that I would call Peter a friend, now, and I truly don’t know how we would have ever met if not for our mutual love of sheep! Let me introduce his lovely wooly friends:
Meet Dolly…
And Violet,
Phoebe,
And Daisy!
They are all half-sisters and are four years old. Their wool was the centerpiece of this camp (in my opinion), and the kids were champs, learning new skills every day and hopefully leaving with something they were proud of.
I’m sitting at my desk now, listening to the wind blow around the house. The temperatures are cooling and the birds are busy at the feeder. I am looking forward to the cooling down, the bundling up, the quieting of winter. Summer can be a full-on explosion of activity, work and play. It’s the extroverted season. These camps were a beautiful expression of all of that. I wonder what new things I’ll imagine up as I sit in the dark introverted winter. I guess we’ll see next year!
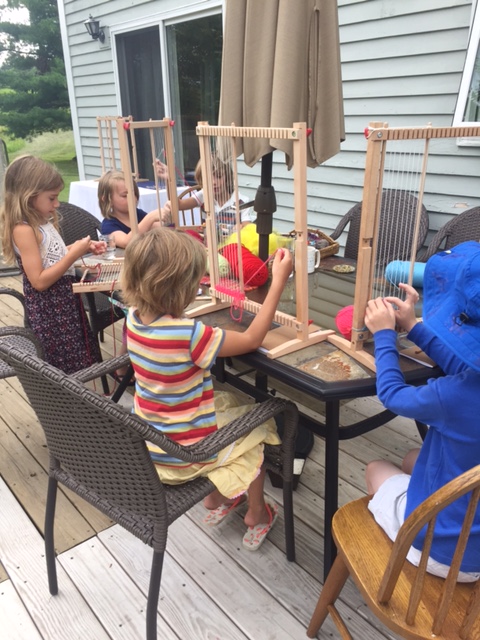
It’s been a while. I’ve missed writing here over the last couple of months. There’s been so much doing that I’ve had a hard time calming down enough to write about it all. But, a highlight of my summer was definitely offering two new summer camps to my repertoire of teaching opportunities: Explorations in Weaving and Making A Book From Scratch. Hanging out with kids, teaching them what I know, and having the flexibility and time to play, learn about each other and experiment with materials is an absolutely wonderful way to spend time. And, I got to have my own kids with me during both camps, which was an added bonus.
Explorations in Weaving Camp was a four-day, weaving filled (as you might imagine) practically meditative ride. All the kids that came were invested in weaving and at times, it was pinch-myself peaceful. The children’s calm and interest reinforced for me, yet again, how soothing weaving can be, and how satisfying it is as the fabric takes form and grows.
For each of the first three days, a different form of weaving was introduced. Day One was spent on Melissa and Doug Weaving Looms and Stitch Studio by Nicole Looms (can be found at A.C. Moore stores) to simply get the weaving process down.
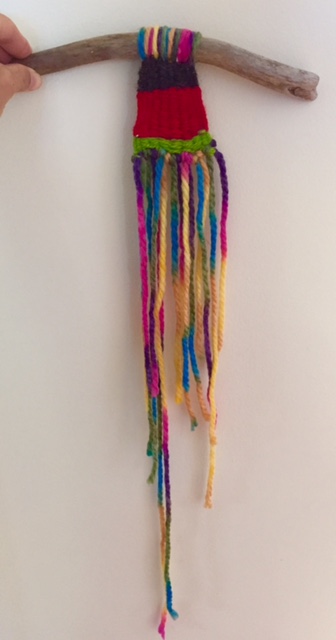
I had prepared a sample project that we might make, which was a bag, but all the children preferred seeing their fabric open and free. We ended up securing them to driftwood, turning them into gorgeous wall-hangings with fringe. Below is one example…
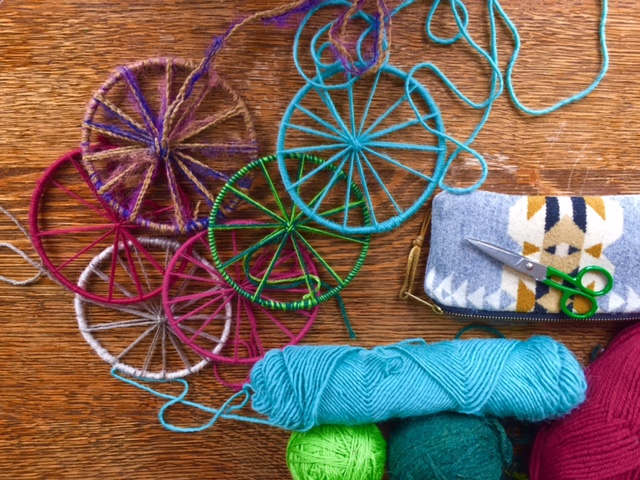
The second day I offered each child a circular loom made from those metal rounds you can get at the craft store. I pre-warped them to save time.
The third day, I offered each child their pick of handmade looms crafted from driftwood and twine. These were my favorites. I’m sorry, but driftwood and yarn? A match made in paradise. I can’t get enough of it and hoped to make my enthusiasm for the combo contagious.
The fourth day was spent finishing up loose ends, decorating for our Weaver’s Art Show and just celebrating the heck out of their creativity and wonderfulness.
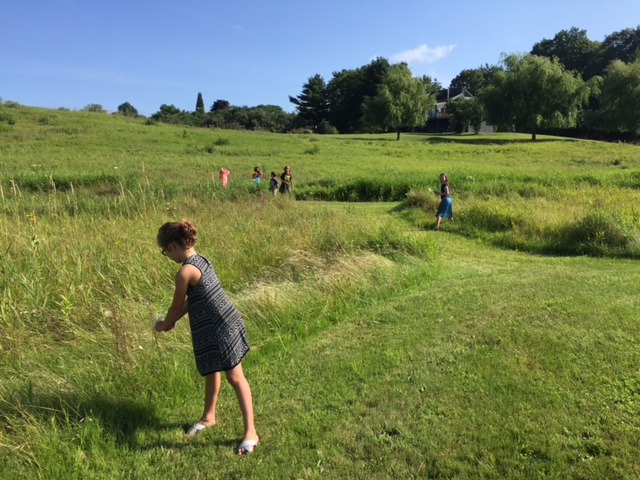
Lest you think all the children did was weave, weave weave… they actually mostly did, but having a sprinkler backup, ice pops and a basket of yarn to finger knit with was important. We also took walks in our field looking for wild flowers and long grasses, fairies and grasshoppers…